Apply the setting.
(14) Touch the [OK] on the “Auto Off
Timer” screen. After the setting
change screen is displayed,
the display returns to the “Timer
Setting” screen.
Enable /Disable [Enable]
[In 30 min.]
[08:40AM–05:40PM]
Operation Stop Time
Time Range Setting
Auto Off Timer
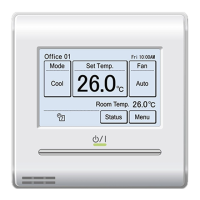
Fri 10:00AM
Cancel OK
3-4
Weekly Timer Setting (for administrator)
Weekly operation schedule can be set. Two schedule pat-
terns can be created. Up to 8 times setting for each day can
be set.
(1) Touch the [Weekly Timer Setting] on the “Main Menu”
screen. After the “Password Verication” screen is dis-
played, enter the password and touch [OK].
(2) “Weekly Timer Setting” screen is displayed.
(1) (2)
Monitor
Next
Page
Page 1/ 2
Main Menu
Air Flow Direction
Setting
Weekly Timer
Setting
Timer Setting
Special Setting
Back
Enable Schedule [None]
[None]
[None]
Schedule Setting
Day Off Setting
Weekly Timer Setting
The following contents are set:
• Enable Schedule:
The schedule to be used is selected or the Weekly
Timer is disabled temporarily .
• Schedule Setting:
The daily operating schedule is created. Two schedule
patterns can be created. Up to 8 times setting for each
day can be set.
• Day Off Setting:
Weekly Timer can be disabled for any day within a
range of 1 week. This is convenient when operation is
not necessary on holidays, etc. When the set day has
passed, its setting is cleared.
When the item to be set is touched, each setting screen
is displayed. Refer to the description of each item for
details. When each setting is complete or canceled, the
display returns to this screen. When [Back] is touched,
the display returns to the “Main Menu” screen.
3-4-1 Enable Schedule
Select the schedule to be used.
(1) Touch the [Enable Schedule] on the “Weekly Timer Set-
ting” screen.
(2) “Enable Schedule” screen is displayed. Select and touch
[Schedule 1] or [Schedule 2].
(1) (2)
Back
Enable Schedule [None]
[None]
[None]
Schedule Setting
Day Off Setting
Weekly Timer Setting
Schedule 2
None
Enable Schedule
Cancel OK
Schedule 1
(3) When the [OK] is touched, after a setting change screen
is displayed, the display returns to the “Weekly Timer
Setting” screen.
Note
To disable use of a schedule already set , touch [None] at
screen of (2).
3-4-2 Schedule Setting
Select the schedule to be set.
(1) Touch the [Schedule Setting] on the “Weekly Timer Set-
ting” screen.
(2) “Schedule Setting” screen is displayed. When the
[Schedule 1] or [Schedule 2] is touched, each setting
screen is displayed.
(1) (2)
Back
Enable Schedule [Schedule 1]
[None]
[None]
Schedule Setting
Day Off Setting
Weekly Timer Setting Schedule Setting
Schedule 1 [None]
Schedule 2 [None]
Back
Select the day of the week
(3) Select by touching the day of the week on which sched-
ule operation is to be performed. The settings for 4
times is displayed on this screen. When the contents
are veried, switch the page by touching the [Next Page]
or [Previous Page].
(4) When the schedule display area is touched, the display
switches to the setting screen of each day of the week.
(3) (4)
1
2
3
4
––
:
–– –– –– ––
°c
––
:
–– –– –– ––
°c
––
:
–– –– –– ––
°c
––
:
–– –– –– ––
°c
Back
Next
Page
Timer Clear
Copy
Schedule1 Setting
Fri 10:00AM
Mon Wed Thu Fri SatTueSun
1
2
3
4
––
:
–– –– –– ––
°c
––
:
–– –– –– ––
°c
––
:
–– –– –– ––
°c
––
:
–– –– –– ––
°c
Back
Next
Page
Timer Clear
Copy
Schedule1 Setting
Fri 10:00AM
Wed Thu Fri SatTueMonSun
Set the schedule for each day of the week.
(5) The setting screen for each
day of the week has 3 pages
which are switched by touch-
ing the [Next Page] or [Previ-
ous Page]. Setting of up to 3
times can be displayed on 1
page.
1
2
3
––
––
––
:
––
–– ––
––
.
–
°c
––
––
.
–
°c
––
.
–
°c
––
:
––
––
:
––
––
Monday
Page 1/ 3
Cancel
OK
Next
Page
By touching each time from [1] to [8], detailed settings
for that time can be set.
(6) The items that can be set for one time are the [Op.
Time], [On/Off], [Mode], and [Set. Temp]. When each
item is touched, each setting screen is displayed. To
clear the setting of the selected time touch [Clear].
When the [Clear] is touched, a verication screen is
displayed. When the [Yes] is touched on the screen, the
setting is cleared.
(7) Touch the [Op. Time] on the screen of (6), and adjust the
time with [
] or [ ].
(6) (7)
Cancel
Monday 01
Op. Time
Mode
––
–– :– –
Set Temp.
On/Off
––
Clear OK
–– .–°c
Fri 10:00AM
Op. Time
Cancel OK
hour
AM
8
min.
40
When the [OK] is touched, the display returns to the
screen of (6).
Note
Setting screen format corresponds to the preference of
the “Display format Setting”.
En-11
 Loading...