4 Using the Console
Here we will start the dongle soundcard and perform the most common tasks when receiving
signals.
4.1 Start your Dongle
There are two stages to starting the dongle:
1. Start the soundcard to get the output (IQ) data,
2. Establish connection to the dongle via the HID driver to set the frequency and adjust the
dongle’s other options.
4.1.1 Soundcard
To start your dongle’s soundcard:
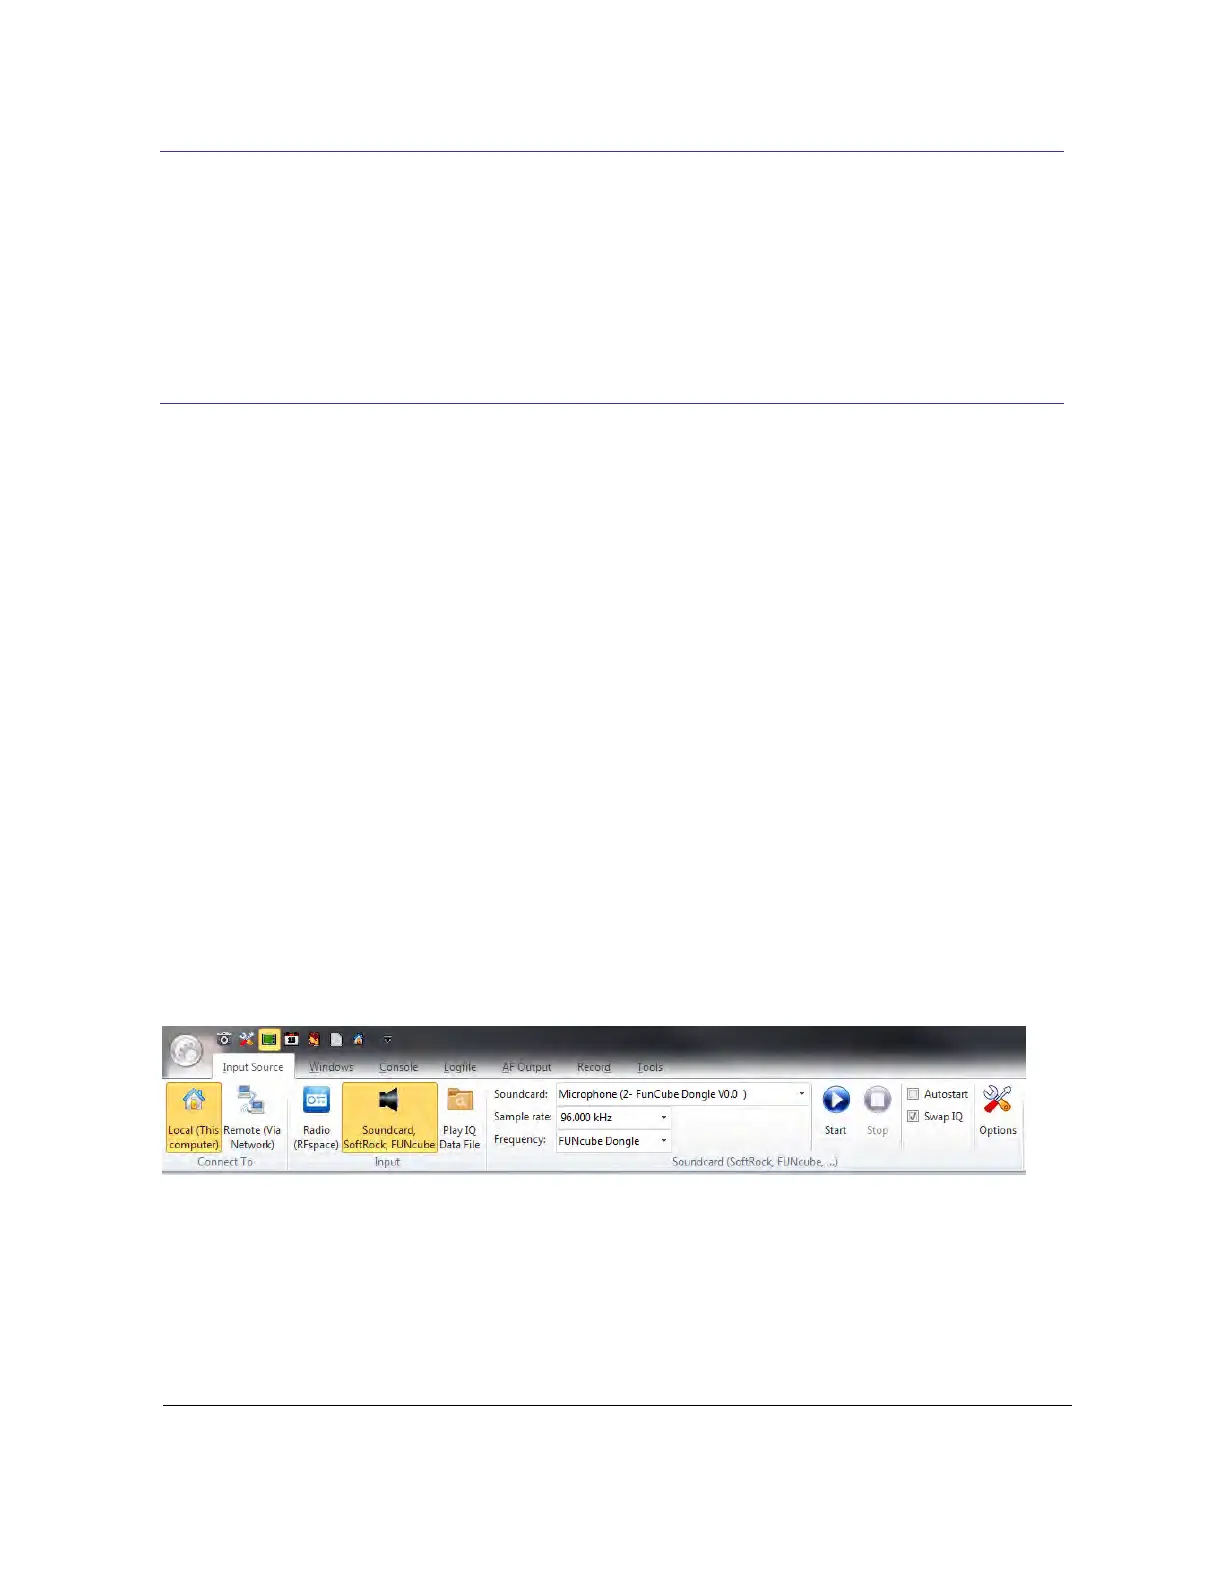
1. Make sure the Input Source pane of the ribbon bar is displayed, if not double-click where
you see Input Source at the top of the console.
2. In the Soundcard, SoftRock, FUNcube group the recording devices (soundcards)
enabled on the computer are shown.
3. Select the FUNcube Dongle soundcard and set the sample rate to 96 kHz (see below).
4. In the Frequency dropdown make sure FUNcube Dongle is selected.
5. Make sure Swap IQ is checked.
6. Press Start!
4.1.2 Control Interface
The dongle is configured and controlled via a Human Interface Device (HID) driver. When the
dongle’s soundcard is started a connection should also be made to the dongle, if not just press
Connect in the FUNcube Dongle pane’s toolbar. When a connection is made you will see output
similar to that below: