English - 25
3. INSTALLATION
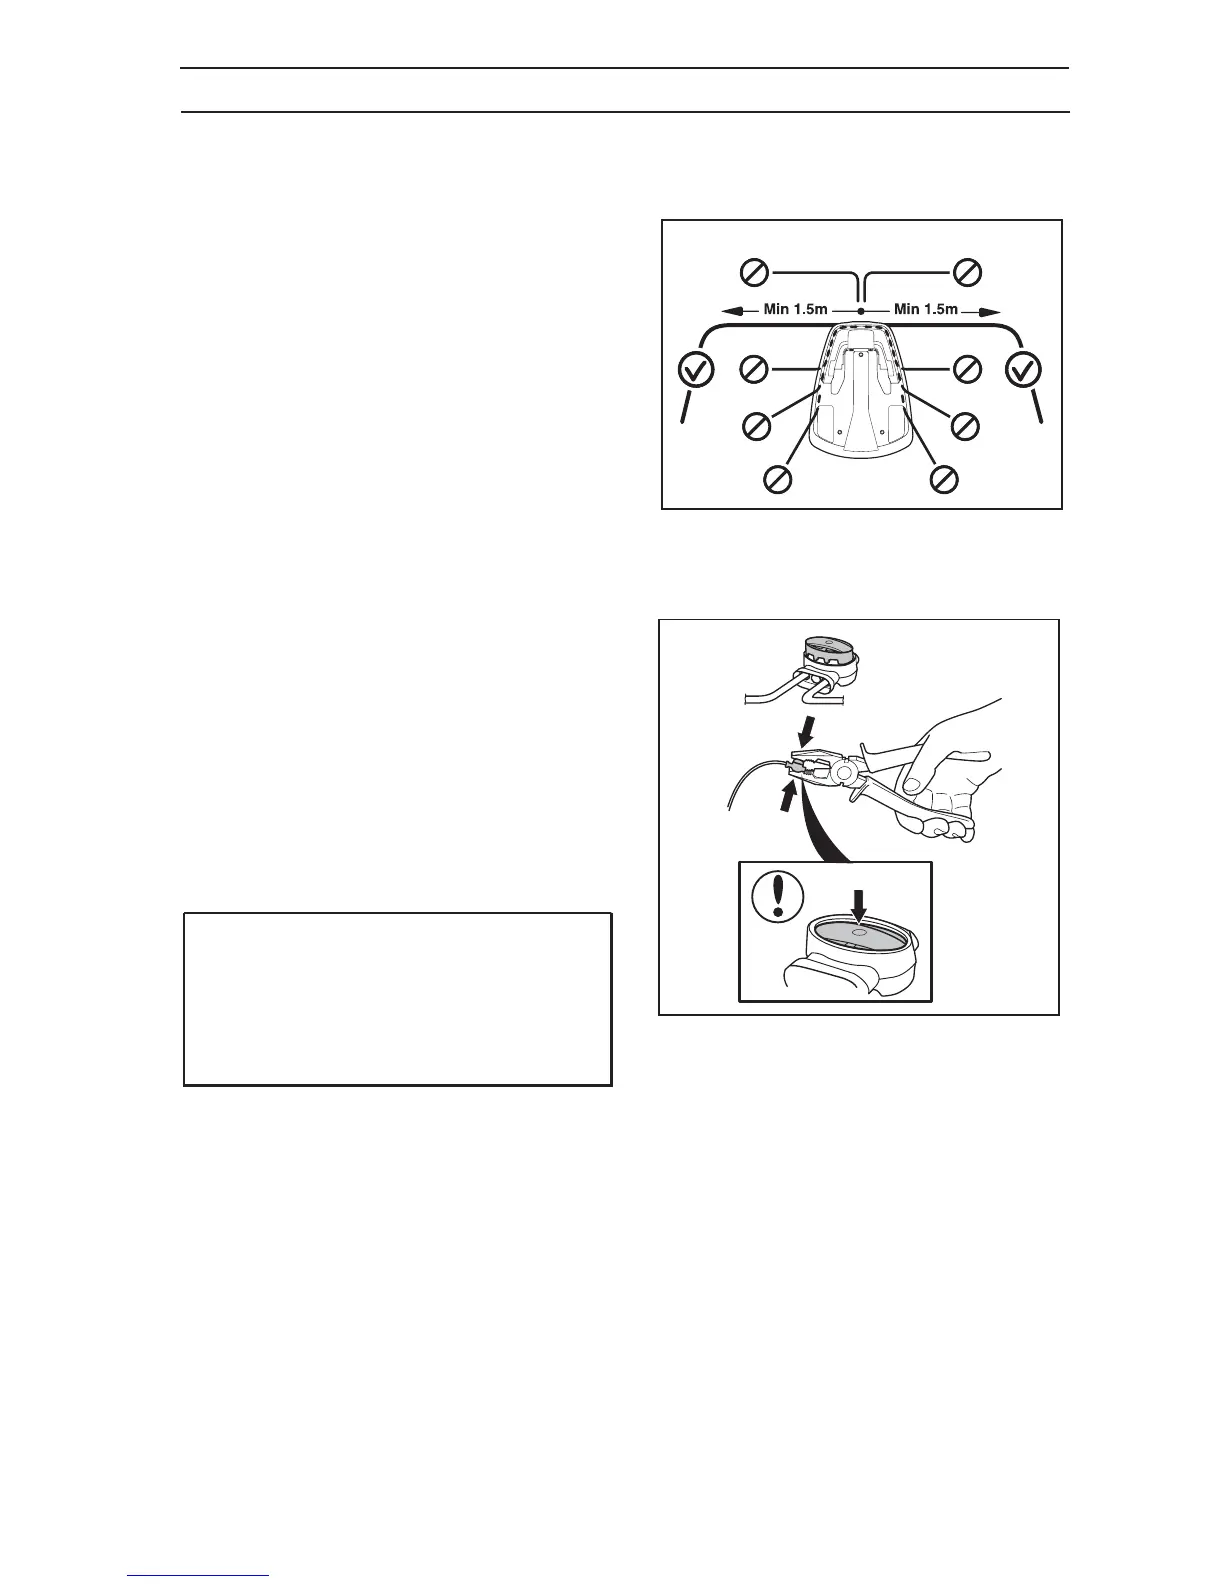
Laying the boundary wire in towards the charging
station
The boundary wire must be laid in line with the rear
end of the charging station. If the boundary wire is
laid in any other way, R40Li may find it hard to enter
the charging station.
In many cases, the straight wire section to the left of
the charging station can be reduced to 1 metre.
Depending on how the boundary wire is laid in the
rest of the installation, the straight wire section to the
right of the charging station may need to be extended
in certain cases.
Joining the boundary wire
Use an original coupler if the boundary wire is not
long enough and needs to be spliced.It is waterproof
and gives a reliable electrical connection.
Insert both wire ends in the coupler. Make sure the
wires are fully inserted in the coupler by checking
that the wire ends are visible through the transparent
area on the other side of the coupler. Now press
down the button on top of the coupler fully. Use a pair
of pliers if the button on the coupler is difficult to
press down by hand.
IMPORTANT INFORMATION
Twinned cables, or a screw terminal block
that is insulated with insulation tape are not
satisfactory splices. Soil moisture will cause
the conductors to oxidise and after a while
result in a broken circuit.
 Loading...