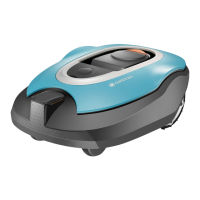
M
Morgan ReidSep 12, 2025
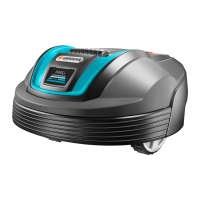
What to do if Gardena R50Li is upside down?
- PPamela FlemingSep 12, 2025
If your Gardena Lawn Mower is upside down, it means it is leaning too much or has turned over. Turn the mower the right way up.
What to do if Gardena R50Li is upside down?
If your Gardena Lawn Mower is upside down, it means it is leaning too much or has turned over. Turn the mower the right way up.
Why Gardena Lawn Mower mows for shorter periods?
If your Gardena Lawn Mower is mowing for shorter periods than usual between charges, grass or another foreign object may be blocking the blade disc. Remove and clean the blade disc.
Why does my Gardena Lawn Mower say no loop signal?
A 'no loop signal' error on your Gardena Lawn Mower can occur for several reasons. It could be due to the transformer not being properly connected, so check the wall socket and the connection of the low voltage cable to the charging station. Also, the boundary wire might not be correctly connected to the charging station. In some cases, metal objects or buried cables nearby can cause disturbances; try moving the boundary wire. Finally, the connection between the mower and the charging station might be broken. To fix this, place the mower in the charging station and generate a new loop signal via Security -> New loop signal.
What to do if Gardena R50Li Lawn Mower cutting system blocked?
If the cutting system of your Gardena Lawn Mower is blocked, it's likely due to grass or another object wrapped around the blade disc. Check the blade disc and remove any obstructions. Alternatively, the blade disc might be sitting in a pool of water. If this is the case, move the mower and try to prevent water from collecting in that area.
Why Gardena R50Li Lawn Mower has no drive?
If your Gardena Lawn Mower has no drive, it could be because it has gotten caught on something. Free the mower and identify the reason for the lack of drive. If wet grass is the cause, wait until the lawn dries before using the mower. Also, if the working area includes a steep slope, this could be the reason. Maximum guaranteed slope is 25%. Steeper slopes should be isolated. Another reason could be that the guide wire is not laid at an angle on a slope. If the guide wire is laid on a slope, it must be laid at an angle across the slope.
How to fix Gardena R50Li Lawn Mower left wheel motor blocked?
If the left wheel motor of your Gardena Lawn Mower is blocked, it's likely because grass or another object has wrapped around the drive wheel. Inspect the drive wheel and remove any obstructions.
What to do if Gardena R50Li Lawn Mower goes outside working area?
If your Gardena Lawn Mower is going outside the working area, it could be due to several reasons related to the boundary wire. The boundary wire connections to the charging station might be crossed, so ensure they are correctly connected. Also, the boundary wire may be too close to the edge of the working area, laid in the wrong direction around an island, or there might be disturbances from metal objects or buried cables nearby. In any of these cases, check that the boundary wire has been laid correctly or try moving it. Another reason may be that the robotic lawnmower finds it hard to distinguish the signal from another robotic lawnmower installation close by. In this case, place the robotic lawnmower in the charging station and generate a new loop signal via Security -> New loop signal....
Why Gardena R50Li vibrates?
If your Gardena Lawn Mower is vibrating, it is likely due to damaged blades causing imbalance in the cutting system. Inspect the blades and screws, and replace them if necessary.
What to do if Gardena R50Li charging station is blocked?
If the charging station of your Gardena Lawn Mower is blocked, it might be because the contact between the charging strips and contact strips is poor, causing the mower to make repeated charging attempts. Ensure the mower is properly placed in the charging station and that the charging strips and contact strips make good contact. Alternatively, an object might be obstructing the mower; remove any such object.
What to do if Gardena R50Li is stuck in charging station?
If your Gardena Lawn Mower is stuck in the charging station, there is likely an object preventing it from leaving. Remove the object.
Explains the robotic lawnmower's capabilities, mowing technique, and operation patterns.
Details all components and accessories included with the robotic lawnmower.
Explains the meaning of various safety and operational symbols found on the robotic lawnmower.
Outlines general safety warnings and usage guidelines for operating the robotic lawnmower safely.
Provides critical safety measures to follow during the operation of the robotic lawnmower.
Details the safe procedure for lifting and moving the robotic lawnmower to prevent injury or damage.
Lists necessary preparations, tools, and initial steps before installing the robotic lawnmower.
Covers the best location, power connection, and physical installation of the charging station.
Guides on planning, laying, and connecting the boundary wire to define the mowing area.
Explains how to install the guide wire for efficient navigation and remote area access.
Details the initial setup process, including language selection, PIN code, and automatic calibration.
Explains the control panel layout, display, keypad functions, and menu navigation.
Covers setting the PIN code, security levels, and alarm functions for protecting the lawnmower.
Provides examples of different garden layouts and recommended installation settings for optimal performance.
Describes how to safely start and stop the robotic lawnmower using the main switch and STOP button.
Explains the different operating modes: HOME, AUTO, and MAN, and when to use each.
Guides on setting the timer for mowing schedules and understanding the standby periods.
Details how to adjust the cutting height of the robotic lawnmower for different grass conditions.
Provides instructions on how to clean the robotic lawnmower's chassis, wheels, body, and charging station.
Explains the process for safely replacing the cutting blades for optimal mowing performance.
Details battery service life, charging, and the procedure for replacing the battery.
Recommends professional service before winter storage to maintain the lawnmower's condition.
Lists common error messages displayed by the lawnmower and their potential causes and solutions.
Explains the meaning of different indicator light patterns on the charging station for diagnosing issues.
Helps identify problems based on observed symptoms and provides recommended actions for resolution.
Guides on how to locate and repair breaks in the boundary or guide wire.
Provides instructions for safely transporting the robotic lawnmower, including battery handling.
Details the correct procedures for cleaning and storing the robotic lawnmower and charging station for winter.
Outlines checks required after winter storage, such as cleaning charging strips and setting the clock.
Advises on the proper recycling and disposal of the robotic lawnmower and its components.
Lists the technical specifications for the R38Li, R40Li, and R45Li models.
Lists the technical specifications for the R50Li, R70Li, and R80Li models.
Explains the terms and conditions of the product guarantee, including coverage and exclusions.
States that the product complies with relevant EU directives and standards.
| Cutting Width | 17 cm |
|---|---|
| Battery Type | Lithium-Ion |
| Battery Capacity | 2.1 Ah |
| Charging Time | 50 min |
| Maximum Slope | 25% |
| Typical Mowing Time on One Charge | 65 min |
| Weight | 7.4 kg |
| Area Capacity | 500 m² |