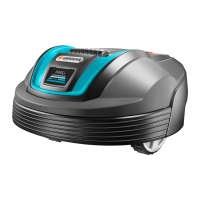
K
kennethdudleySep 14, 2025
Why is my Gardena R70Li vibrating?
- KKevin WardSep 14, 2025
If your Gardena Lawn Mower is vibrating, inspect the blades and screws, replacing them if necessary. Ensure only one blade is fitted at each screw.
Why is my Gardena R70Li vibrating?
If your Gardena Lawn Mower is vibrating, inspect the blades and screws, replacing them if necessary. Ensure only one blade is fitted at each screw.
Why Gardena Lawn Mower mows for shorter periods?
If your Gardena Lawn Mower is mowing for shorter periods than usual between charges, grass or another foreign object may be blocking the blade disc. Remove and clean the blade disc.
Why Gardena R70Li showing low battery?
If your Gardena Lawn Mower displays 'Low battery', it might not be finding the charging station. Ensure the charging station and guide wire are correctly installed. Also, check if the indicator lamp in the charging station flashes yellow. If the battery is spent, replace it. Check if the charging station's antenna is defective, indicated by a red flashing indicator lamp.
Why Gardena R70Li gives uneven mowing results?
Uneven mowing results with your Gardena Lawn Mower can stem from several factors. The mower might not be working enough hours per day, so increase the mowing time. The proportion setting might be incorrect for your working area's layout; check that the correct proportion value is selected. If your working area's shape requires it, use both Remote start 1 and Remote start 2 to guide the mower to all remote areas. The working area might be too large, so try limiting it or extending the working time. Dull blades can also cause unevenness, so replace all blades and screws to balance the rotating parts. If the grass is long relative to the set cutting height, increase the cutting height and then successively lower it. Finally, check for grass accumulation by the blade disc or around the motor s...
What to do if Gardena R70Li Lawn Mower says 'Wrong PIN'?
If the Gardena Lawn Mower is showing 'Wrong PIN', enter the correct PIN code. If you've forgotten the PIN code, contact GARDENA Central Service.
How to fix uneven mowing results with Gardena R70Li?
If your Gardena Lawn Mower shows uneven mowing results, increase the mowing time and check that the correct Proportion value is selected. If the shape of the working area requires it, use Remote start 2 to steer the robotic lawnmower to a remote area. Try limiting the working area or extending the working time. Replace all the blades and screws so that the rotating parts are balanced. Increase the cutting height and then successively lower. Check that the blade disc rotates freely and easily; if not, screw off the blade disc and remove grass and foreign objects.
How to prevent breaks in the Gardena R70Li Lawn Mower loop wire?
Breaks in the loop wire are usually the result of unconscious physical damage to the wire such as when gardening with a shovel. To avoid this, always select the maximum cutting height the first weeks after installation and then lower the height one step at a time every second week until the desired cutting height has been reached. A defective splicing of the loop wire can also lead to disruptions first several weeks after the splice was done. Please first check all known splices before further troubleshooting is done.
What to do if my Gardena Lawn Mower shows 'No loop signal'?
If your Gardena Lawn Mower displays 'No loop signal', there could be several reasons. First, ensure the transformer is properly connected to the wall socket and that the low voltage cable is connected to the charging station. Also, check the boundary wire connection to the charging station. If the boundary wire is broken, locate the break and replace the damaged section using an original coupler. Verify the boundary wire isn't laid incorrectly around an island, and if disturbances from metal objects or buried cables are present, try moving the boundary wire. If the connection between the lawnmower and charging station is broken, place the lawnmower in the charging station and generate a new loop signal via Security -> New loop signal.
What to do if the cover has been closed without the START button first being pressed in Gardena R70Li?
To resolve this issue, open the cover, press the START button, and then close the cover.
Why Gardena Lawn Mower has difficulty docking?
If your Gardena Lawn Mower is having trouble docking, it could be due to a few reasons. The boundary wire might not be laid in a long, straight line far enough out from the charging station. Also, the guide wire might not be inserted in the slot at the bottom of the charging station, it is absolutely critical for operation that the guide wire is perfectly straight and is in the correct position under the charging station. Finally, the charging station itself might be on a slope. Ensure the charging station is placed on a completely level surface.
Crucial safety information, user responsibilities, and general advice before appliance use.
Specific safety guidelines for operating the robotic lawnmower, including lifting and moving.
Criteria for charging station placement and connecting the power supply unit for optimal function.
Steps for installing the charging station and charging the mower's battery.
Describes the different methods for installing the boundary wire around the lawn area.
Guidelines for boundary wire planning and placement relative to obstacles.
Creating islands to isolate obstacles and managing secondary mowing areas.
Advice on narrow passages, slopes, and boundary wire installation techniques.
Explains the purpose and steps for installing and connecting the guide wire.
Procedures for initial setup, language selection, PIN code, and guide wire calibration.
Test to ensure the mower can successfully dock with the charging station.
Functionality and settings for the timer to control mowing periods.
Testing installation settings, including guide width and distance calculation for remote areas.
Testing docking, adjusting drive past wire, and security settings overview.
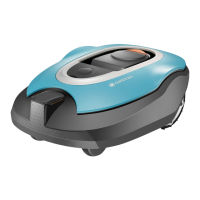
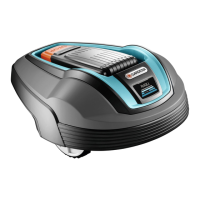
Overview of troubleshooting and lists common error messages, causes, and actions.
Lists common symptoms and their potential causes and solutions for troubleshooting.
Method for locating and repairing breaks in the boundary or guide wire.
| Type | Robotic lawn mower |
|---|---|
| Cutting width | 170 mm |
| Cutting height | 50 mm |
| Cutting system | - |
| Recommended lawn area | 700 m² |
| Minimum cutting height | 20 mm |
| Grass collecting volume | - L |
| Power source | Battery |
| Charging time | 1.16 h |
| Cordless | Yes |
| Weight | 7500 g |
|---|