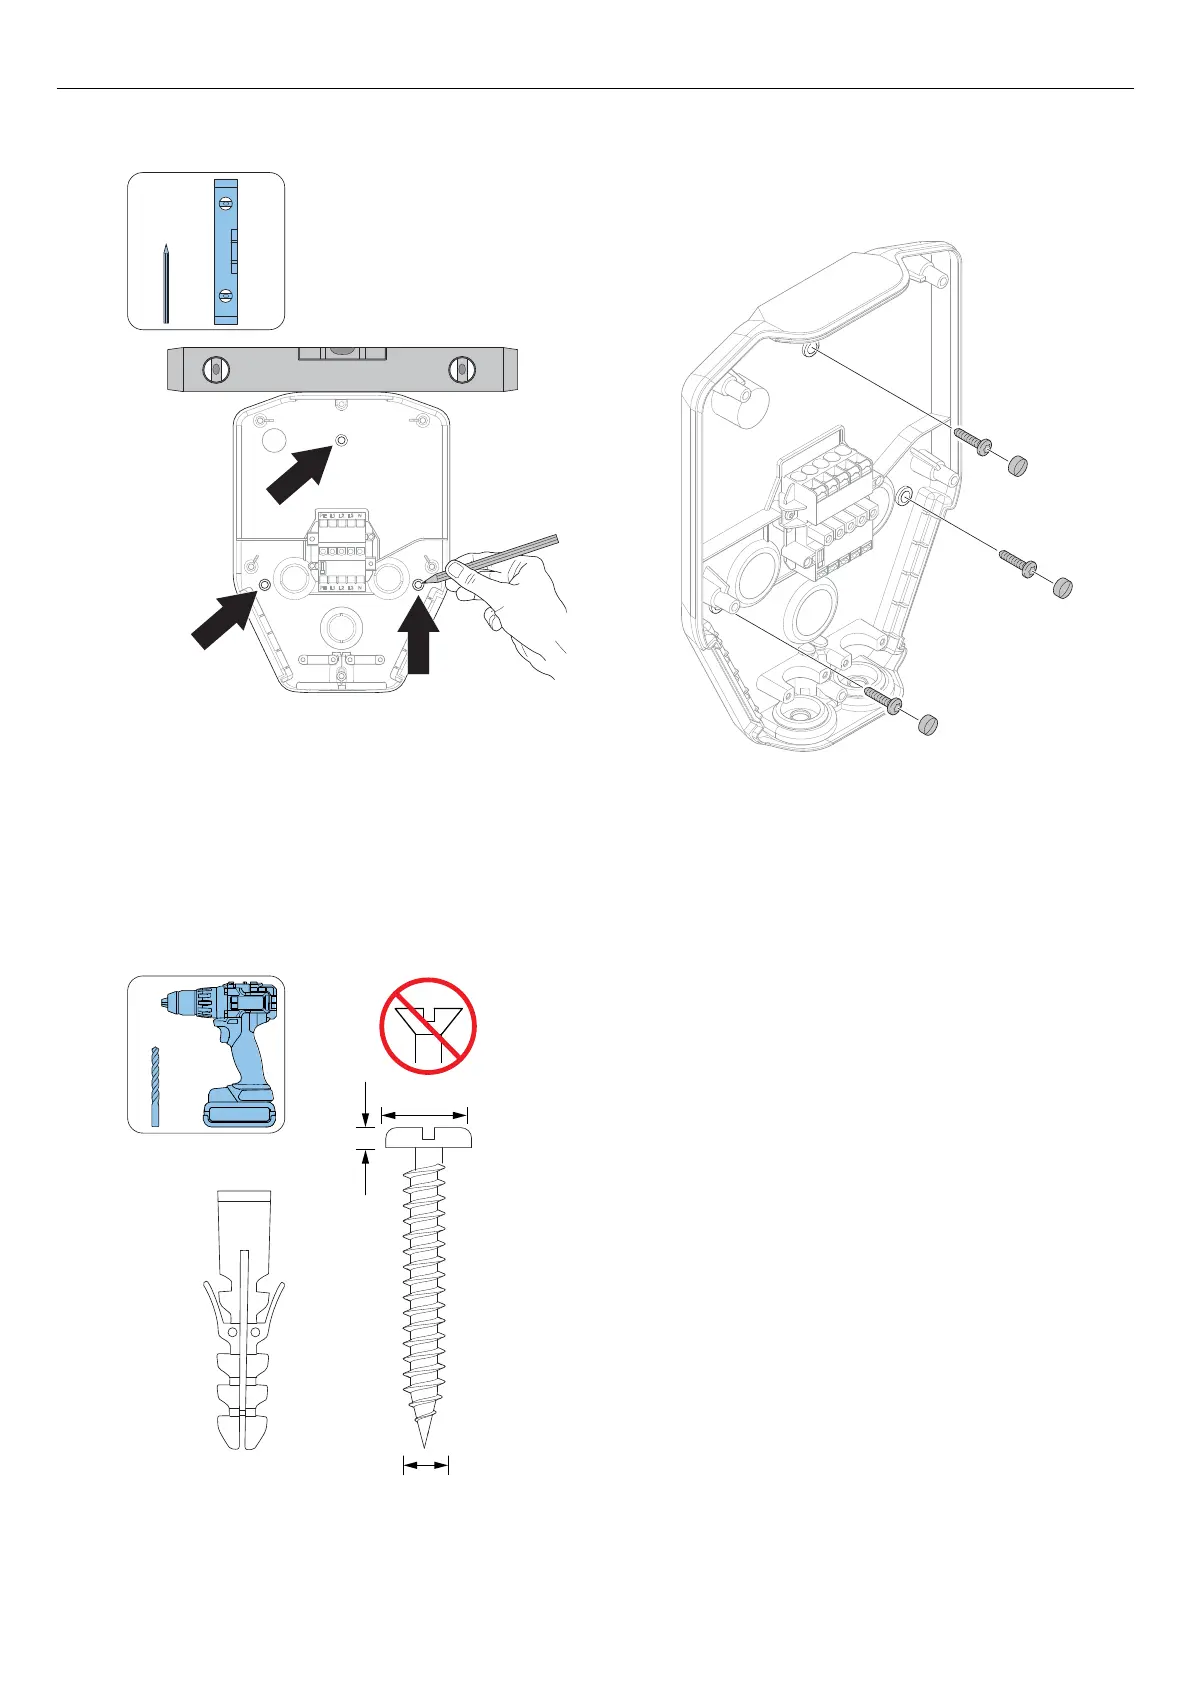
3. Use a spirit level to make sure that the installation
bracket is straight.
4. Use a pen to mark the drill holes on the wall, if
needed.
5. Choose appropriate screws for the wall material. If
it is necessary, also choose appropriate plugs and
drill for the wall material.
6. Drill the holes and attach the plugs if it is necessary.
7. Attach the installation bracket to the wall with the
screws.
8. Attach the screw covers to the screws.
NOTE
Ground stands and polemont fixtures are available as
accessories. The workflow is similar. See separate
manuals for those accessories.
4.12.4 TO PREPARE THE POWER CABLE FOR
INSTALLATION
CAUTION
If it is necessary to pass the connection terminal with
connection of the power cable due to dual power cables
in the same direction, route the wires on the opposite
side from the connection terminal, compared to where
the Type 2 outlet is to be placed (right or left). For
example, if the Type 2 outlet is located on the right side
of the charging unit (default), lead the wire the wires on
the left (A) side of the connection terminal. If the Type 2
outlet is located on the left side of the charging unit,
lead the wire along the right (B) side of the connection
terminal. Refer to 3.4 Charging station overview, page
15 to see where the Type 2 outlet is.
8-14 mm
max. 6 mm
max. 5 mm
26
Installation