Replacing convertible notebook components
24
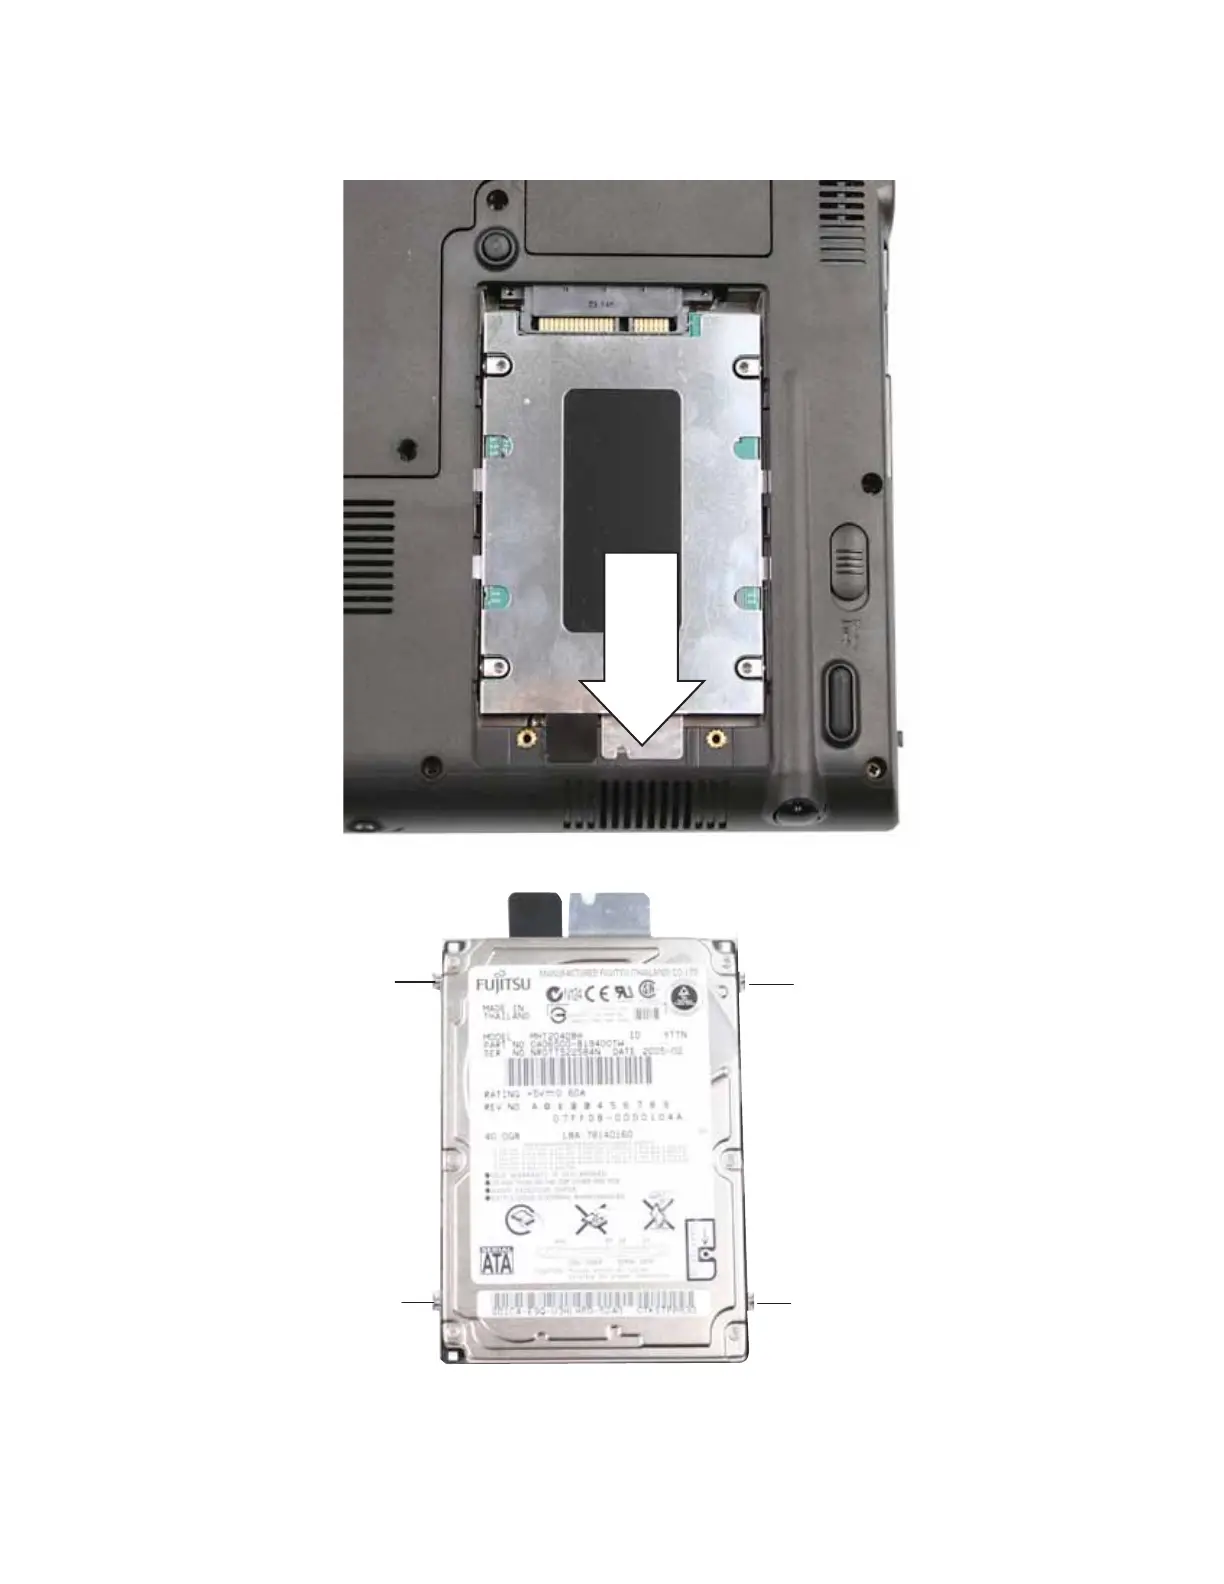
5 Slide the old hard drive kit out of the convertible notebook.
6 Remove the four screws that secure the hard drive to the hard drive kit bracket.
7 Insert the new drive into the bracket, label side up, so the screw holes line up.
8 Replace the four screws that were removed in Step 6.
Screw
Screw
Screw
Screw