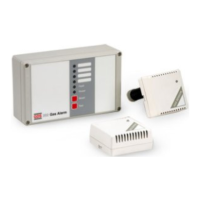
10
Testing the LEDs (7) and Relays (8)
To test all LED’s and beep the buzzer, use menu number 7 and press SELECT (3) to make all
LED’s illuminate in dimmed mode to see if they are functioning. At the end of the test, the
buzzer beeps twice to confirm its operation.
Note: some diagnostic LED’s on the main PCB are not part of this test. In particular these are,
Modbus, RS232 and CAN active. These LED’s are only illuminated when transmitting data
from the Combi panel.
When a remote relay board is present in the system, each of the 64 relays can be energised
or de-energised using USER menu number 8.
When selected, use the UP (1) and DOWN (5) buttons to choose a relay and then the + (4)
and – (2) buttons to energise or de-energise respectively.
When finished, use the SELECT (3) button to return to the USER menu.
Inhibiting a sensor (14)
During maintenance, it is sometimes required to inhibit the alarms on a particular sensor.
A front panel LED will illuminate if any sensor is inhibited.
Choosing ENGINEER’S menu 14, the UP (1) and DOWN (5) buttons select which of the direct
4-20 inputs will be inhibited. The + (4) and – (2) buttons are used to turn the inhibit ON and
OFF respectively.
Pressing SELECT (3) moves the selection to the CAN networked sensors and the buttons are
used in the same way.
Pressing SELECT (3) again returns to the ENGINEER’S menu.
Changing the direct gas type (18)
Each of the sixteen 4-20mA inputs can have a different gas type which can be changed using
ENGINEER’S menu 18.
When selected, buttons + (4) and – (2) change the channel number and UP (1) and DOWN
(5) will change the gas type (according to the Gas Type library).
There are 8 user definable gases (61 to 68) available in the Gas Type library. When one of
these is selected pressing DIM (6) allows the user to name the gas using UP (1) and DOWN
(5) to sequentially change the alphanumeric characters and + (4) and – (2) to move the cursor
beneath the characters. Pressing SELECT (3) saves the name and returns to gas selection
menu.
Pressing RESET (7) changes this menu to allow the maximum value of a gas to be changed.
The + (4) and – (2) buttons will change the displayed value. Pressing SELECT (3) will return
to the ENGINEER’S menu.
Note: that it is not possible to change the gas type for addressable sensors from the Combi
panel. The gas type is set at the sensor itself and the Combi panel displays the information
received from the sensor.