– 43 –
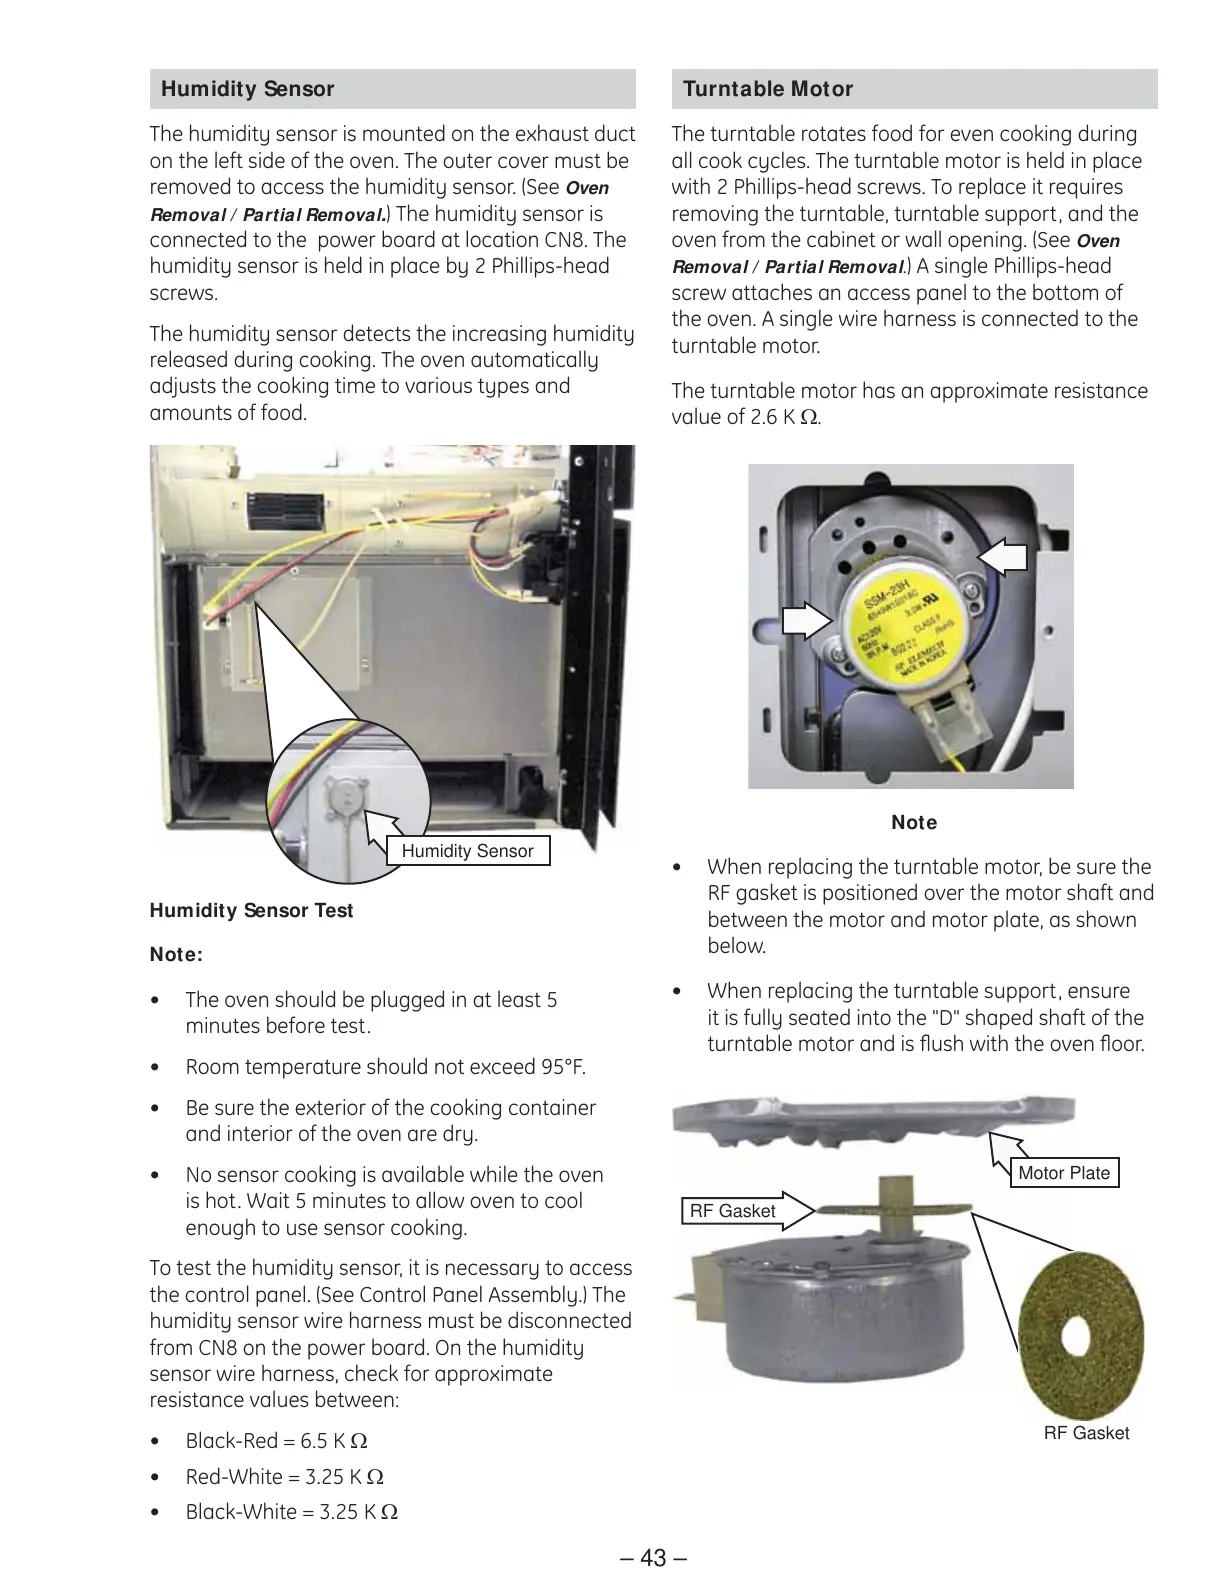
Humidity Sensor
The humidity sensor is mounted on the exhaust duct
on the left side of the oven. The outer cover must be
removed to access the humidity sensor. (See Oven
Removal / Partial Removal.) The humidity sensor is
connected to the power board at location CN8. The
humidity sensor is held in place by 2 Phillips-head
screws.
The humidity sensor detects the increasing humidity
released during cooking. The oven automatically
adjusts the cooking time to various types and
amounts of food.
Humidity Sensor
Humidity Sensor Test
Note:
The oven should be plugged in at least 5 •
minutes before test.
Room temperature should not exceed 95°F. •
Be sure the exterior of the cooking container •
and interior of the oven are dry.
No sensor cooking is available while the oven •
is hot. Wait 5 minutes to allow oven to cool
enough to use sensor cooking.
To test the humidity sensor, it is necessary to access
the control panel. (See Control Panel Assembly.) The
humidity sensor wire harness must be disconnected
from CN8 on the power board. On the humidity
sensor wire harness, check for approximate
resistance values between:
Black-Red = 6.5 K • Ω
Red-White = 3.25 K • Ω
Black-White = 3.25 K • Ω
Turntable Motor
The turntable rotates food for even cooking during
all cook cycles. The turntable motor is held in place
with 2 Phillips-head screws. To replace it requires
removing the turntable, turntable support, and the
oven from the cabinet or wall opening. (See Oven
Removal / Partial Removal.) A single Phillips-head
screw attaches an access panel to the bottom of
the oven. A single wire harness is connected to the
turntable motor.
The turntable motor has an approximate resistance
value of 2.6 K Ω.
Motor Plate
RF Gasket
Note
When replacing the turntable motor, be sure the •
RF gasket is positioned over the motor shaft and
between the motor and motor plate, as shown
below.
When replacing the turntable support, ensure •
it is fully seated into the "D" shaped shaft of the
turntable motor and is fl ush with the oven fl oor.
RF Gasket