EasyManua.ls Logo

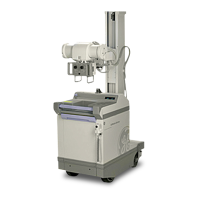
GE AMX-II

GE AMX-II
223 pages
To Next Page IconTo Next Page
To Previous Page IconTo Previous Page
Loading...
GENERAL
ELECTRIC
MEDICAL
SYSTEMS
AMX-il
X-RAY
UNIT
1-981
OM
A0654E
NOTE:
As
an
aid
in
positioning
the
unit,
it
may
be
driven with
Telescoping
Arm
unlatched
from
the
Latch
Bar.
Use
of
the
Drive
Assist
Button
is
not
recommended
with
the
Telescoping
Arm
unlatched.
6.
Turn
the
keyed
X-Ray
Generator
Standby
Switch
to
the
ON
position.
The
UNIT
ON
light
will
glow
red.
The
BATTERY
CONDITION
indicator
needle
must
swing
into
the
green
band.
If
it
does
not,
the
batteries
must
be
recharged.
Check
to
see
that
the
battery
voltage
compensator
switch
is
in
the
position
indicated
by
the
battery
condition
indicator.
7.
Rotate
the
collimator
until
the
crosshairs
from
the
Field
Light
align
in
the
desired
position.
8
Collimate
to
the
desired
film
size
with
the
Field
Light.
9.
Depress
the
handswitch
ROTOR
button.
There
will
be
a
2.5
second
delay
before
the
white
READY
light
will
glow.
ģ†Œģ†Œ
10.
After
ready
lite
glows,
depress
the
handswitch
X-Ray
button.
An
audible
tone
signal
will
sound
and
the
red
X-RAY
light
will
glow
during
the
time
that
x-rays
are
emitted.
WARNING:
IF
EITHER
THE
LAMP
GLOWS
OR
THE
AUDIBLE
SIGNAL
CONTINUES
FOR
MORE
11.
12.
13.
THAN
3
SECONDS,
RELEASE
THE
ROTOR
AND
X-RAY
BUTTONS
AND
TURN
THE
MAIN
POWER
CIRCUIT
BREAKER
OFF.
IN
THIS
CASE,
DO
NOT
ATTEMPT
AN-
OTHER
EXPOSURE
UNTIL
THE
UNIT
HAS
BEEN
CHECKED
BY
A
QUALIFIED
SERVICEMAN.
Check
the
Battery
Condition
Meter
between
exposures.
If
the
meter
reads
in
the
red
region
after
one
minute
rest;
the
batteries
must
be
recharged
as
described
below.
Turn
the
X-RAY
Generator
Standby
switch
to
OFF
when
completed.
The
unit
may
be
driven
to
a
new
location.
Prepare
the
unit
for
transport
as
described
previously.
Only
the
MAIN
POWER
CIRCUIT
BREAKER
should
be
ON
while
driving.
Recharging
the
Battery
Battery
recharging
is
required
only
when
the
BATTERY
CONDITION
METER
reads
in
the
RED
band
after
a
one
minute
rest.
Charging
is
recommended
only
when
the
battery
condition
meter
indicates
a
need.
The
battery
should
not
be
routinely
charged
between
patients.
When
charging
is
necessary,
the
battery
is
automatically
protected from
overcharging.
1.
With
the
unit
prepared
for
transport
as
described
previously,
drive
the
entire
mobile
unit
to
within
15"
of
a
115
or
230V,
50-60
Hz
power
outlet
in
a
ventilated
area.
Check
that
the
power
outlet
matches
the
nameplate
rating
of
the
basic
unit.
The
nameplate
is
located
beneath
the
exposure
hand-
switch
bracket.
CAUTION:
ALWAYS
LOCATE
THE
UNIT
IN
A
WELL
VENTILATED
ROOM
WHEN
RECHARG-
ING
THE
BATTERY.
Move
the
Main
Power
Circuit
Breaker
to
ON.
Insert
the
extension
cord
into
the
power
outlet.
The
cord
is
stored
on
a
reel
inside
the
mobile
unit
cabinet.
Upon
pull
and
slow
release,
the
cord
remains
extended
the
desired
length.
Turn
the
Standby
Switch
to
CHARGE.
The
BATTERY
CONDITION
indicator
needle
will
swing
to-
ward
the
green
band
and
the
fan
will
run.
The
CHARGE
ON
lamp
will
glow
red.
The
battery
is
now
charging.
11

Related product manuals