ENGLISH
WARNINGS
PORTUGUÊS
AVISOS
Substitua os fusíveis pelo mesmo tipo e categoria para uma pro
teção constante contra risco de incêndio.
• Este produto está classicado com Segurança Classe 1. Ele deve estar
conectado a uma fonte de energia aterrada. Se este instr
umento for
usado de forma diferente da especicada pela GE Analytical Instruments
USA, a proteção fornecida pelo instrumento será prejudicada.
• Sempre pare os protocolos/medidas de TOC antes de desligar e
desconectar o amostrador automático GE.
• Siga as orientações a seguir quando usar o amostrador automático GE
com líquidos inamáveis. Para reduzir o risco de incêndios, o amostrador
automático GE não deve ser usado para amostrar líquidos inamáveis
com ponto de inamação menor do que a temperatura ambiente de
+ 25 ºC. Com exceção da agulha, o amostrador automático GE não
deve ter qualquer parte em contato com o uido. Certique-se de
que nenhuma parte, na superfície ou próxima ao uido, seja capaz de
incendiar um líquido inamável.
• Mantenha-se afastado do braço da sonda durante a operação. Embora
tenha sido projetado para parar quando detectar uma obstrução, o
braço da sonda pode se mover sem aviso durante a operação normal
e na partida.
20
2016 General Electric Company. All rights reserved. DQS
77700-01 MUL Rev. B
For continued protection against re hazard, replace fuse with
same type and rating.
• This is a Safety Class 1 product. It must be attached to a grounded
power source. If this instrument is used in a manner not specied by GE
Analytical Instruments USA, the protection provided by the instrument
may be impaired.
• Always stop TOC measurements/protocols before turning o or
unplugging the GE Autosampler.
• Observe the following guidelines when using the GE Autosampler
in conjunction with ammable liquids. To reduce the risk of re, the
GE Autosampler shall not be used to sample ammable liquids with a
ash point of less than ambient temperature + 25 ºC. Other than the
needle, the GE Autosampler should have no parts in contact with the
uid. Ensure that no parts, in or near the uid surface are capable of
igniting a ammable liquid.
• Keep clear of the probe arm during operation. Although it is designed to
stop upon detecting an obstruction, the probe arm can move without
warning during normal operation and at start-up.
This symbol on the instrument indicates that the product does not
contain any restricted substances included in China RoHS I.
5
3. Position the needle into the arm, lowering the tip through the
lower mount block, and pushing the top of the assembly up-
ward and into the upper mount block.
4. Secure with the nut (placed over the washer), and tighten with
1/2” open-end wrench. Be careful NOT to over-tighten the nut.
5. Screw the PEEK nut (with sample tubing attached) back into the
threaded mount of the needle assembly until it is nger tight.
DO NOT over-tighten the nut.
6. Using a at-blade screwdriver, raise the arm back into place.
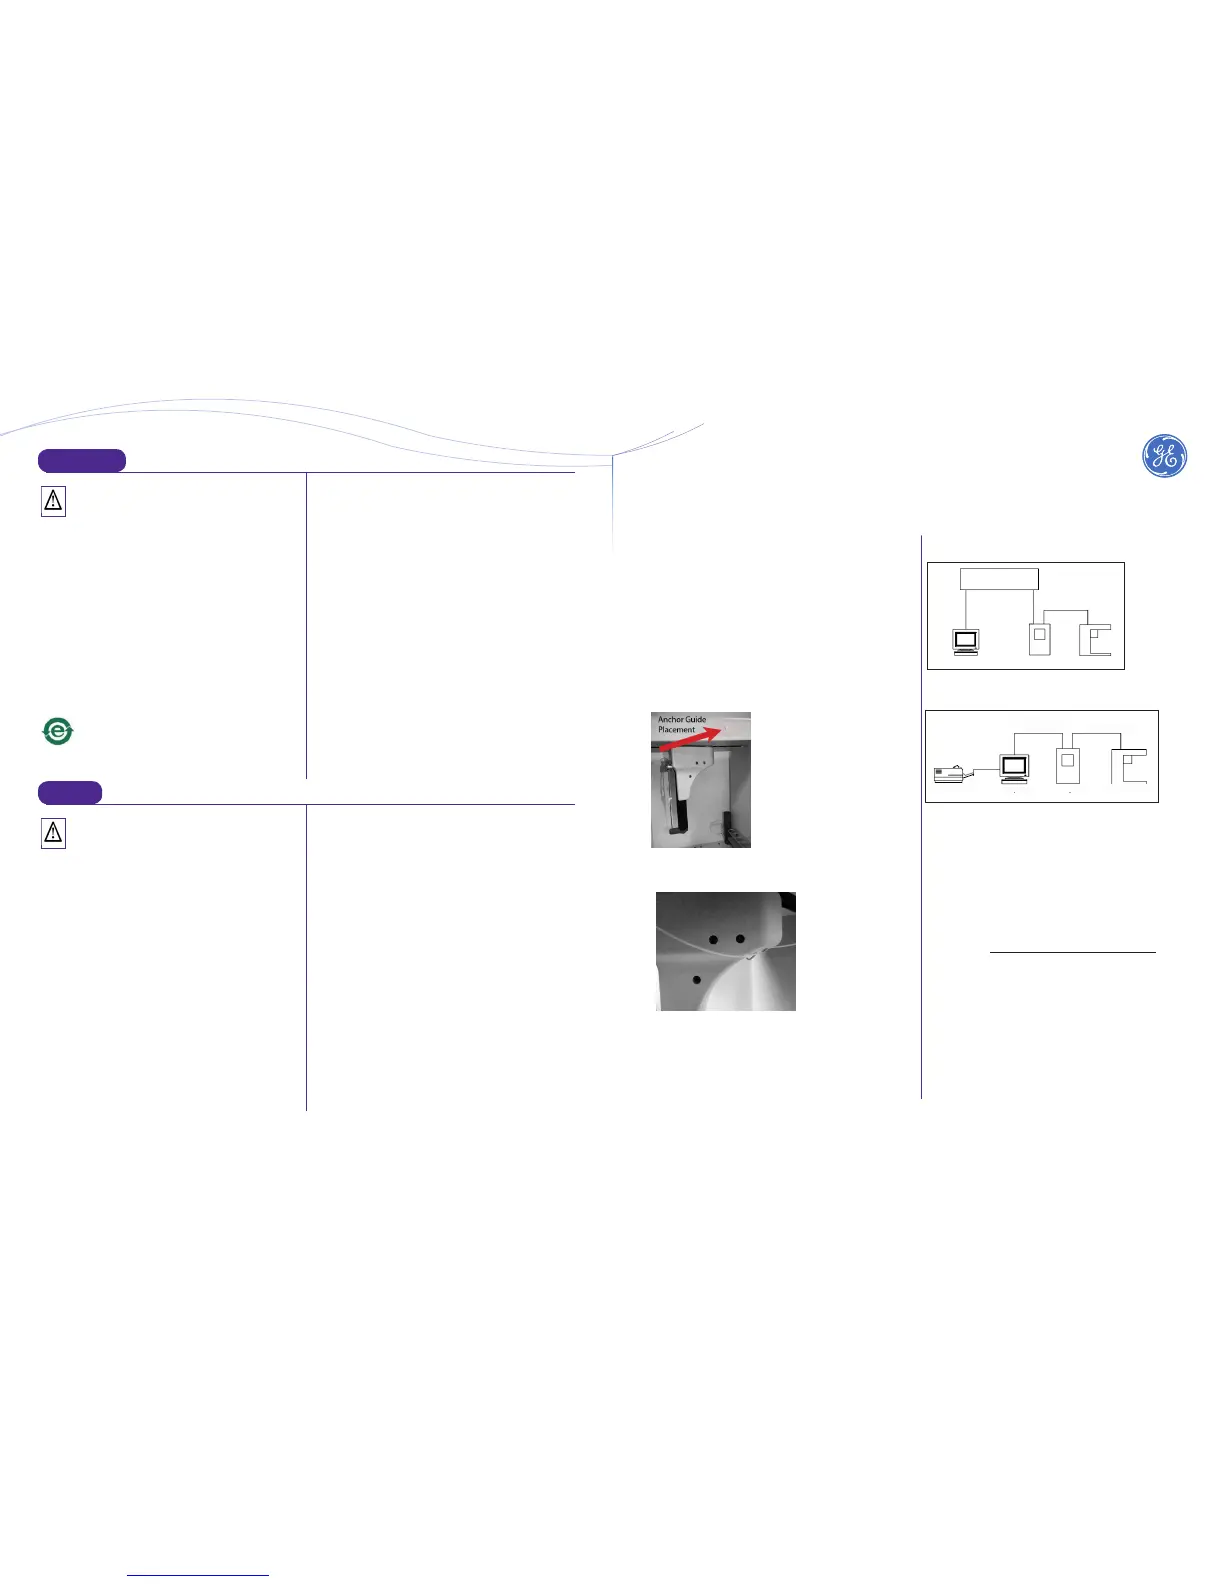
STEP 5: Route the Sample Tubing
1. Insert the anchor guide into the hole on the top side of the
GE Autosampler.
2. Route the tubing through the small eyelet on the Autosampler
arm.
3. Connect the Valco tting to the end of the tubing.
4. Route the tubing through the anchor guide.
STEP 6: Connect the Communication/Power Cables
Network
Computer Sievers Analyzer GE Autosampler
Ethernet
[Straight-Through
Cable]
USB-USB
Ethernet
1. Connect the GE Autosampler to the Analyzer using the
provided USB-to-USB cable.
2. Connect the Analyzer to a network using a straight-thru
Ethernet cable or directly to a computer using a USB
cable. Insert the power cord into the GE
Autosampler and then connect to a grounded power outlet.
STEP 7: Install DataPro2 Software
Refer to the GE Autosampler Installation Guide for instructions.
(Download from www.geinstruments.com/library/manuals).
Connecting to a Computer
Small Eyelet on Needle Arm
Connecting Directly to a Network
ComputerPrinter Analyzer Autosampler
USB-USB
USB-USB
Anchor Guide
 Loading...