Do you have a question about the GE DV 1 and is the answer not in the manual?
Introduction to the user manual and advice for future reference.
Copyright details for the manual, 2010 General Imaging Company.
Trademarks mentioned in the manual belong to their respective owners.
Provides instructions for using the GE digital video camera and notes on accuracy.
Explains symbols used in the manual to help locate information quickly.
Advice against exposing the camera to rain or humidity to prevent fire or electric shock.
Details FCC standards compliance for US and CE mark for European safety and environmental standards.
Lists model, trade name, company, address, and power supply standards for product conformity.
Avoid direct sunlight, high temperatures, humidity, dust, and magnetic fields for camera longevity.
Guidelines for formatting, copying data, file names, and inserting/removing memory cards.
Explains normal pixel variations and actions for liquid crystal contact with skin, eyes, or ingestion.
Key instructions: do not disassemble, avoid drops, turn off before card access, protect lens, use proper cleaning agents.
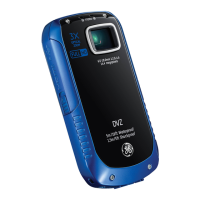
Camera meets JIS/IEC waterproof grade 8 (IPX8) and dustproof grade 6 (IPX6).
Ensure covers are sealed, rubber is clean, unit is not damaged, avoid geothermal springs.
Do not exceed 5m depth or 2 hours underwater, avoid dropping or impact, do not open covers underwater.
Wipe with lint-free cloth, dry covers and body, wash with clean water if used in water/sand, clean rubber gaskets.
Do not use chemical agents or silicone grease. Damaged gaskets compromise waterproofing.
Lists items typically included in the package: Warranty Card, Quick Guide, Wrist Strap, USB Cable, Power Adapter, CD-ROM.
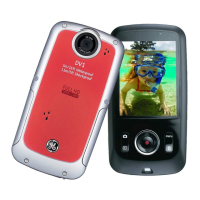
Identifies numbered parts on the front and side of the camera, including LCD, buttons, lens, and ports.
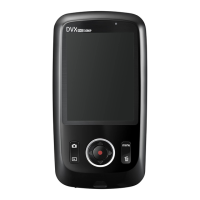
Identifies numbered parts on the rear and bottom, including SD card slot, power button, and tripod socket.
Describes three methods to charge the internal battery using USB cable and adapter or PC.
First charge takes about 4 hours. Status indicator turns green when fully charged. Charging times vary by method.
Step-by-step guide to open the SD card cover, insert the card, and close the cover.
Notes optional cards, suggests high-speed cards for Full HD, and advice for slow card access.
Press the Power button to turn the video camera on or off.
How to reset and power off the camera by pressing and holding the power and record buttons.
The Language, Date/Time setting menu appears on first-time startup.
Steps to turn on the camera, select settings using navigation buttons, and confirm.
Press menu, navigate to General Setup, select Language option using navigation buttons.
Choose desired language from the list, press menu button to return to shooting screen.
Press menu, navigate to General Setup, select Date/Time option.
Use navigation buttons to select function, set values, and save using the Set button.
Date format is M-D-Y; Time format is 24-hour. Displays selected/unselected options with colors.
Turn on camera, press record button to begin, press record button again to end.
Use Up/Down buttons to zoom in or out during recording. Digital zoom is shown as an orange icon.
Press button to scroll through White Balance options (Auto, Daylight, Cloudy, Fluorescent, Incandescent, Underwater).
Press the shooting button during video recording to capture a photo.
Details of indicators: battery, memory card, picture count, resolution, quality, white balance, HDR, histogram, etc.
Explains indicators during video recording: battery, memory card, recording status, available photos, image quality, WB, HDR, zoom.
Shows indicators for vertical playback: battery, previous/next media, selected media, reminder, date/time.
Shows indicators for horizontal playback: battery, previous/next media, selected media, date/time, ranking, film length.
Pressing the DISP button switches between two different shooting screen layouts.
Press button to enter playback. Use navigation buttons to select previous/next photo/video.
Explains playback controls: Pause, Fast Backward, Decrease Volume, Fast Forward, Increase Volume.
Press button to return to Playback screen from video mode or pause screen.
Notes on first frame display, fast forward/backward speeds, and turning on camera in playback mode.
Use function button to magnify photos up to 4x. Moving display area uses navigation buttons.
Zooming facility is only for still images, not video playback. Maximum zoom is 4x.
Return to playback mode or shooting screen. Displays media playback information.
Displays 3x3 thumbnails; use navigation buttons to select media.
Sorts thumbnails by date, enters Date Folder Thumbnails by pressing button.
Press delete button to select media, then confirm deletion. Erased media cannot be recovered.
Select Yes or Cancel to delete the selected photo/video or return to menu.
Press menu button to enter Setup menu, select Photo Setup option.
Navigate and select options within Photo Setup, then press Set to confirm or Back/Menu to exit.
Adjusts image compression ratio. Options: Best, Fine, Normal, affecting photo quality and memory space.
Specifies the picture area used for exposure: Spot, Center, or AiAE for intelligent determination.
Lightens dark areas and darkens light areas by overlapping multiple exposures. Options: ON/OFF.
Hold shooting button for continuous shooting. Options: ON/OFF.
Saves date and time data with the picture. Options: Date/Time, Date, OFF.
Press menu, navigate to Movie Setup, select Movie Resolution.
Choose resolution from options like 1920x1080 30FPS, 1280x720 60FPS, etc.
Lists five resolution options: 1920x1080: 30FPS, 1280x720: 60/30FPS, 1440x1080: 30FPS, 640x480: 30FPS.
HD recording time is limited to below 29 minutes.
Sets exposure area for movies: Spot, Center, or AiAE.
Enhances picture by lightening dark and darkening light areas. Options: ON/OFF.
Press menu, navigate to General Setup option.
Navigate and select options like Beep, LCD Brightness, Date/Time, World Time, Power Saver.
Adjusts the volume of beeps when buttons are pressed. Options: ON/OFF.
Adjusts screen brightness. Options: Auto or different brightness ratios.
Adjusts time zone to the nearest city when overseas. Options: Location, Travel Target.
Prolongs battery life by automatically turning off screen/camera. Options: ON/OFF.
View current firmware version and check for updates on www.ge.com. Requires sufficient battery.
Deletes all data from storage card and internal memory. Options: Yes/No.
Resets the video camera to factory default values. Options: Yes/No.
Copies files from internal memory to the storage card. Options: Yes/No.
In Playback mode, press menu, select Playback Setup.
Options include Delete, Slide Show, and Red-Eye Reduction. Note: only horizontal mode display.
Return to Playback mode, select media, press delete button to display info.
Select Yes or Cancel to delete the selected photo/video or return to menu.
Select 'All' option to delete all files, confirm with Yes/Cancel.
Select 'Date Folder' to delete files from a specific date. Confirm deletion.
Select Slide Show, press button to save, then press button to start playing.
Press button to stop playing. Select Continue to Start or Return to Playback screen.
Select Red Eye Removal option, press button to enter setup, remove or cancel.
Red eye reduction does not work for video files. Message if no red eyes are detected.
View photos and videos on TV using HDMI cable. Camera enters Playback Screen automatically.
Select previous/next photo/video using navigation buttons. Press button to start/stop playback.
Press button to start/stop video. Use navigation buttons for pause/return to single playback screen.
Steps to connect camera to PC via USB cable for copying photos and videos.
The camera supports Windows 2000, XP, Vista, and 7.
Details sensor resolution (5.08MP), focal length (5.5mm), F number (2.8), and lens construction (4P).
Specifies 4x digital zoom, still image resolution (5MP/3MP), and movie resolutions (1920x1080 to 640x480).
Lists Face Detection, Auto shooting mode, Red-eye Reduction support, Waterproofing, and Shock Resistance.
Details the 2.5-inch LTPS TFT LCD display and Auto ISO sensitivity range (100-800).
Lists exposure metering modes (Spot, Center, AiAE) and playback modes (Single Photo, Index, Slide Show, Movie).
Lists white balance control options and approximate shooting capabilities (260 shots, 80 min video).
Specifies internal memory (27MB), SD/SDHC card support (up to 32GB), and internal rechargeable battery (GB-50).
Provides physical dimensions (105x55x20.1mm) and weight (approx. 145g).
Explains messages like 'Warning! Battery exhausted' and 'No picture'.
Explains messages like 'Pull USB out', 'Connection failed', 'File can't be recognized'.
Explains messages like 'Warning! Don't power off when upgrading!' and 'Software update failed'.
Explains 'Internal memory card full', 'Memory card full', 'Write protection', 'File can't be edited', 'Memory card error'.
Explains 'Battery exhausted, can't update FW' and the need for sufficient battery power.
Solutions for camera not turning on or turning off suddenly: charge battery.
Solutions for blurred photos (use tripod) and inability to take photos (memory full, not formatted).
Solutions for inability to record video (no/full memory card, playback mode).
| Image Stabilizer | Electronic |
|---|---|
| Min Illumination | 3 lux |
| Microphone Operation Mode | Stereo |
| Display Type | LCD |
| Sensor Type | CCD |
| Video Resolution | 720 x 480 |
| Focus Adjustment | Automatic |
| White Balance | Auto |
| Special Effects | Black & White, Sepia |
| Digital Scene Transition | Fade, Wipe |
| Connector Type | USB |
| Interface | USB |
| Battery Type | Lithium ion |