EasyManuals Logo

GE GTD75GCPLDG Installation Instructions

GE GTD75GCPLDG
40 pages
To Next Page IconTo Next Page
To Previous Page IconTo Previous Page
Page #18 background imageLoading...
Page #18 background image
Installation Instructions
18
A
REVERSING THE DOOR - SOLID DOOR
MODELS (cont.)
5
Mount the door on the 2 upper left side hinge screws
installed in step 2. Move the hinge screws loosened in
step 3 into the lower left side screw holes and firmly
tighten all 4 screws.
6
Install the 4 plastic caps removed in step 1 into the 4
right side front panel holes.
NOTE: To return the door to the original setup, follow
these instructions, swapping “left” and “right”.
When you finish
Plug the dryer back into
its electrical outlet.
Door
Hang door and
tighten screws
Plastic Cap (4)
Right side of
front panel
REVERSING THE DOOR (cont.)
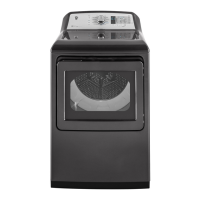
Other manuals for GE GTD75GCPLDG

Questions and Answers:

Question and Answer IconNeed help?

Do you have a question about the GE GTD75GCPLDG and is the answer not in the manual?

GE GTD75GCPLDG Specifications

General IconGeneral
Colorgray, diamond gray
Dryer Capactity7.4 cubic feet
Number of Cycles14
Cycle Selectionsantibacterial, bulky items, damp dry, dewrinkle, extended tumble, jeans, mixed load, quick fluff, sanitize, steam dewrinkle, steam refresh, towels/ sheets
Optionsedry, extended tumble, my cycle, delay dry, volume, damp alert
Stackableno
Ventingno
Temperature Settings5
Temperature Selectionshigh, medium, low, extra low, no heat
Temperature Controlno
Delay Startyes
Child Lockno
Cycle Signalyes
Moisture Sensor Optionyes
Steamyes
Smart Homeyes
Weight and Dimensions IconWeight and Dimensions
Depth30 1/2 inches
Height48 inches
Width27 inches

Related product manuals