Do you have a question about the GE JB250 and is the answer not in the manual?
Ensures the range is secured with a bracket to prevent tipping hazards.
Provides essential safety rules for daily appliance use.
Details items that must be kept away from the range to prevent fire.
Outlines steps to prevent fires and actions to take during a fire incident.
Specific safety advice for operating the electric cooktop surface.
Highlights safety measures related to coil heating elements.
Guidelines for safely using the oven and its components.
Essential safety measures before and during self-cleaning cycles.
Explains how to operate and set the surface heating elements.
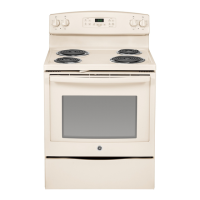
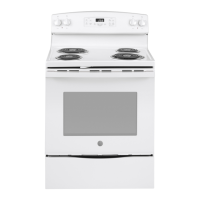
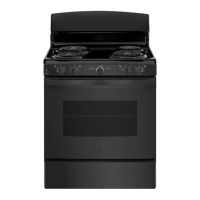
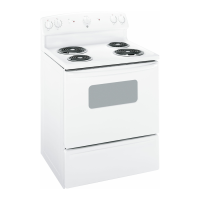
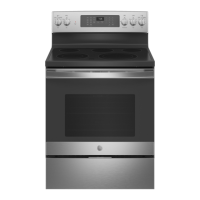
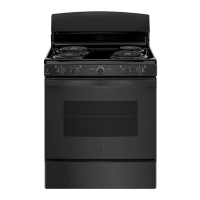
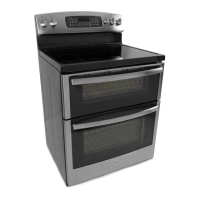
This document is an owner's manual for a GE Electric Free-Standing Range, specifically models JB250 and JB350. It provides comprehensive instructions for safe operation, usage, and maintenance of the appliance.
The GE Electric Free-Standing Range is a kitchen appliance designed for cooking food using both surface units (cooktop) and an oven. It offers traditional cooking modes such as baking and broiling, as well as a self-cleaning function for the oven. The range is equipped with controls for both the surface units and the oven, allowing users to select desired temperatures and cooking times. Some models include a "Melt" setting on the surface units for delicate tasks like melting chocolate or butter. The oven features multiple rack positions to accommodate various cooking needs and optimize results. A storage drawer is also integrated into the range for convenient storage of cookware.
The cooktop features multiple surface units controlled by knobs. To operate, push the knob in and turn it to the desired setting (Lo to Hi). A surface ON indicator light illuminates when any surface unit is active. The controls click into position at both OFF and HI settings, and slight clicking sounds during cooking indicate the control is maintaining the set temperature. Users are reminded to turn the control knob to OFF after cooking. For home canning, it's recommended to center the canner over the surface unit, ensure it has a flat bottom, and use caution due to steam and heat. Reputable sources like Ball® and Kerr® and the Department of Agriculture Extension Service should be consulted for recipes and procedures. Flat-bottomed canners are preferred, and those with rippled bottoms may extend boiling time.
The oven control panel includes several pads for various functions:
The range offers several customizable features accessible by pressing and holding the BAKE and BROIL pads simultaneously for three seconds until "SF" appears.
The oven may include extension racks and/or traditional flat racks. Rack positions can be adjusted to influence cooking results (e.g., for darker tops or more even browning). When using multiple pans, ensure at least 1½" space between them for air circulation. Racks should be placed in the desired position before turning on the oven to prevent burns. Extension racks pull out to a fully open position for easy loading/unloading. If they become difficult to extend, a graphite lubricant (provided) can be applied to the side tracks. To remove an extension rack, push it fully in, then slide it to the stop position, tilt the front up, and pull it out. To replace, align the curved end with oven supports, tilt up the front, and push in.
Cookware material, finish, and size impact baking performance. Dark, coated, and dull pans absorb heat more readily, leading to browner, crisper crusts. Shiny pans promote more evenly cooked goods. Glass and ceramic pans heat slowly but retain heat well, suitable for pies and custards. Air-insulated pans heat slowly and can reduce bottom browning. Keeping cookware clean ensures even heating.
Before cleaning, ensure all controls are off and surfaces are cool. If the range is moved for cleaning, ensure the anti-tip device is re-engaged properly upon replacement.
Removable for cleaning. Turn to OFF, pull straight off, and wash in a dishwasher or with soap and water. Ensure they are dry before replacing.
The touch pads can be deactivated for cleaning. Splatters can be wiped with a damp cloth. For heavier soil, use warm, soapy water; avoid abrasives. Reactivate touch pads after cleaning.
Wipe after each use with mild soap and water or vinegar and water, rinse, and polish dry with a soft cloth. Avoid abrasive cleansers, strong liquid cleansers, plastic scouring pads, or oven cleaners as they can damage the finish.
Clean with mild soap and water or vinegar and water solution. Rinse with clean water and dry with a soft cloth. Avoid oven cleaners, abrasive cleansers, strong liquid cleansers, steel wool, plastic scouring pads, or cleaning powders. Clean surfaces at room temperature, not in direct sunlight. Persistent stains on the door vent trim can be addressed with a mild abrasive cleaner and sponge-scrubber. Acidic spills (marinades, fruit juices, tomato sauces) should be wiped up immediately after cooling to prevent discoloration.
Includes sides, door, control panel top, and drawer front. Clean with soap and water or a vinegar and water solution.
Do not use steel wool pads. Clean with warm sudsy water or a stainless steel cleaner/polish, wiping in the direction of the grain.
This finish is sturdy but breakable if misused and acid-resistant. Acidic foods (fruit juices, tomato, vinegar) spilled while hot should be wiped up immediately with a dry paper towel or cloth. Once cooled, wash with soap and water or cleansing powders, rinse, and polish dry.
To clean, turn the control to the highest setting for one minute to burn off soil. To remove for cleaning drip pans, push the unit back to free the locking tab, lift about 1 inch, and pull out. Do not lift more than 1 inch to avoid damaging the receptacle. Do not immerse surface units in liquids, clean in a dishwasher, or bend terminals. Do not attempt to repair the plug-in receptacle.
Remove surface units, then lift out drip pans. For best results, clean by hand in a covered container with 1/4 cup ammonia to loosen soil, then rinse and polish. They can also be cleaned in a dishwasher. Clean the area under the drip pans frequently to prevent grease fires. Do not cover drip pans with foil. If equipped with shiny, silver-colored drip pans, do not clean them in the self-cleaning oven. Black or gray porcelain-coated drip pans can be cleaned in the self-cleaning oven; remove heavy soil first, place on oven racks (not on the oven bottom), and wipe ash after cooling.
The entire cooktop can be lifted and supported for easier cleaning. Surface units do not need to be removed, but doing so can make lifting easier. Two side supports lock the cooktop in the up position. Clean underneath with hot, mild soapy water and a clean cloth. To lower, push the rods back and gently lower the cooktop.
Avoid oven cleaners, abrasive cleansers, strong liquid cleansers, steel wool, scouring pads, or cleaning powders. Clean with mild soap and water or vinegar and water solution, rinse, and dry with a soft cloth. Acidic spills should be wiped up immediately after cooling.
Operates at high temperatures to burn away food soils. Read safety instructions before use. Lock the oven door. Wipe up grease and soils before starting. Remove all items except enameled (dark color) racks. Shiny or silver racks and cookware must be removed. Close and latch the door (do not force if too hot). Press Self Clean, adjust time (3-5 hours, 5 for heavy soil), and press Start. The oven turns off automatically. After cooling, slide the latch handle left and open the door. Wipe out ash. Vent the kitchen during the first self-clean cycle. The door gasket should not be cleaned or rubbed; it's essential for a good seal. Ensure the oven light bulb cover is in place and the light is off. Move birds to a well-ventilated room due to fumes. To stop, press Cancel/Off and wait for the self-clean light to go off and the oven to cool below locking temperature.
All racks can be washed with warm, soapy water. Enameled (not shiny) racks can remain in the oven during self-clean. After self-clean, racks may be difficult to slide; apply vegetable oil to the edges with a soft cloth or paper towel.
Do not clean the bake or broil elements; soil will burn off during heating. To clean the oven floor, gently lift the bake element and clean with warm, soapy water.
WARNING: SHOCK OR BURN HAZARD. Disconnect power before replacing. CAUTION: BURN HAZARD. Ensure glass cover and bulb are cool. To remove: Turn glass cover counterclockwise 1/4 turn, then remove bulb counterclockwise. To replace: Insert new 40-watt appliance bulb clockwise until tight. Place glass cover tabs into grooves, turn clockwise 1/4 turn. Clean glass cover frequently. Reconnect power.
The door is heavy. To remove: Fully open the door. Pull hinge locks down. Grasp both sides of the door at the top. Close the door to the removal position (approx. 3" open). Lift the door up and out until hinge arms clear the slots. To replace: Grasp both sides of the door. Starting on the left, seat the indentation of the hinge arm into the bottom edge of the hinge slot, ensuring the notch is fully seated. Fully open the door. Push hinge locks up to the locked position. Close the oven door. To straighten a crooked door, push down on the high corner.
To remove: Pull drawer out until it stops. Lift the front until stops clear guides. Remove. To replace: Place drawer rails on guides. Push back until it stops. Lift front and push back until stops clear guides. Lower front until it closes.
Carefully peel off shipping film. For adhesive residue, apply household liquid dishwashing detergent with a soft cloth and allow to soak. Remove all adhesive before first use, as it cannot be removed if baked on.
| Type | Freestanding |
|---|---|
| Oven Capacity | 5.0 cu. ft. |
| Cooktop Surface | Porcelain |
| Number of Burners | 4 |
| Self-Cleaning | Yes |
| Fuel Type | Electric |
| Oven Type | Conventional |
| Cooktop Material | Porcelain |
| Color | White |
| Width | 29.875 inches |
| Ignition Type | None (Electric) |