Finishes
The porcelain enamel finish
is
sturdy
but
breakable if misused.
This finish
is
acid resistant. How-
ever,
any
acid foods spilled (such
as fruit juices,
tomato
,
or
vinegar)
should
not
be permitted
to
remain
on the finish.
Oeaning Under the Range
The
area
under the range
of
models
equipped with a
bottom
drawer
can
be reached easily for cleaning by
removing the
bottom
drawer.
To
remove, pull
drawer
out
all the way,
tilt up the
front
and
remove it.
To
replace, insert glides
at
back
of
drawer
beyond
stop
on
range glides:
Lift
drawer
if necessary to insert
easily. Let
front
of
drawer down,
then push in
to
close.
Removable Oven
Door
To
REMOVE
door
,
open
to
BROIL
position,
or
where you feel hinge
catch slightly. Grasp
door
at
sides;
lift
door
up
and
away from hinges.
To
REPLACE,
grasp
door
at
sides.
Line up
door
with hinges
and
push
door
firmly into place.
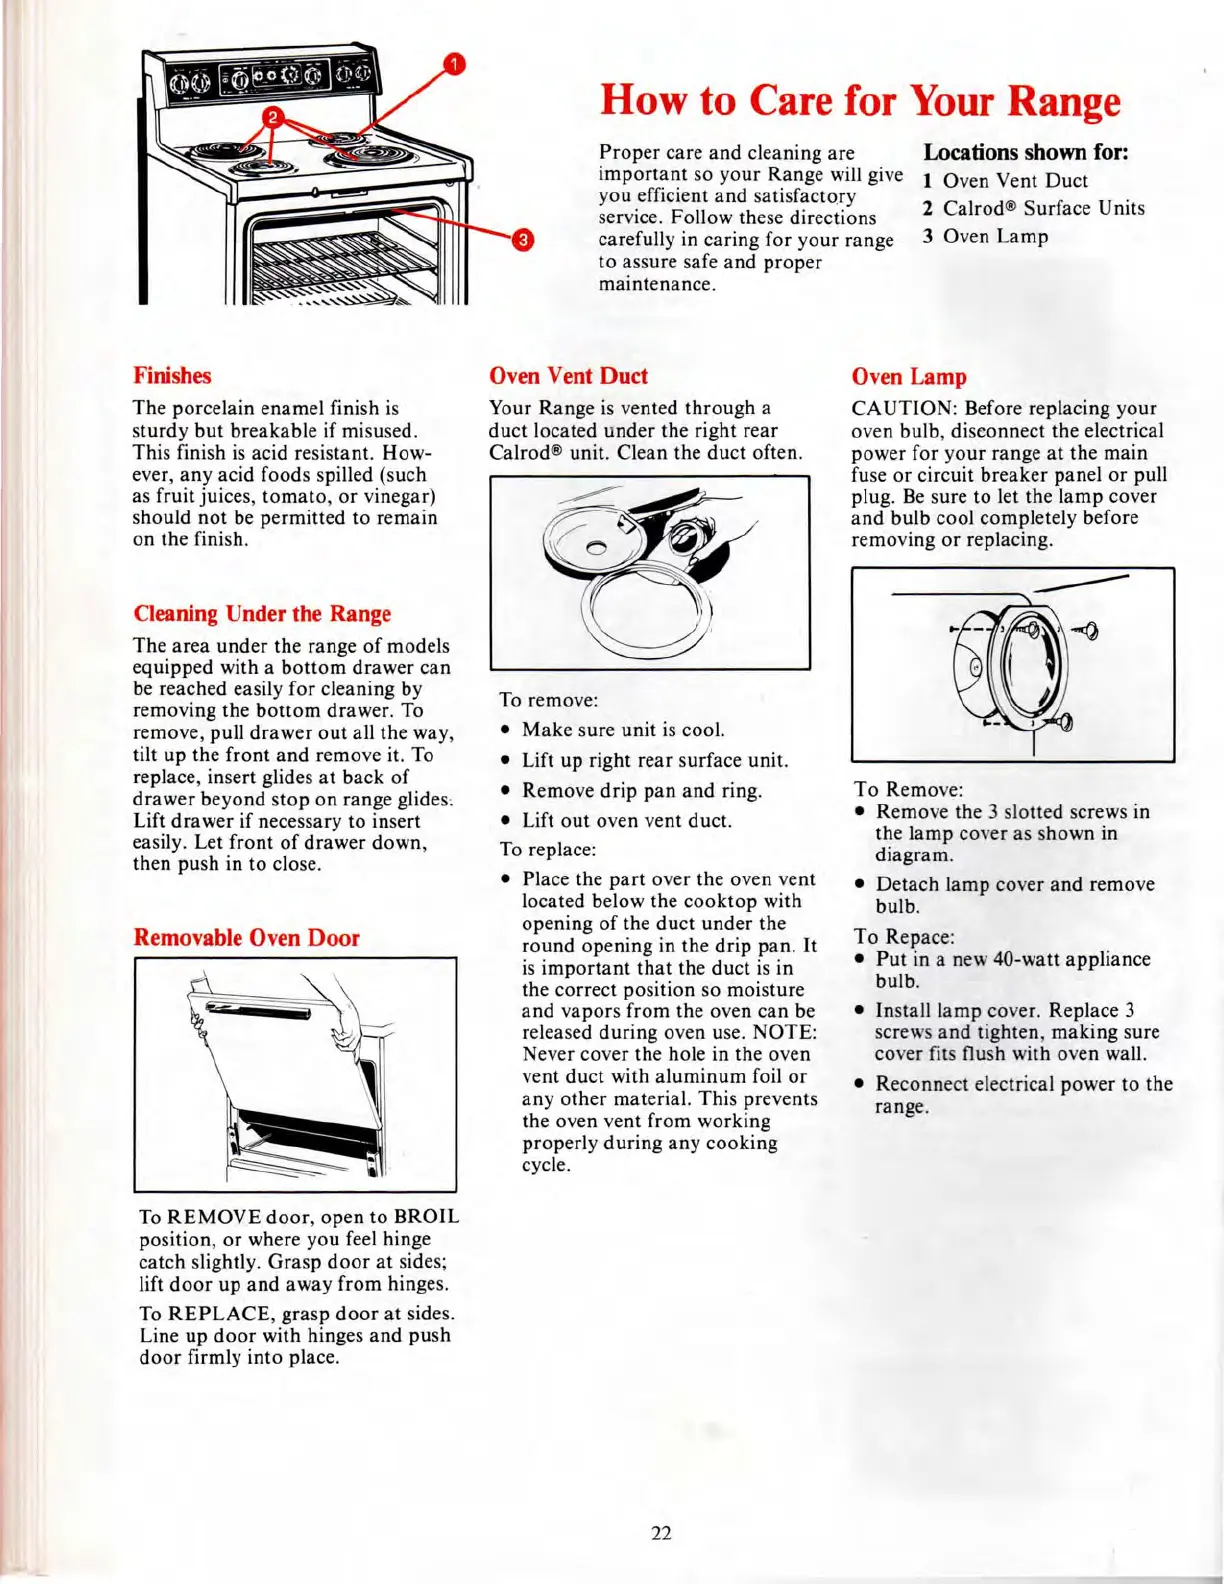
How
to Care for
Your
Range
Proper
care
and
cleaning are
important
so
your
Range will give
you efficient
and
satisfactory
service. Follow these directions
carefully in caring for
your
range
to
assure safe
and
proper
maintenance.
Locations shown
for:
1 Oven Vent
Duct
2 Calrod® Surface Units
3 Oven
Lamp
Oven Vent Duct
Your Range
is
vented
through
a
duct
located
under
the right rear
Calrod® unit. Clean the duct often.
To remove:
•
Make
sure unit
is
cool.
• Lift up right rear surface unit.
• Remove
drip
pan
and
ring.
• Lift
out
oven vent duct.
To replace:
• Place the
part
over the oven vent
located below the
cooktop
with
opening
of
the duct under the
round
opening in the drip
pan
.
It
is
important
that
the duct
is
in
the correct position so moisture
and
vapors from the oven can be
released
during
oven use.
NOTE
:
Never cover the hole in the oven
vent
duct
with
aluminum
foil
or
any
other
material. This prevents
the oven vent from working
properly
during
any
cooking
cycle.
22
Oven Lamp
CAUTION:
Before replacing your
oven bulb,
disconnect the electrical
power for
your
range
at
the main
fuse
or
circuit
breaker
panel
or
pull
plug.
Be
sure to let the
lamp
cover
and
bulb cool completely before
removing
or
replacing.
To
Remov
e:
• Remove the 3 slotted screws in
the
lamp
co
er
as shown in
diagram
.
• Detach lamp cover
and
remove
bulb.
To
Repace:
•
Put
in
a new 40-watt appliance
bulb.
• Install lamp cover. Replace 3
screws
and
tighten, making sure
cov
er
fits flush with oven wall.
• Reconnect electrical power to the
range.
 Loading...