29
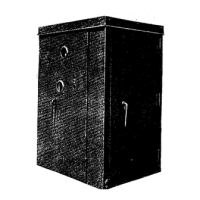
M-PRO Test Box
The M-PRO test box may be used as a means of powering up
an M-PRO, simulating faults by secondary and tertiary
injection or for performing a forced trip of the breaker. All
usage should adhere to the connection procedure below.
Connection
Ensure that the battery is fully charged before attempting any
work that may require an extended operating period. Full
charge of a flat battery should be achieved in an 8 hour
charging period. To maintain the battery life span it is not
advisable to charge a battery that still holds a charge, so
always allow the battery to discharge fully before re-charging.
Turn the Test Box on using the “Power On/Off” button; the
lamp above the switch should illuminate. Connect the Test Box
to the M-PRO via the front panel connector (located behind the
access door on the breaker facia). Do not test the M-PRO with
the charger still connected, as this will disable power to the M-
PRO.
Note: should the “Battery Low” warning light illuminate at any
time then there is approximately 20 minutes of usage left in the
battery before power will be removed from the M-PRO.
Re-charging
Ensure that the ambient temperature is between +15ºC and
+50ºC. With the Test Box unplugged from M-PRO, connect the
charger unit via the charger socket at the top of the test unit.
The “Battery Charging” lamp should illuminate. Wait a few
seconds and ensure that the lamp remains illuminated as there
can be enough power in the charger to illuminate this lamp for
a short period of time even with the mains supply off.
Calibration
The equipment does not require calibration. It is recommended
that the general condition and functionality be checked before
each usage. Particular attention must be paid to the presence
and condition of the polarising pin in the M-PRO 20/30/40
rectangular connector. The M-PRO power supply may be
damaged if the test connector is mis-inserted. The M-PRO
17 D-type connector does not require a polarising pin.
Over current and earth fault tests (M-PRO 20/30/40 only)
With the test box in this mode (O/C & E/F lamp illuminated) it
causes the M-PRO to tertiary inject itself with the configured
current and fault type. Having turned the test box on and
selected “O/C & E/F” the remainder of the operation is
performed on the M-PRO itself.
Application notes 29 and 30, available on request, provide a
walk-through example of using the test box.
Turn the test box on and connect to the M-PRO.
Press the “Trip Enable” button if it is required that the full
breaker functionality is to be tested. The “Test Mode” menu will
now be active on the M-PRO (the bottom-most level 1 menu
item). From the ‘Fault Current Type’ menu select the test that
is required (overcurrent or various earth faults).
The next menu sets the fault current level (in terms of Iset for
overcurrent and In for earth faults). Make a note of the
protections settings on the M-PRO and set the current to test
the required part of the configured curve. Calculate the
expected trip time using the graphs included in this manual or
using the Excel spreadsheet available on request. The M-PRO
long time and inverse time short circuit menus state the trip
time and 2*Iset and 6*Iset respectively, use these injection
levels to save calculating trip times.
Having defined the tests, use the ‘Activate Test’ menu to select
‘Start Test’.
After allowing sufficient time for the test to run the ACB should trip.
We can check if the test is running correctly by viewing the thermal
register and highest phase entry on those ACB’s configured with
ammeters. The thermal register will be at 0% under normal load
conditions, but immediately the overcurrent region is entered the
register will start counting up to a value of 115% at which point the
ACB should trip.
Once the ACB trips the M-Pro will default to the existing faults
display. The time to trip may be checked by viewing the history of
trips display. A ‘T’ is displayed next to the trip history entry to show
that the test was configured to trip the breaker.
In the case of M-PRO 30 the volt free trip initiated output 3 should
also have changed state from normally open to closed.
Finally, return to the ‘Activate Test’ menu and select ‘Stop Test’,
and reset the fault.
Testing of earth faults follows the same procedure, note that the
HV inter-trip output 4 should change state if testing REF trips (and
SEF if configured for inter-trip).
NOTE it is important to ‘stop’ the tests and clear the trips
before unplugging the test box. Failure to do this may cause
the breaker to trip on power-up in reaction to uncleared
existing faults.
If the above tests are made with “Trip Enable” turned off on the
test box then the breaker will not trip and the outputs will not
change state. The existing faults message and history of trip
menus will react as normal as will the reported trip time. The
history of trips entry will show the symbol ‘N’ to show the test was
a ‘none trip test’.
MCR/HSISC Tests
These tests use secondary injection. A DC signal is imposed on
the Rogowski input circuits of the M-PRO. Red, yellow and blue
phases may be tested individually. The neutral phase does not
offer this protection.
The Making Current Release (MCR) is set to 50kA as standard
and is active only whilst the ACB is open/closing, and switches off
when closed and latched.
The High Set Instantaneous Short Circuit (HSISC) is set to 65kA or
80kA as standard and is active whilst the ACB is closed and
latched.
With the ACB open, the test box on and connected; turn “Trip
Enable“ on and select the “MCR/HS Phase” test.
Start the test by pressing the “Test Now” button on the test box.
Immediately the M-Pro recognises the fault it will try to fire the
sensitive trip and will default to the ‘Existing Faults’ display,
reporting ‘MCR Trip on TEST’. The trip level can be checked by
viewing the history of trips display.
The M-PRO 30 volt free tripped initiated output 3 should also have
changed state from normally open to closed.
We can now close the ACB, which will reset the fault and repeat
the test above for HSISC.
Force Trip
The final test available on the test box. This test is a quick way of
tripping the breaker in order to test the mechanical operation and
reset mechanism.
To perform a forced trip, turn the test box on, connect to M-Pro,
turn “Trip Enable” on and select “Force Trip”.
Pressing the “Test Now” button will cause the M-PRO to initiate a
trip, reporting the trip as normal (the fault level reported in the trip
history is the highest phase current at the time the trip was
initiated).
A forced trip clears itself on removal of the test box. There is no
need to clear the existing fault as is necessary for the other tests.
Powering M-PRO
The test box may be used as a simple power box to facilitate
viewing of faults (e.g. after a trip) or the history of trips. The feature
may also be required for changing protection settings. For setting
of the inputs, outputs and re-configuring the factory settings, the
breaker must be open. In this case some form of external power is
mandatory (power box, APU or test box).