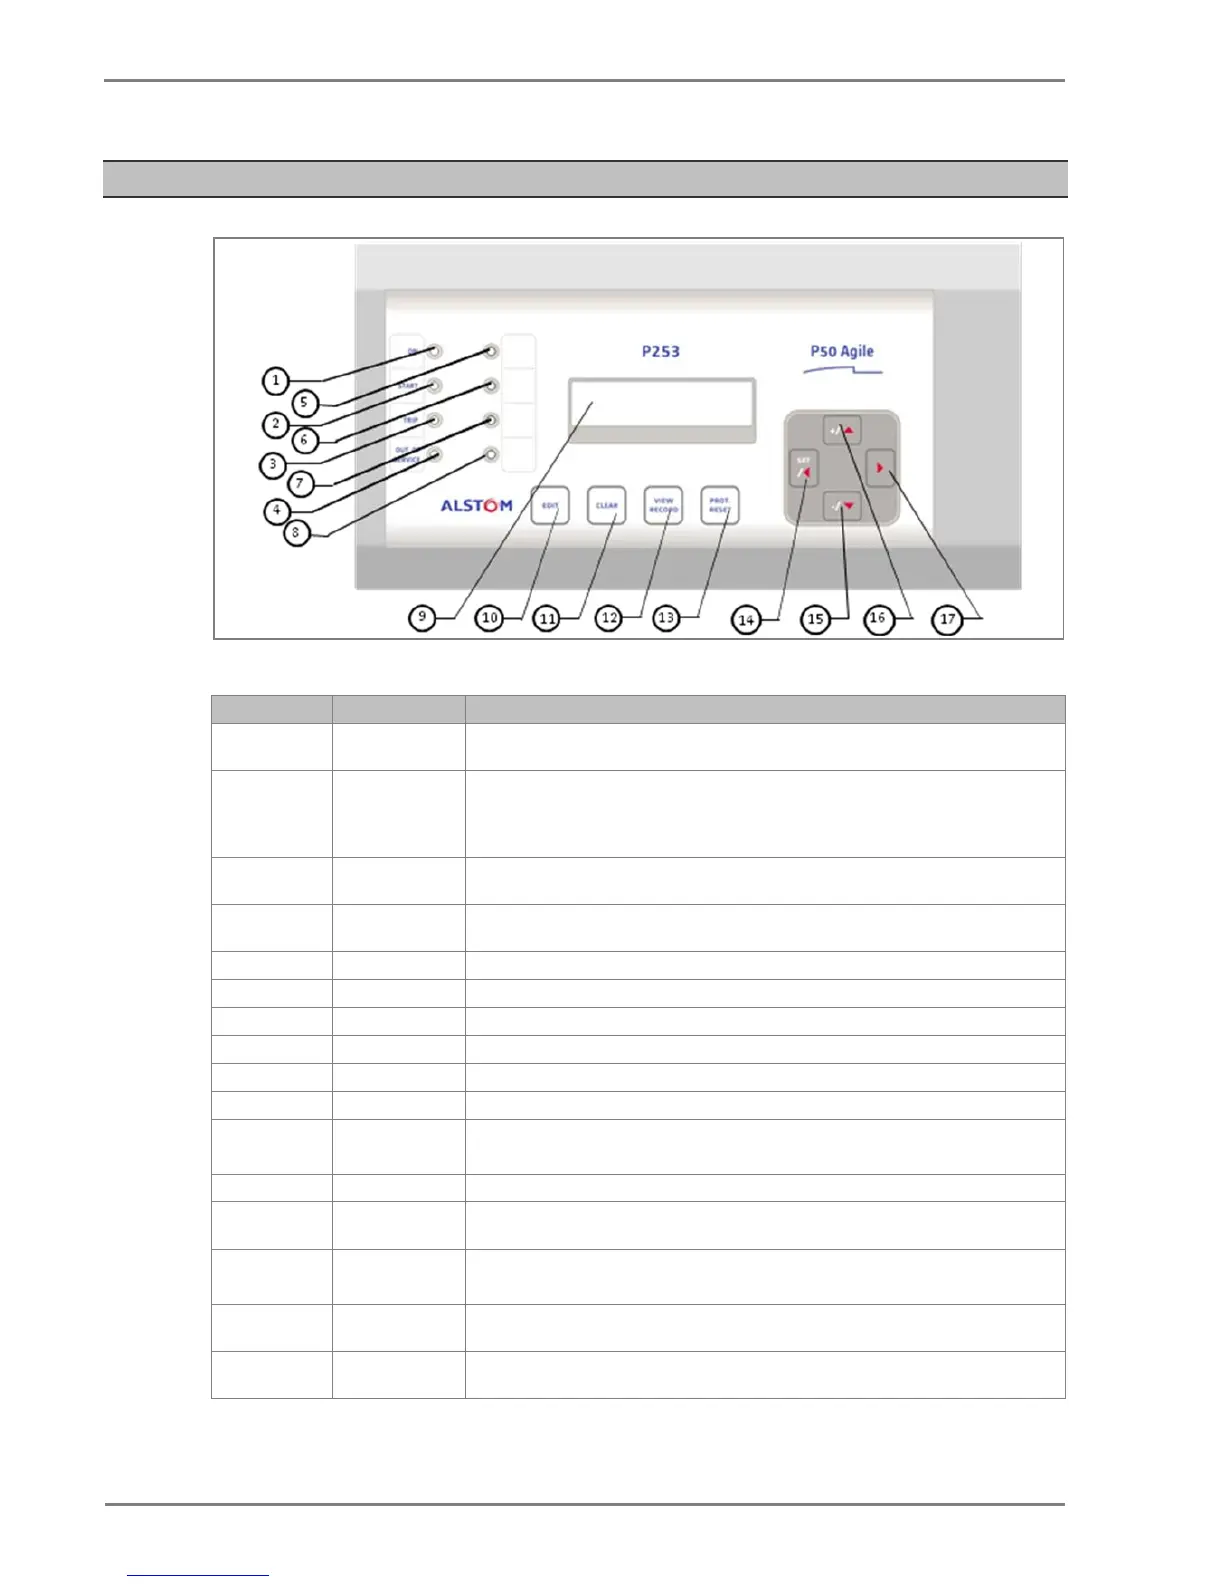
2 FRONT PANEL
Figure 1: Front panel
SL no Label Function
1 ON
The green LED indicates that the IED is in correct working order. The green LED should be ON
at all times. If there is an error in the hardware or software the LED will turn red.
The amber LED flashes when the IED registers an alarm. This can be triggered by a fault or an
event or maintenance record. The LED will flash until the alarms have been accepted (read).
Press the VIEW RECORD function key and it will change to ON. When the alarms have been
cleared, press the CLEAR key and the LED will switch OFF.
3 TRIP
The red LED switches ON when the IED issues a trip signal. When the faults have been cleared
press the CLEAR key and the LED will switch OFF.
The amber LED flashes when the IED's protection is unavailable (eg. Setting Error, ADC Error
detected by unit’s self-test etc).
Programmable dual colour LED
6 L6 Programmable dual colour LED
7 L7 Programmable dual colour LED
8 L8 Programmable dual colour LED
9
The LCD display is used to view the settings and parameters of the relay.
10
Feather touch key to edit parameter settings.
Feather touch key to clear the fault LED indications.
Also used to discard the setting changes.
Feather touch key to view fault records.
Feather touch key to reset the hardware. This key should be be used alongside the EDIT key.
The relay will reboot when ‘PROT. RESET’ + EDIT are pressed simultaneously.
Feather touch key SET to save the settings and /
is used for navigating through the
] is used to INCREASE the values and [▲] is used to change the menu
level or change between settings in a particular menu.
16 - /▼ Feather touch key [-] is used to DECREASE the values and [▼] is used to change the menu
level or change between settings in a particular menu.
 Loading...