– 5 –
OVERVIEW OF INSTALLATION PROCEDURE
This section gives a brief overview of what you
need to do to install this oven. Read these entire
instructions before you begin installation.
Before you install this oven, remove the adhesive
tape, if there is any, on the exhaust adaptor,
grease filters and power supply cord.
1. Install an outlet and make sure you meet the
electrical requirements for this installation.
2. Open the installation hardware packets.
Compare it to the hardware list to make sure
you have all the parts.
3. Remove the mounting plate.
4. Check the oven exhaust duct and change it if
required.
5. Attach the mounting plate to the wall.
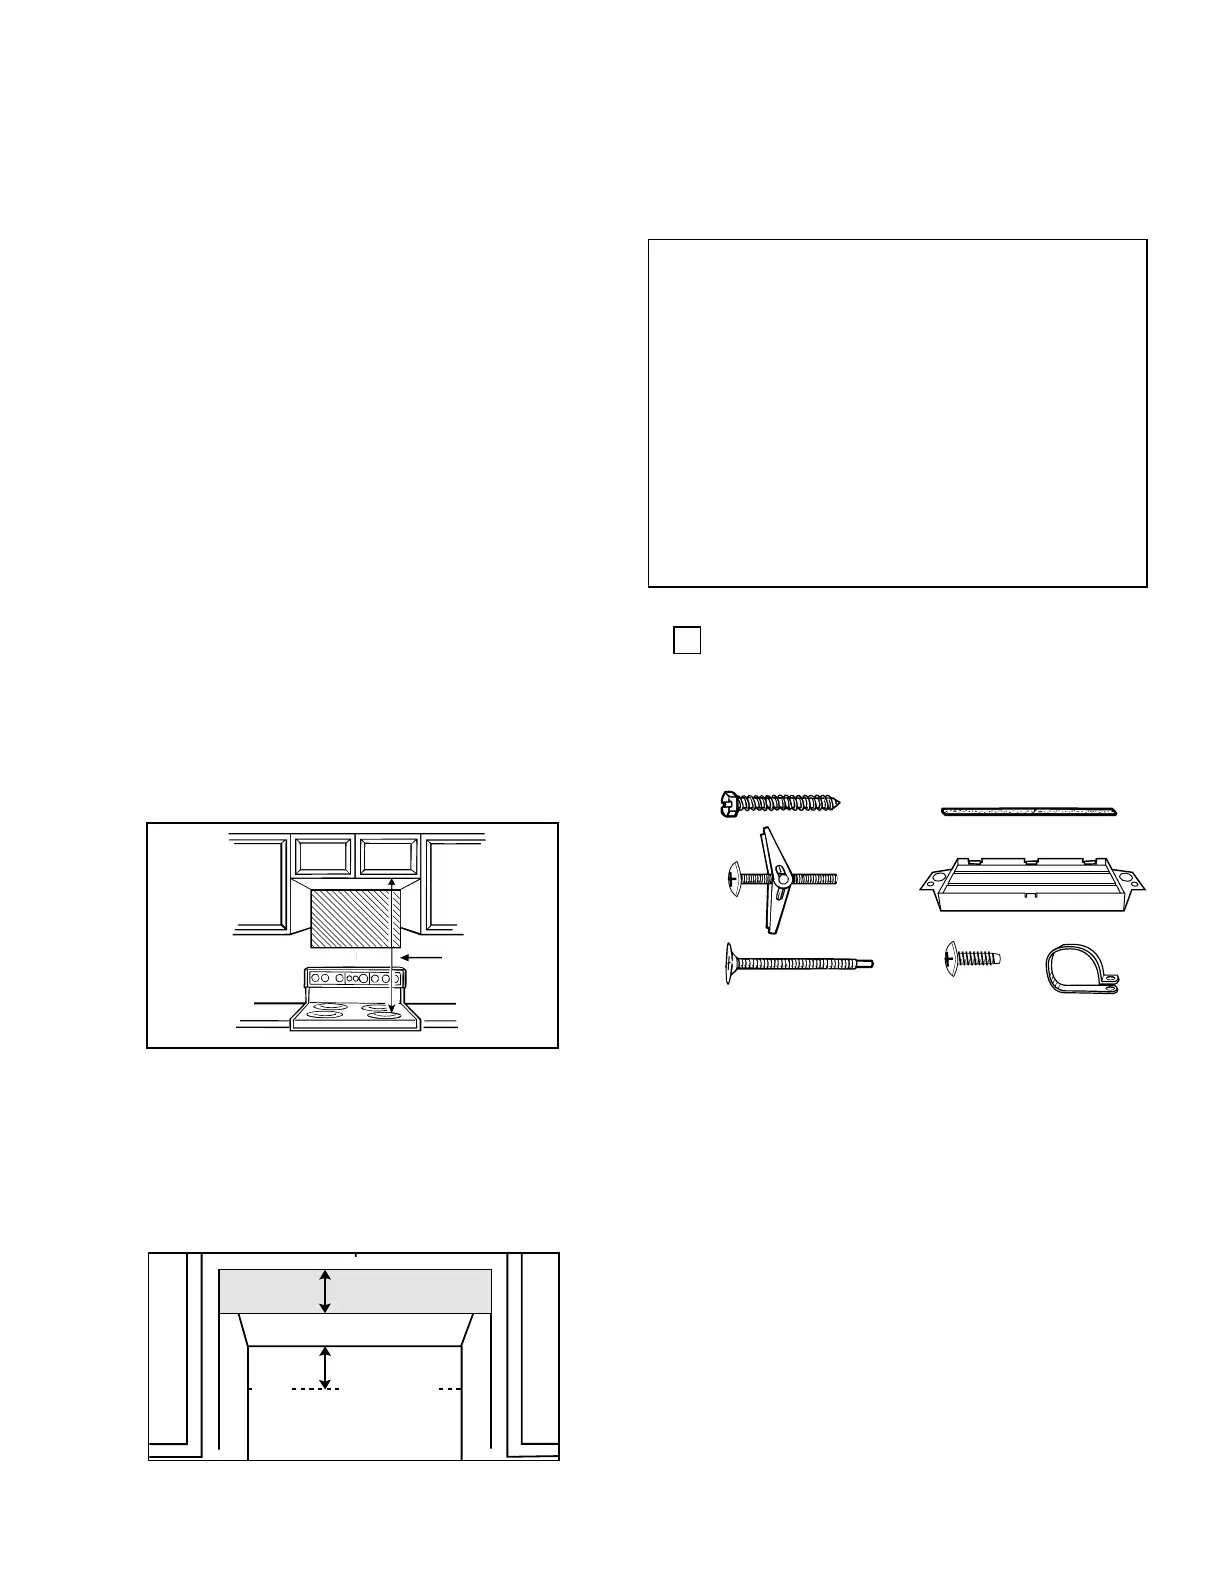
Your cabinets may have trim that interferes
with the oven installation. You may need to
remove the trim in order to fit the oven in
and to make it level.
The space must be 30″ wide. Remove any
cabinet side trim that interferes with the 30″
space, front or back.
THE OVEN MUST BE LEVEL.
If the cabinets have top trim (front, back or
both), this can be left in place if there is still
enough clearance for proper installation.
If you leave the top front trim on, and there is
no back trim, make sure the mounting plate
is positioned down far enough to keep the
oven level. Keep the space between the
bottom of the cabinet and the mounting plate
equal to the height of the top front trim. This
will insure level installation of the oven.
PARTS INCLUDED
You will find the installation hardware packed
with the unit. Check to make sure you have all
these parts. The installation hardware (1–7)
should include the following:
Hardware List Qty
(some extra parts are included)
1. Wood Screws (1/4″ x 2″) 2
2. Toggle Bolts (and wing nuts) 4
1/4″ x 3″
3. Self-aligning Machine Screws
(1/4″ x 3
1
/
4
″) 3
4. Nylon Grommet (for metal cabinets) 2
5. Exhaust Adaptor (with damper) 1
6. Metal Screws (1/8” x 1/2”) 3
(1 black, 2 bronze)
7. Power Cord Strap (plastic) 1
In addition you will need:
Top Cabinet Template 1
Installation Instructions 1
Separately Packed Grease Filters 2
2
6. Hook the slots at the back bottom edge of the
oven onto the 2 lower tabs of the mounting
plate and rotate it up.
7. Attach the oven to the top cabinet.
TOOLS YOU WILL NEED
• Phillips screwdriver
• Pencil
• Ruler or tape measure and straight edge
• Carpenter square (optional)
• Tin snips (in some applications)
• Electric drill with 3/16″, 1/2″ & 5/8 ″ drill bits
• Hammer
• Stud finder (optional)
• Filler blocks, if needed for top cabinet spacing
• Gloves
• Saw (jig or keyhole)
1
2
4
5
6
3
Mounting
plate must
be installed
so that the
oven
is level
Height of the
Top Front Trim
Back
Wall
7
30″