Service Procedures
4–5
4.3 Software upgrade
The software upgrade kit includes an upgrade card that contains current versions of the
oximetry, system, and other monitor software. You upgrade the software by inserting
this card into a connector located on the System board.
Checking the current software versions
1. Power ON the monitor. Then power OFF and note the software version numbers that
display briefly:
• The oximetry software version number displays in the SpO
2
display area.
• The system software version number displays in the pulse rate display area.
NOTE: You will also see “50” or “60” in the high pulse rate alarm area. This is the line
power filter monitor setting that is set to match the AC power source.
2. If either software version is below the version noted on the software upgrade label,
install the software upgrade.
Installing the software upgrade
WARNING: Power OFF and disconnect the monitor from external power
before performing any procedure that involves disassembly of the monitor.
WARNING: Internal electronic components are susceptible to damage by
electrostatic discharge. To avoid damage when disassembling the monitor,
observe the standard precautions and procedures for handling static-
sensitive components.
Tool: Phillips screwdriver, #1
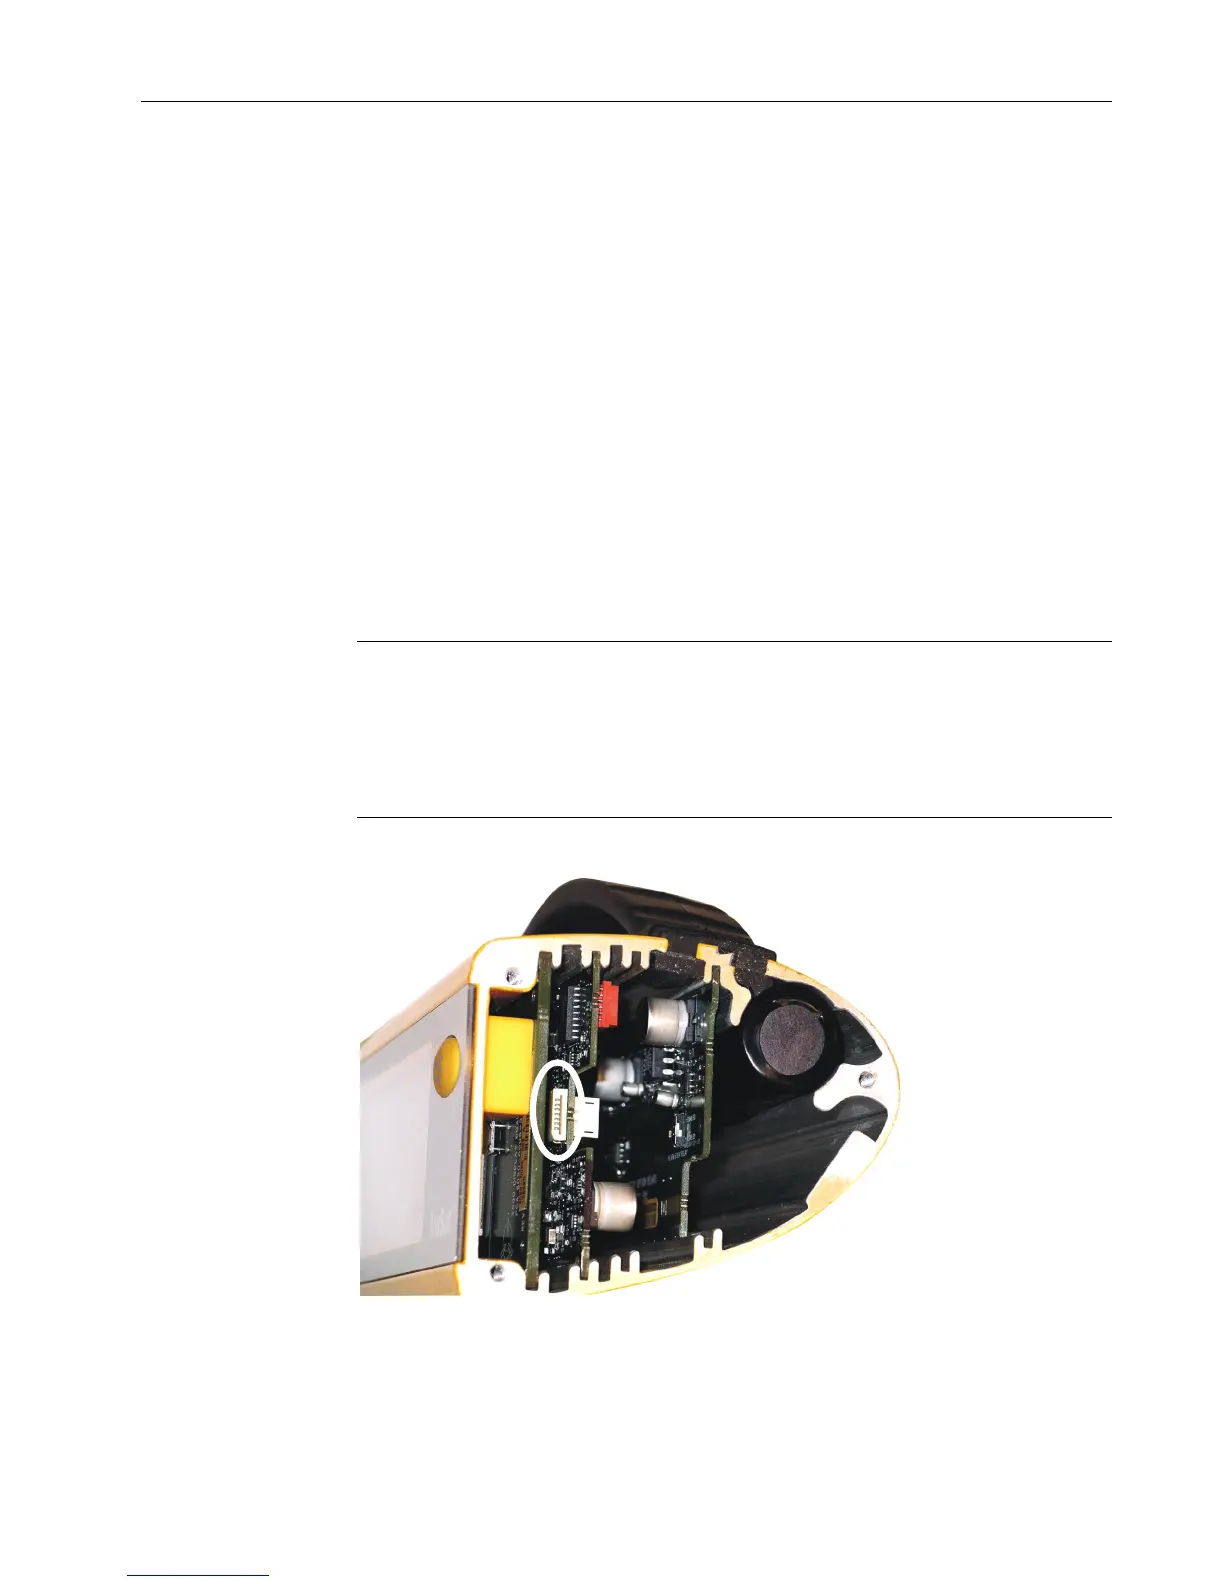
Figure 4-2. Software upgrade connector on System board
1. Power OFF and disconnect the power cord and other cables from the monitor.
2. On the right (ComWheel) side of the monitor, loosen the 3 screws until you can lift
the bumper assembly away from the housing.
 Loading...