www.gemu-group.com22 / 32GEMÜ 1434 µPos
10 Mounting
1. Mount the mounting kit on the travel sensor 4. (see
“Mounting kit assembly: With mounting bracket/external“,
page19)
2. Move the actuator to the open position.
3. Depending on the version, attach the mounting bracket 5
to the actuator 3 or adapter 3.1 and guide the travel
sensor 4 through the mounting bracket as far as it will go
into the actuator opening and screw in place in the clock-
wise direction against the initial spring tension. Tighten
the travel sensor 4 using a suitable open-end wrench WAF
27.
NOTICE
Wrong mounting kit
▶ If no initial spring tension can be felt, it may be the case
that the wrong mounting kit with too short an operating
bush has been used.
▶ If the spring locks and the positioner cannot be correctly
mounted on the valve, it may be the case that the wrong
mounting kit with too long an operating bush has been
used or that a required adapter has not been used.
▶ In both cases, check the mounting kit parts and that they
are being used correctly and in their entirety.
4. Mount the positioner 1 on the mounting bracket 5.
5. Connect the travel sensor 4 to the positioner 1 electrically.
6. Connect the pneumatic supply to the positioner 1 and con-
nect to the process valve 3.
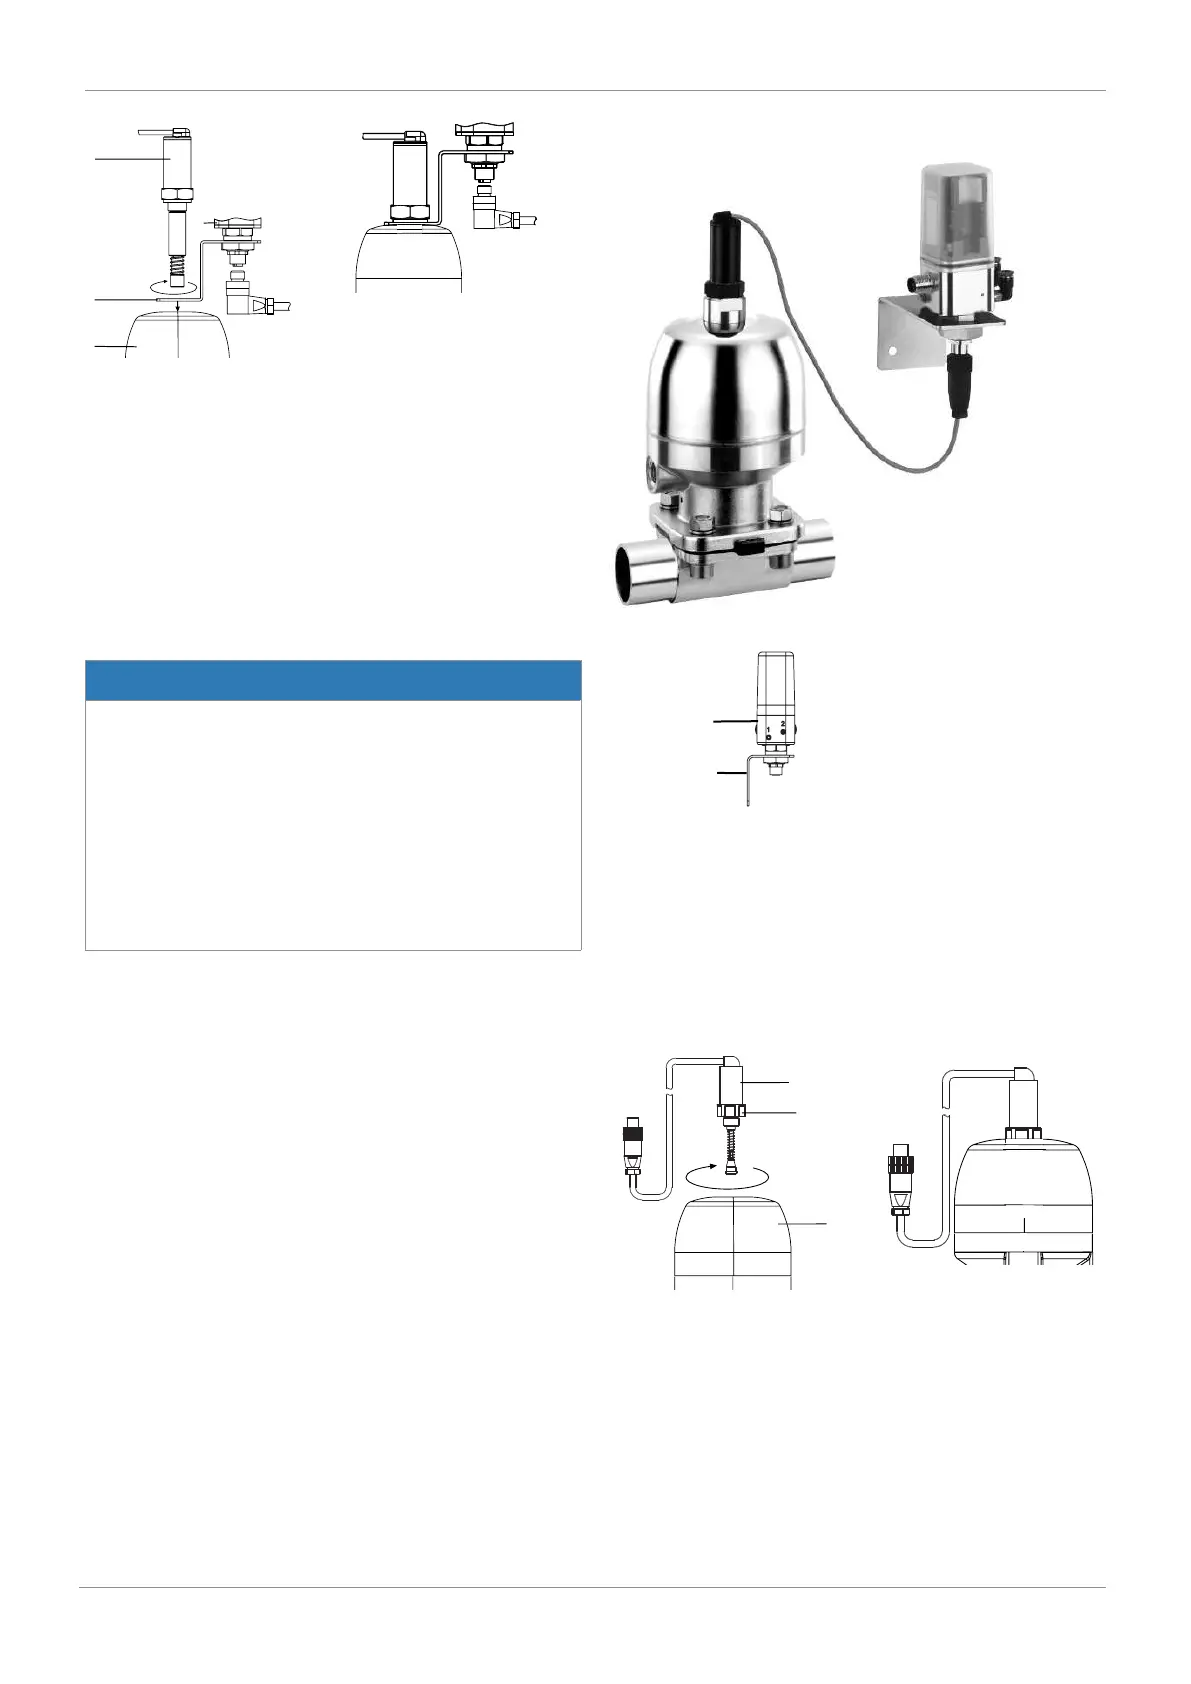
10.7 Remote mounting
Travel sensor
GEMÜ 4232 ... 4001
Travel sensor mounting kit
GEMÜ 4232 S01...
GEMÜ globe valve
Positioner
GEMÜ 1434 ... S01
Mounting bracket
GEMÜ 1434 000 Z MP
1
2
1. Attach the positioner 1 in a suitable position (the separ-
ately available GEMÜ 1434 000 ZMP mounting bracket
can be used for this).
2. Mount the mounting kit on the travel sensor 4. (see
“Mounting kit assembly: With mounting bracket/external“,
page19)
3. Move the actuator to the open position.
4. Guide the travel sensor 4 as far as it will go into the actu-
ator opening 3 or the adapter and screw in the clockwise
direction against the initial spring tension.
 Loading...

