Document Reader AT10K User Guide Installing the Reader
Page 19 of 29
3. Click Select.
4. Verify that the yellow LEDs are in landing lights sequence and the Reader State in the lower left is
“Enabled”.
The reader is ready to accept documents.
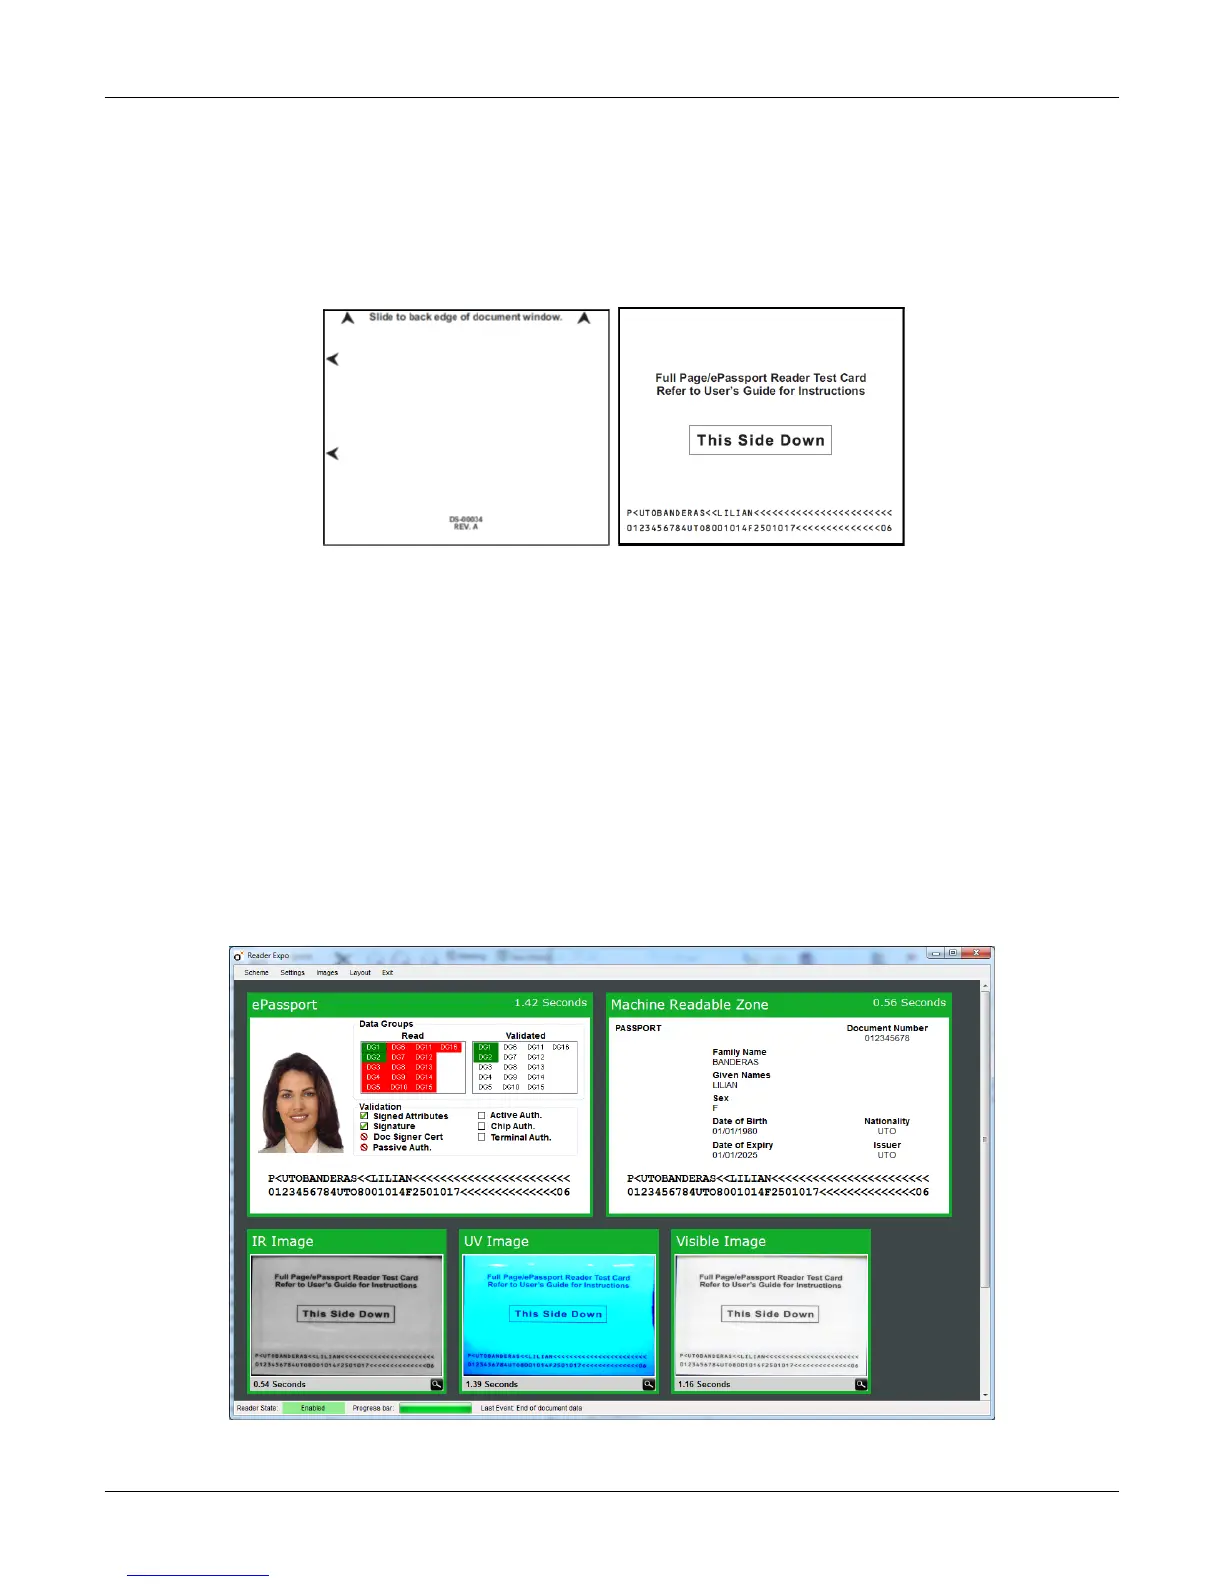
5. Select the test card (DS-00031 or DS-00034) supplied with the reader.
6. Place the test card face down on the document window, aligned with the left guide, with the test
card instructions facing up.
7. Push the card to the back of the document window until it stops.
Note: Do not move the document during the scanning process.
8. Observe the lights during the scanning procedure.
The yellow LEDS change from landing lights sequence to prgress bar sequence while the
reader scans and processes the data. Ensure that the document is held still whilst reading.
The OK light (green tick) turns on, indicating a successful read.
The yellow LEDs return to landing lights sequence, indicating that the reader is ready to
scan another document.
The data from the test card is sent to the host computer and the results displayed on the PC screen.
If the test is successful, a screen similar to the following screen is displayed.
 Loading...