1 SafeNet Luna Network HSM Hardware Installation
See "SafeNet Luna Network HSM Hardware Installation"on page 10 to continue the installation process.
Using the Optional Sliding Rail System
The optional sliding rail system allows for the appliance to be extended out in front of the equipment rack, possibly
easing access to other racked appliances. This should rarely be necessary. After configuration, the SafeNet Luna
Network HSM should remain secured in the rack with the locking bezel installed. Some security standards require the
use of this bezel. Leaving the HSM uncovered for ease of access may compromise security.
The sliding rail mounts should fit into any standard 19" equipment rack.
Ensure you have all the necessary components before proceeding. In addition to the supplied components, you will
need a #2 Philips screwdriver.
To mount the SafeNet Luna Network HSM hardware:
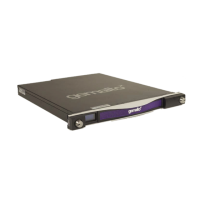
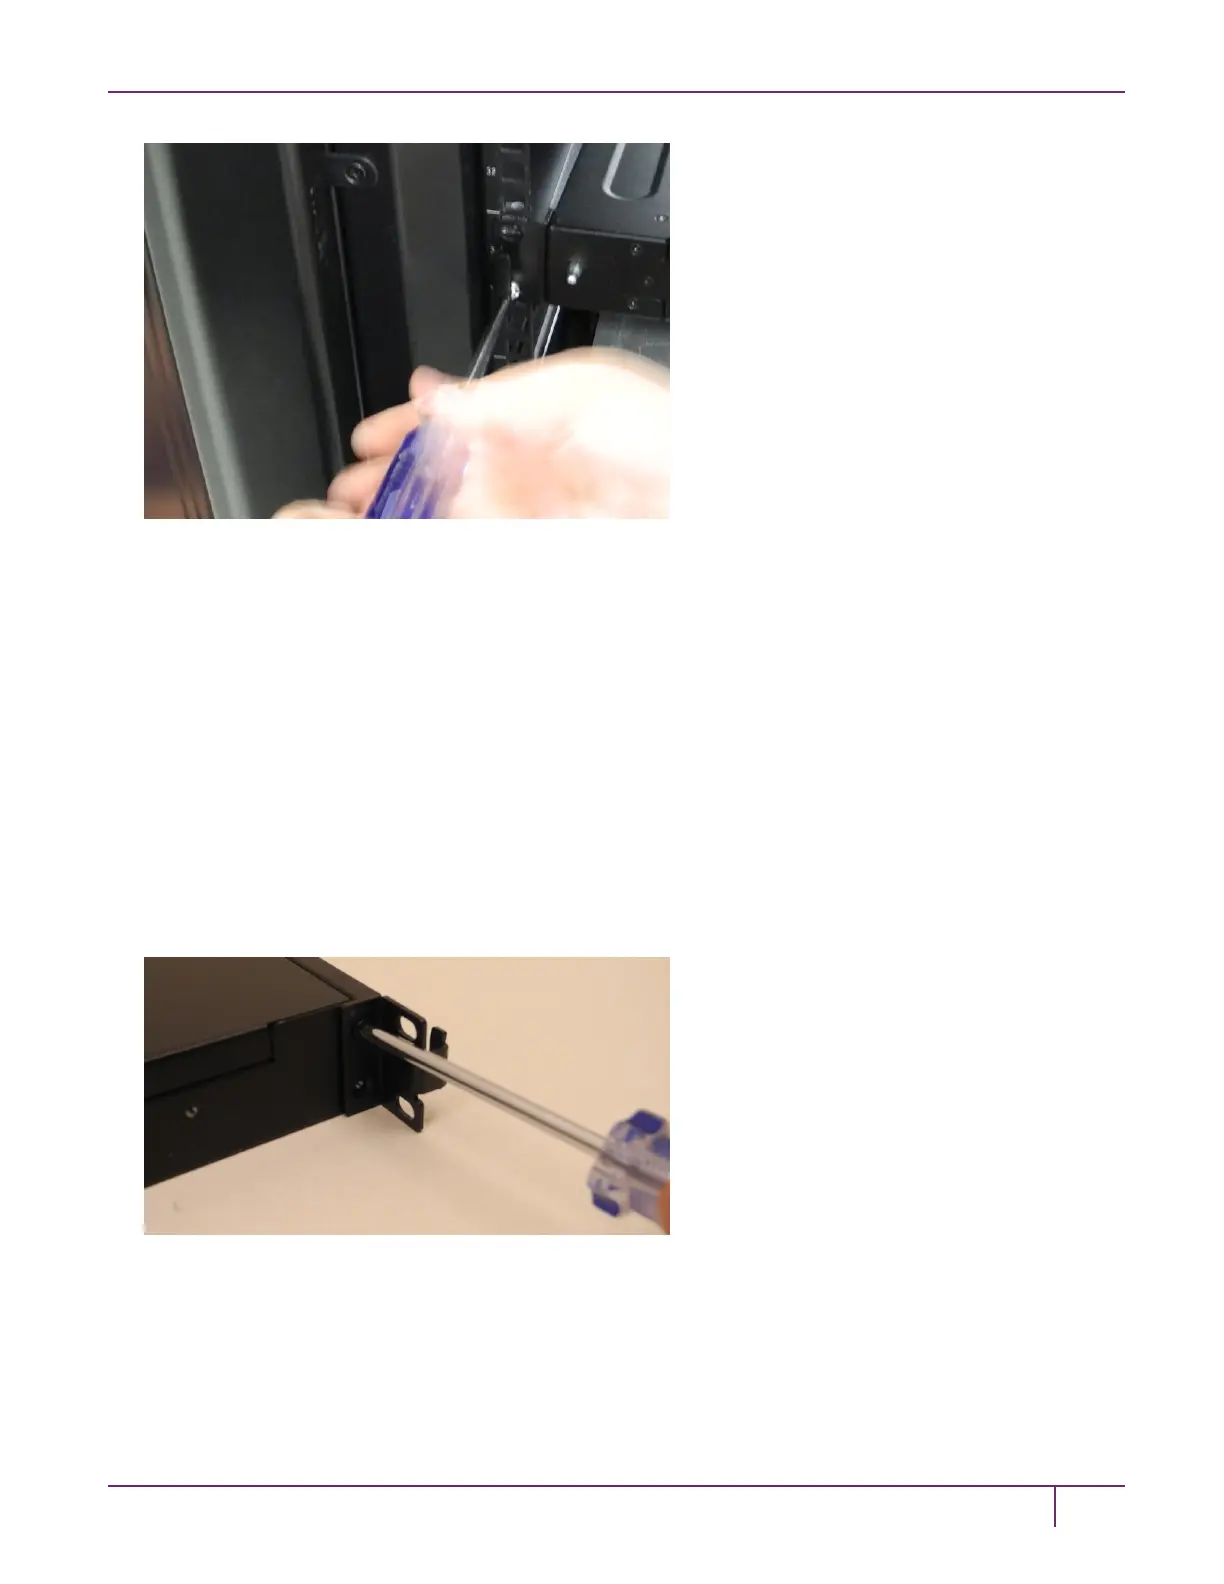
1. Install the two front ear mounting brackets on the HSM chassis using the included screws and a #2 Phillips
screwdriver.
2. Fit the front end of each mount into either side of the rack and pull the spring-loaded latch at the rear to snap it in
place.
SafeNet Luna Network HSM Installation Guide
Release 7.0 007-013576-002 Rev. A June 2017 Copyright 2001-2017 GemaltoAll rights reserved.
19
 Loading...