33
User and Service Manual
Doc # M010-004WWE July 2005
Gendex DenOptix® QST
Panoramic/cephalometric imaging
Figure 5-9
Place the erased panoramic or cephalomet-
ric imaging plate into the cassette with the
white side pointed toward the tubehead.
Insert the cassette into the panoramic or
cephalometric unit and expose in the usual
manner.
Figure 5-10
With the EO/CH carousel you can scan 4 #2
size imaging plates, 2 #0 size and 1 #4 size
imaging plate. Follow the steps previously
outlined for intraoral imaging but mount the
I/O imaging plates on the panoramic
carousel.
When scanning a Pan or Ceph plate, rotate the knob in the direction of Pan or Ceph. When
no pan or ceph is loaded, rotate the knob in the direction of “NO PAN or CEPH”.
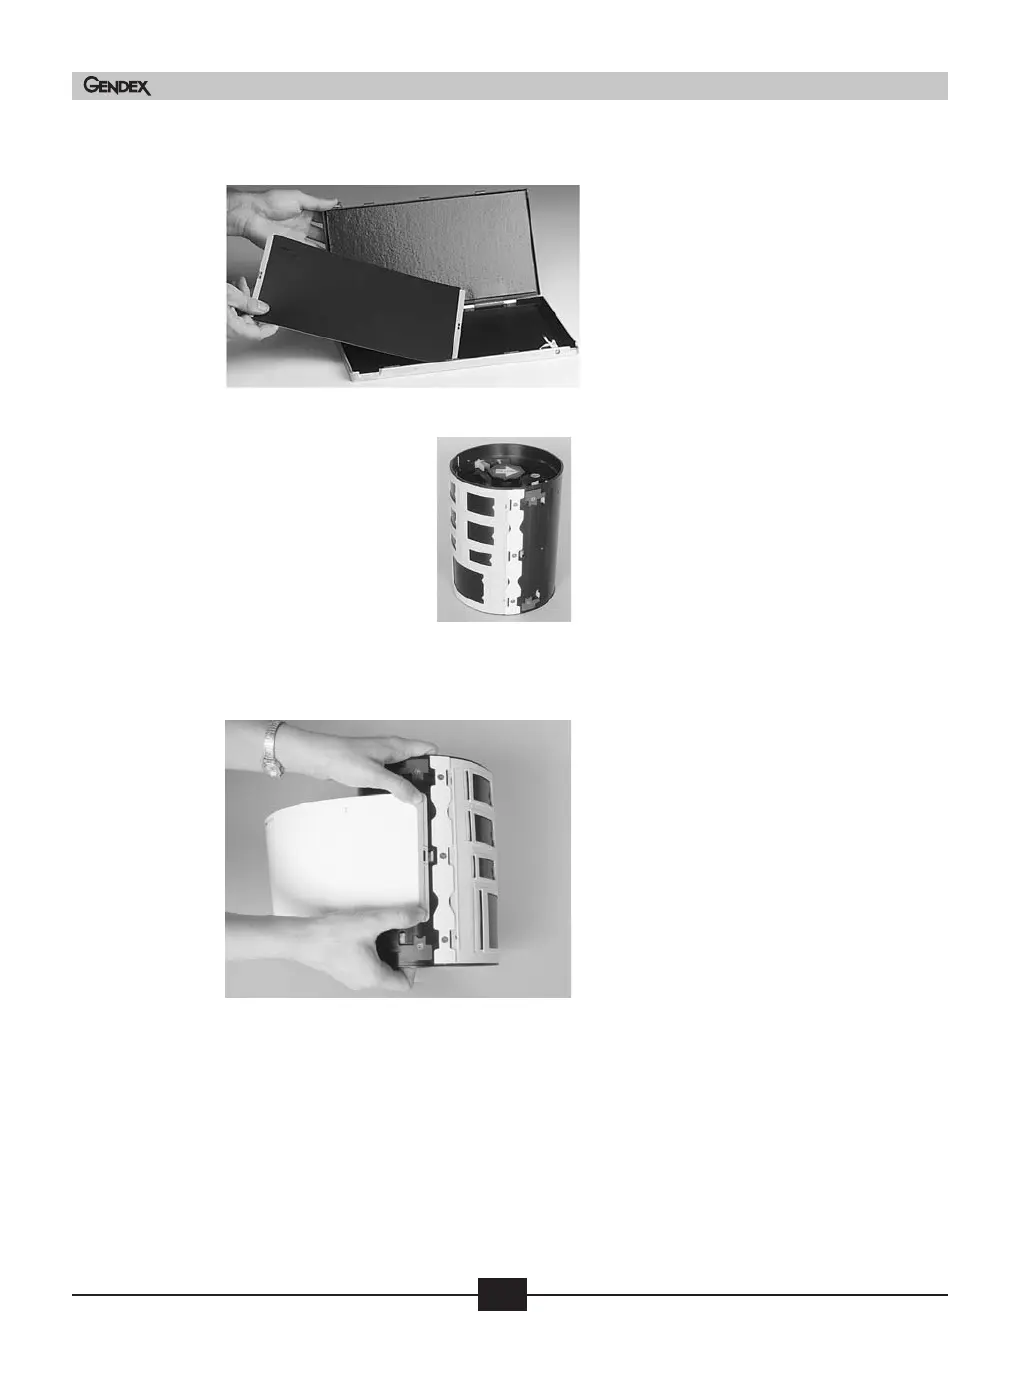
Figure 5-11
In a semi-darkened room (see Section 4.8),
open the cassettes. With the white surface
pointed away from the carousel, insert one
side of the imaging plate under the edge of
the panoramic or cephalometric imaging
plate clip. Push with your thumbs until you
hear a “click.” NOTE: If the IP does not click
into place, slide the IP to one side then the
other until it clicks into place.
Panoramic shown.

 Loading...