General Dynamics Itronix | 72-0136-005
GD6000 User Guide
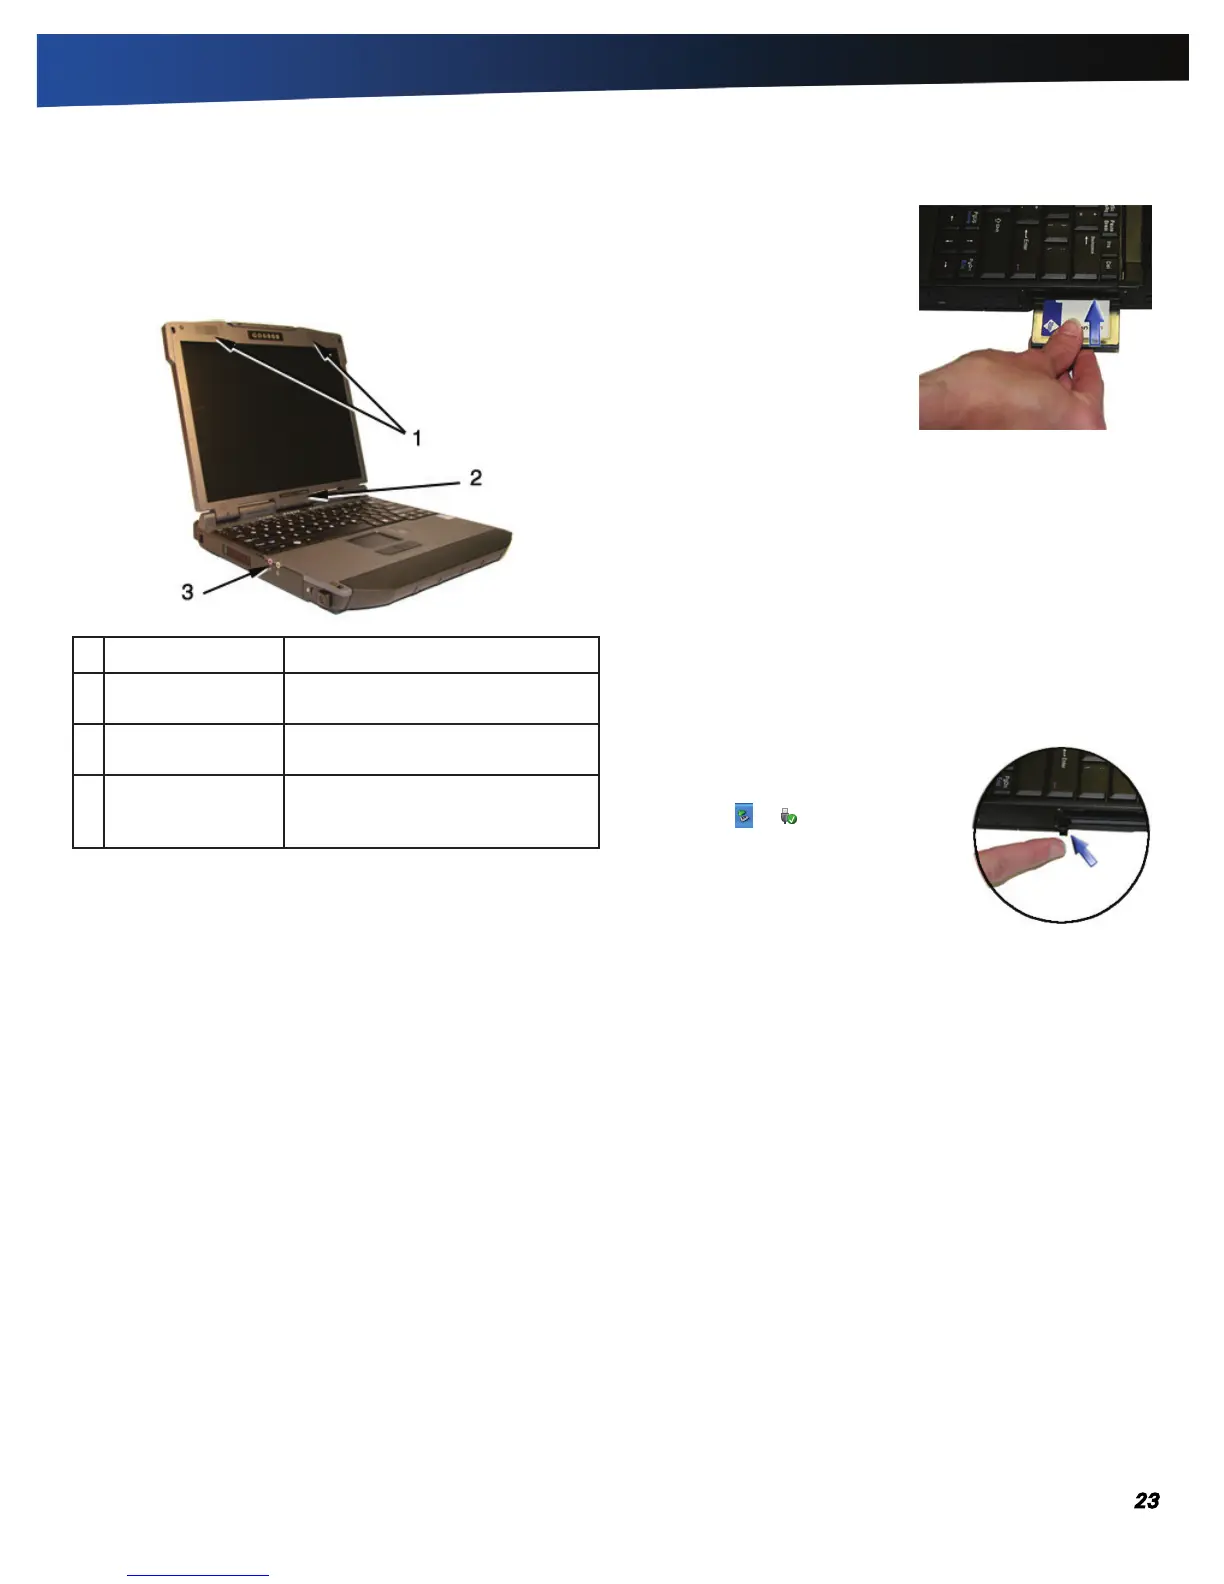
Getting Familiar With Your Computer
Audio
Your computer includes 16-bit high-fidelity stereo audio output
and an integrated microphone. The speakers are located above
the display. The microphone is under the display.
# Feature Description
1 Speakers Integrated stereo speakers for
audio output.
2 Microphone Integrated microphone for audio
input.
3 Audio in/out jacks Attach an external microphone or
speakers using the jacks on the left
side of the computer.
Adjusting the Volume
To increase volume, press FN+F9
To decrease volume, press FN+F8
You can also adjust the volume with the Windows volume con-
trol applet located on the taskbar. However, the volume control
function keys override the Windows volume control applet. If
your volume is too low or too high after setting the volume in
the applet, adjust the volume with the function keys.
The PC Card Slot
The computer has a built-in CardBus PC Card slot on the right
side of the computer that can accommodate one Type II PC
Card. It accepts credit-card sized cards that enhance the usabil-
ity and expandability of the computer. The PC Card slot can
be used as an interface between your computer and a variety
of communications devices, such as network adapters, SCSI
adapters, or fax/modems. They can also be used to provide
additional data storage capacity. Please consult your dealer
for PC Card options available that you can purchase for your
computer.
note Refer to your card’s instructions on how to install and
use the card and its functions.
Inserting a Card
1. The top side of a PC Card is usu-
ally identified with a label. Insert
the card into the slot with the top
up and the edge with pinhole
contacts going in first. You will
feel some resistance as the card
slides into the back of the slot.
2. PC Cards require drivers, or a
program that allows the operat-
ing system A set of programs
that manage the overall operation of the computer. to use a
specific device. Many drivers are included with Windows, but
if not, you will be prompted to install the driver included with
your card.
3. The computer will beep twice to indicate successful installation.
A single beep means that there was a problem recognizing the
card.
note Please read the instructions included with individual
PC Cards. Some cards may be inserted with power on, while
others require that the computer be turned of.
Ejecting a Card
1. First, exit the application using the card.
2. Left-click on the Safely Remove Hard-
ware
icon or on the taskbar and
stop the card operation.
3. Press the slot eject button once to pop
it out; then press it again to eject the PC
Card.
The Hard Disk Drive
Your GD6000 features a removable hard disk to provide high-
capacity storage and fast access. Windows and most programs
are stored here. Your GD6000 identifies the hard disk drive as
drive C.
See the BIOS Setup Utility to password protect your remov-
able hard disk drive.
Removing the Hard Disk Drive
You should print these instructions before continuing. They
will not be available after you shut down the computer in step
two.
1. Turn off the computer and turn it over so you are looking at the
bottom.
2. Using a Phillips head screwdriver, remove the screw next to the
hard disk drive lock.
note If you prefer quick hard disk drive removal, do not
reinstall this screw. It is an additional locking feature.