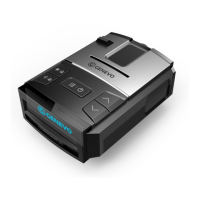
The Genevo PRO is an advanced radar and laser detector designed to help drivers avoid speeding fines. It communicates with the driver in English, providing comprehensive alerts for various speed detection technologies.
Function Description
The primary function of the Genevo PRO is to detect microwave radars (K and Ka bands), red light cameras, and sectional speed cameras using its integrated GPS database. It also identifies MultaRadars CT/CD and radar Gatso RT3 and RT4. A key feature is its ability to jam laser guns, offering an additional layer of protection. The device provides a quick deactivation of all functionality by simply removing the magnetic display, which is useful in areas where radar detectors are prohibited.
The Genevo PRO keeps the driver informed about the connectivity status of its GPS antenna and all connected radars and accessories. A flashing GPS icon on the screen indicates a disconnected GPS, while flashing HWY, A-C, or CTY icons signal issues with accessories.
Usage Features
Notifications:
When a radar is detected, the Genevo PRO provides both text warnings on the display and voice alerts. The intensity of the received signal is indicated by signal strength levels (ten levels) and corresponding beeps. GPS alerts are reported via voice, for example, "Speed Camera." Accessory alerts are also voice-reported, such as "Laser."
Control:
The device features a user-friendly control interface with distinct buttons for various functions:
-
First button (MENU/ON-OFF):
- Short press: Enters the setup menu. During a radar alert, a short press mutes the volume. Subsequent alarms will revert to the standard volume.
- Long press: Turns the Genevo PRO ON or OFF. During a radar alert, a long press allows entry into the menu.
-
Second button (BRIGHTNESS/ALERT SUPPRESSION):
- Short press: Adjusts the display brightness through a cycle: Bright -> Dim -> Smart Dark -> Full Dark.
- Long press: If held during an alert, it marks the location of a false radar report. The detector will then suppress alerts at this specific point during future passages. If a false alert is suppressed, the detector will not detect radars at that location. Holding the button again during a "suppressed" radar alert will cancel the suppression, and the radar alert will be signaled acoustically on the next passage.
-
Third button (SENSITIVITY / ADD YOUR OWN GPS POINT):
- Short press: Scrolls through sensitivity modes: Highway / City / Auto City. In City or Auto City modes, the sensitivity of K/Ka bands can be reduced based on user preference.
- Long press: Adds a user-defined GPS point.
-
Buttons (∧∨):
- Short press: Changes the detector's volume.
To enter the menu, press the first button. To navigate between categories, press the second button. To change settings within a category, use the VOLUME ∧ or ∨ buttons on the right side of the detector. To save changes, simply wait a few seconds without pressing any button; the unit will display "Setting Completed." Alternatively, you can exit the menu by pressing the third button. The menu will automatically save and quit after five seconds of inactivity.
Key Menu Items and Recommended Settings:
- Front Radar: On / Off (Controls front radar functionality. If off, related menu items are hidden.)
- Rear Radar: On / Off (Controls rear radar functionality. If off, related menu items are hidden.)
- Sensitivity: Highway / City / Auto City (Recommended setting is highlighted for optimal performance.)
- Setting the speed in Auto City: (Only available if sensitivity is set to Auto City.) Use the second button to select speeds for editing. The left number indicates the speed below which the detector will not respond to alerts, and the right number indicates the speed below which it will detect alerts in City mode. Use the ∧∨ buttons to change the specific speed. For example, with a "20 50" setting, the radar will not respond below 20 km/h. Between 20-50 km/h, it will only respond to stronger radar signals. Maximum sensitivity begins at 50 km/h.
- Setting values City and Auto City sensitivity: (Only available if sensitivity is not Highway.) Use the second button to select the radar band for editing. Use ∧∨ to change the signal level for radar responses. Suppression levels can be set from 0-9. For instance, X2 K2 and Ka2 settings slightly decrease detection levels across all bands.
- Minimum speed for signaling radar: Off, 10 km/h, 20 km/h, 30km/h, ..., 130 km/h.
- F-K-Band: Wide / Narrow / Instant Only / Off (For countries using K band radars, K Narrow is recommended.)
- F - K Filter: Off / Low / High (Filters false alerts from blind spots and ACC. Pulsed radars like Iskra are not detected when activated.)
- F-Ka-Band: Wide / Narrow / Off
- F-Ka 34.0, 34.3, 34.7, 35.5: On / Off (Turn Off if police in your region do not use these specific bands.)
- F - Ka Filter: Off / Normal / High (Filters false alerts from blind spots and ACC. Detection distance on Ka band radars is slightly reduced when activated. Normal is recommended for good sensitivity/false alert immunity.)
- F-Laser: On / Off
- F - MR CT: Wide / Narrow / Off (Used in countries like SR, A, PL, NL, ES, P, LT. Narrow is recommended in these countries. Otherwise, Off.)
- F - MR CD: Wide / Narrow / Off
- F - Gatso RT3: On / Off
- F - Gatso RT4: On / Off
- F - MR Filter: Low / High / Off (Filters false alerts from blind spots and ACC. Detection distance on MR band radars is slightly reduced when activated. Normal is recommended for good sensitivity/false alert immunity.)
- Jammer: ALP/FF / Off: Turns on accessories. It's crucial to select the correct type of accessories installed in your car for proper PRO functionality.
- Parking Assistance: On / Off
- Jamming: Off / 1s / 2s / ... / 9s / Unlimited (Sets the duration of laser gun jamming.)
- Display Mode: Speed/Time, Speed/Voltage, Battery Voltage, Time, Speed, Speed/Compass.
- Auto Mute: On / Off (If activated, the volume is reduced after two seconds of an ongoing alert.)
- Alert type: Voice first / Beep first / No voice (Sets whether the primary alert is voice or beep.)
- Voice first / Beep first: Sets whether the user is first alerted with voice or beeps.
- Startup sound: On / Off
- GPS connect announce: On / Off
- GPS detection by database type: Use the Second button to select GPS point types. Use ∧∨ to edit. Individual point types can be turned on or off.
- GPS warning distance: Normal (approx. 250m) / Farther (approx. 375m) / Farest (approx. 500m).
- Unit: Imperial (mph) / Metrics (km/h).
- Setting local time: Change time zone via ∧∨.
- Language: English / Deutsch / Czech.
- Factory reset: Press the third button to reset.
- Delete all user points: Press the third button to delete all user points.
- S/N: XXXXX: Displays the Serial Number, which may be needed for Genevo PRO updates.
SpeedMeter Option:
This function is designed to legalize the detector in countries where radar detectors are prohibited. When activated, the detector stops alerting to radars and lasers. Only the current speed will be displayed, and all radar and laser detection settings will disappear from the menu. Upon entering the menu, you will be notified of deactivated functions.
To activate SpeedMeter, ensure the detector is switched on, then press and hold the second and third buttons on the display simultaneously for five seconds. "SpeedMeter ON" will appear on the display, and all radar and laser detection functions will be completely deactivated. To reactivate the detector, simply update it through a computer, and all functions will become available again.
Maintenance Features
Database Updates:
It is recommended to check for database updates once every three months. Instructions for downloading new databases are available on www.genevoupdate.com. You can also register at www.genevo.com/en/updates-subscription to receive notifications of new and updated databases via email.
Installation Recommendations:
To ensure proper functionality of all components, it is highly recommended to have the Genevo PRO device installed by an authorized garage. Contact your dealer to arrange installation.
Component Placement Guidelines:
- Genevo PRO Control Unit: Typically placed in a fuse box or above the pedals. It can be secured with stripping tape to wires or double-sided duck tape. Ensure the speaker on top of the unit faces free space.
- Display: Usually placed in the vehicle cabin using double-sided sticky tape or magnetic tape, in an easily accessible area.
- GPS Antenna: Place using double-sided duck tape where it has a clear view of the sky, ideally on the dashboard. If placed under the dashboard, ensure no metal objects obstruct it. A constantly glowing GPS icon indicates proper function; a blinking icon means it's searching for a signal. The initial connection may take 1-5 minutes.
- Speaker: Positioned in the leg-space of the driver or passenger, ensuring alerts are clearly audible.
- Radar Antenna HD+ / HDM+: Crucial for signal capture. Mount to the front of the car, usually in the plastic bumper or behind the front grille, ensuring a clear view of the road ahead. Ideal placement is in the bumper vent, 30-50 cm above the ground. Avoid mounting behind metal parts. Use self-tapping screws or classic nut bolts. A special L-shaped support plate (included) can be used in some vehicles.
- Laser System Control Unit: Installed inside the vehicle, under the dashboard or padding, ensuring it does not come into contact with water. Connect its power cord to the control unit. A 1A fuse is located inside the control box. Connect laser sensors to the "S" slots on the Genevo PRO hub.
- Laser Sensors: Mount on the front or rear of the vehicle (front grill, above bumper). Exercise extreme caution to avoid damaging cables, sensors, or connectors during installation to prevent voiding the warranty. Plexiglass "Perspex" is recommended to hide sensors for aesthetic purposes. Route cables carefully through original cable passes or drilled holes, sealing any gaps with silicon to prevent water entry. Ensure sensors are held firmly and maintain a horizontal front/rear facing position.