12
PN# 37026500123 05/15/2009
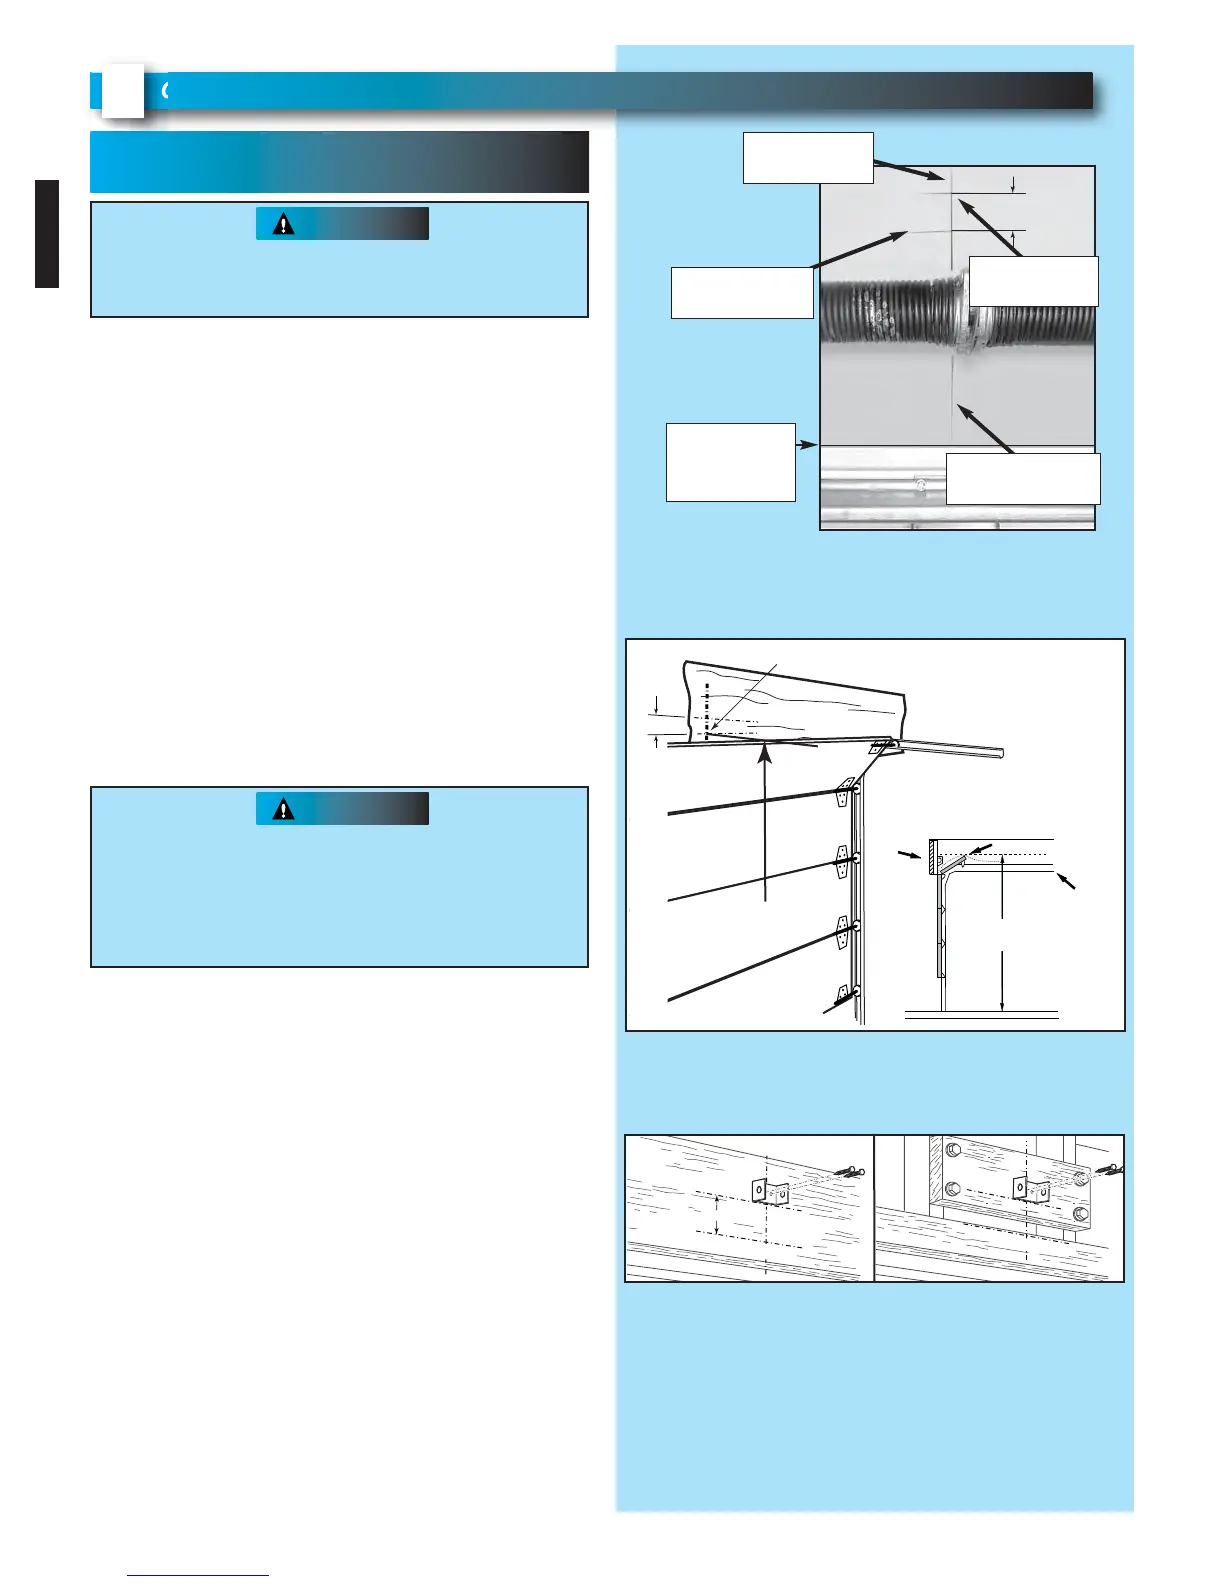
FIG. 2-2 Finding highest point of travel.
OPENER INSTALLATION
FOR HELP-1.800.354.3643 OR WWW.GENIECOMPANY.COM
2
HEADER AND DOOR
MOUNTING BRACKETS:
1. Finding header bracket mounting location.
• Close garage door.
– Use a pencil and level.
a) Mark center of garage door (one-half overall
width) on the wall with 6" vertical line at top
edge of door.
b) Continue this line on wall above door for
about 12" (Fig. 2-1, a).
• Raise garage door until top edge of door
reaches its maximum height
(Fig. 2-2)
.
• With door at highest point.
–
Measure height from top edge of door to floor
(Fig. 2-2).
• Close door again.
• Mark height measurement on wall above door
(Fig. 2-1, c)
.
–Make your mark across vertical line made earlier.
• Add 2-1/2" to height mark just made on
wall. This
is location for header bracket (Fig. 2-1, d).
NOTE: If header bracket location needs to be
above header for garage door opening, you need
to add a "mounting surface." A 2" x 6" board
securely attached (board and fasteners not
included) to wall studs on either side of your mark
is sufficient (Fig. 2-3).
NOTE: For header bracket and bolts locate Bag 2
from Box 1.
NOTE: The bolts supplied in Bag 2 are designed
to be used on pressure treated lumber.
2. Mounting the header bracket.
• Hold header bracket against wall
(Fig. 2-3).
• Position bracket as shown.
–
Place center on vertical line,
–
Bottom edge on final height line.
•
Mark screw hole locations on wall.
• Drill 3/16" pilot holes at each screw hole mark.
–
Fasten header bracket with 2 lag screws
(provided) (Fig. 2-3).
FIG. 2-1 Final height mark.
Header bracket must be fastened to garage
framing. Do NOT fasten to drywall, particle
board, plaster or other such materials.
WARNING

 Loading...