PN# 37026500123 05/15/2009
16
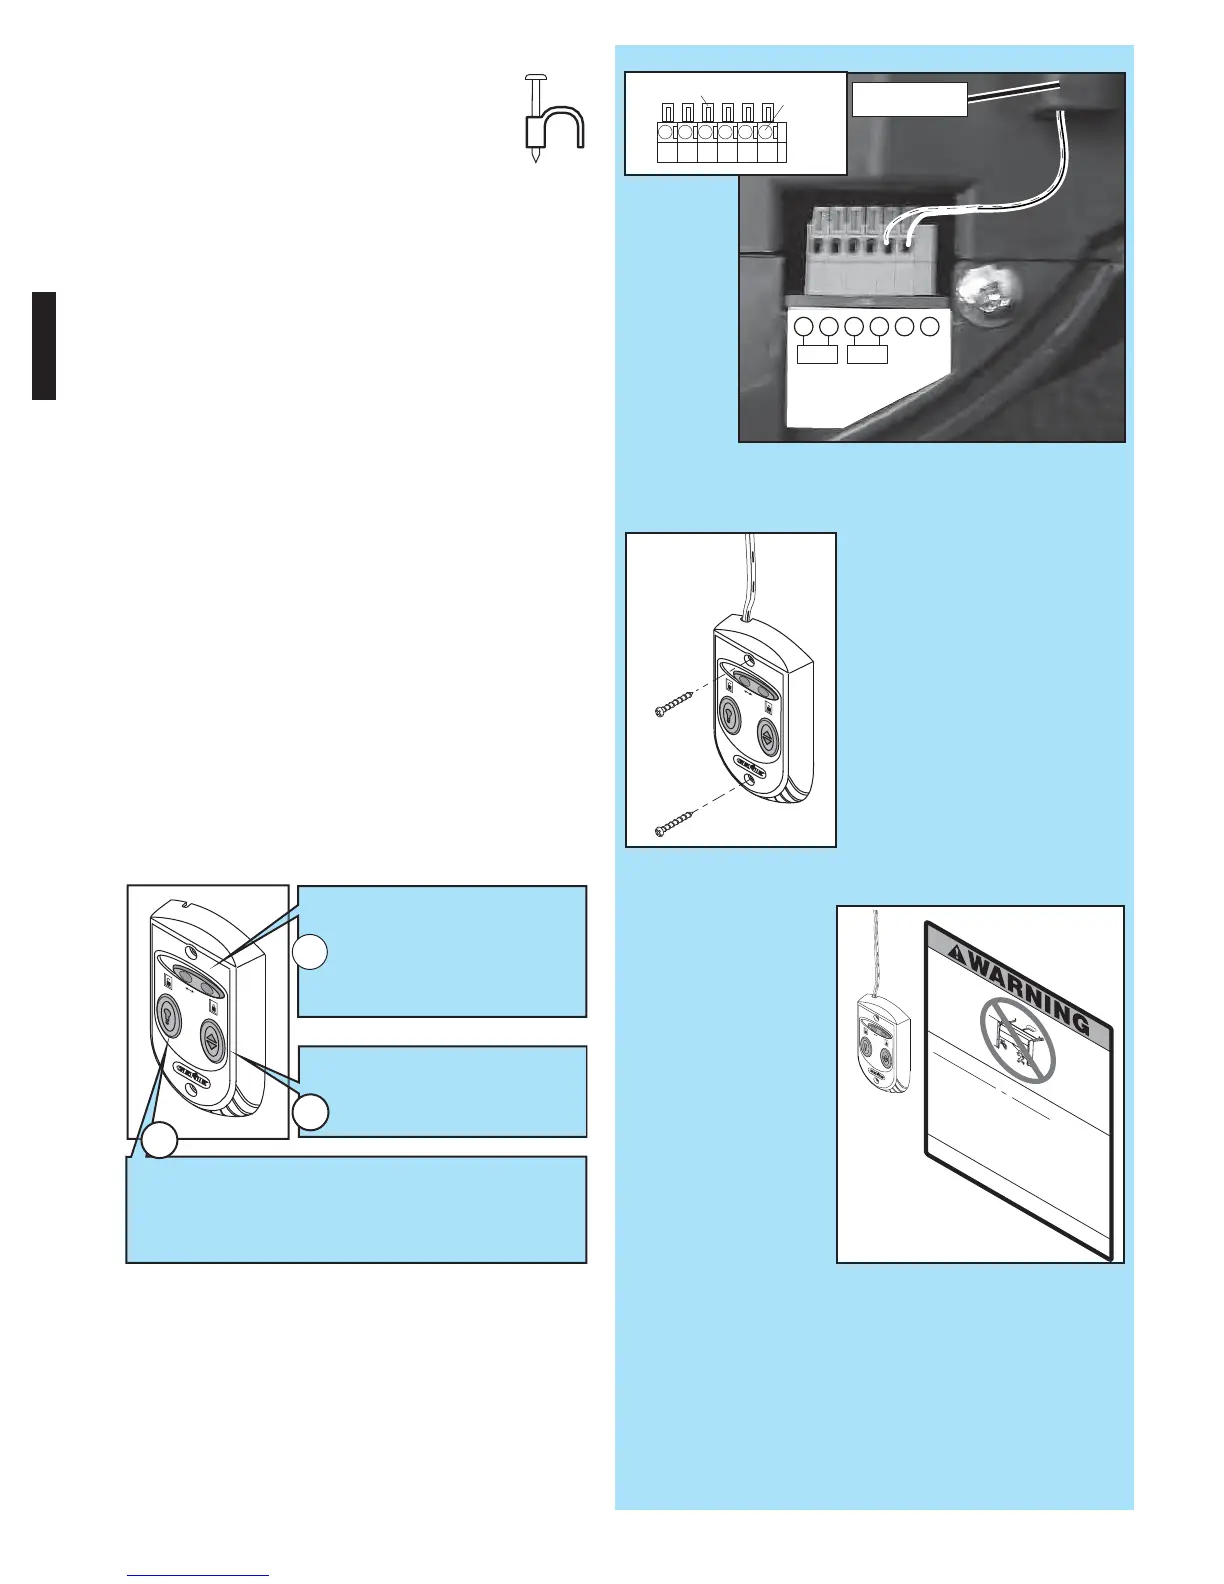
3. Securely fasten wires.
• Securely fasten wires to ceiling and
wall using insulated staples provided.
– Use insulated staples.
– Staples should be snug only.
• If rear cover is attached to power head,
remove it.
• On power head:
– Route Wall Control wires through wire guide
on power head.
– Split and strip ends of wire (Fig. 3-2 on
previous page).
–Insert wire into terminal holes and lightly press in
the orange locking clips above each terminal
hole. (You can use a pencil or small screwdriver
to comfortably press in locking clips.) The white
wire into #1 terminal hole and striped wire into
the #2 terminal hole.
–Confirm wire lock by lightly tugging on the wire.
The wire should remain in the terminal hole.
• Do NOT install rear cover yet.
4. Mounting.
• Fasten Wall Control to wall with 2 screws
(provided) (Fig. 3-4).
• Remove protective backing from "Entrapment"
warning label (Fig. 3-5). The "Entrapment" label
is located in the center of this manual.
– Stick label on wall near Wall Control.
FIG. 3-4 Mounting Wall Control.
Childcanbe pinned under automatic garage
door.
Death or serious injury can result.
•
Never let child walk or run under moving door.
.
•
Never let child use door opener controls.
•
Always
keep moving door in sight.
•
If person is pinned, push control button or use
emergency release.
•
Te st door opener monthly:
Refer to your owner'
’
smanual.
Place 1
1
/
2
-inch object (or 2x4 laid flat) on floor.
If door fails to reverse on contact, adjust opener.
If opener still fails to reverse door, repair or replace opener
.
Do not remove or paint over this label.
Mount wall control out of child's reach
(at least 5 feet above floor).
Place next to wall control.
©1999
FIG. 3-3 Insert wires
.
(Power Head With Rear Cover Removed)
1234
Terminal
Holes
Locking
Clips
56
FIG. 3-5 Mounting Entrapment warning label.
3
2
1
Independent Light Control
–
Controls door opener lights from inside garage
–
Energy-Saver shut-off turns OFF lights 3 minutes after
door activation
Vacation Locking Switch
– LOCK disables controls after
door is completely closed
– UNLOCK allows controls to
work normally
Door Control "Open/Close" Button
–
Open and closes door from
inside garage

 Loading...