o Forall types and stylesof doors:
- if the ceiling inyour garageisso low that there is
not at leasta 3 spaceabovethe HeaderBracket
mountingpoint, contact aGenieFactory
AuthorizedDealer.
o If.adoor spring isin the way,placethe HeaderBracket
abovethe spring.Do Not move the door spring.
WARNING:
Door Springsare under extremely high tension and
should beBandiedONLYby atrained professional.
C Checkwall forastudor asolidheaderat your mark:(tfcheckinga
finishedwall,a studfinder maybehelpful).
, tf locationisaboveHeader,a2"x6" boardmustbe
screwedto studsbesideyourmarkwith atleasttwo Lag
ScrewsandFlatWashers(not provided).
, Transferyourmarkto newmountingboard.
CHECKPOWERHEAD
MOUNTINGAREA
CheckceiB_gor spaceabovewhereOpenerPowerHeadwilI be
mounted (Figure5): Theremust bea 120VoRgrounded outlet or
wiring boxwithin 3 feetof PowerHead.
Grounded
outlet
(7L6"<
Figure 5 Check Power Head location
A Themeasurementsabovearetakenfromthegaragedoor
centerlinetowardthe rearof the garage.
B FindlocationofceilingjoistortrussabovewhereOpenerPower
Headwill beandestimatetypeandquantityof materialsneededfor
yourinstallation(Figure6A& B).
MOUNTING EXAMPLES
Standard Straps Extrawood required Perforated Angle
kon
OPENCEILINGSStrapsandangleironmayattachdirectlytojoists
ortrusses.
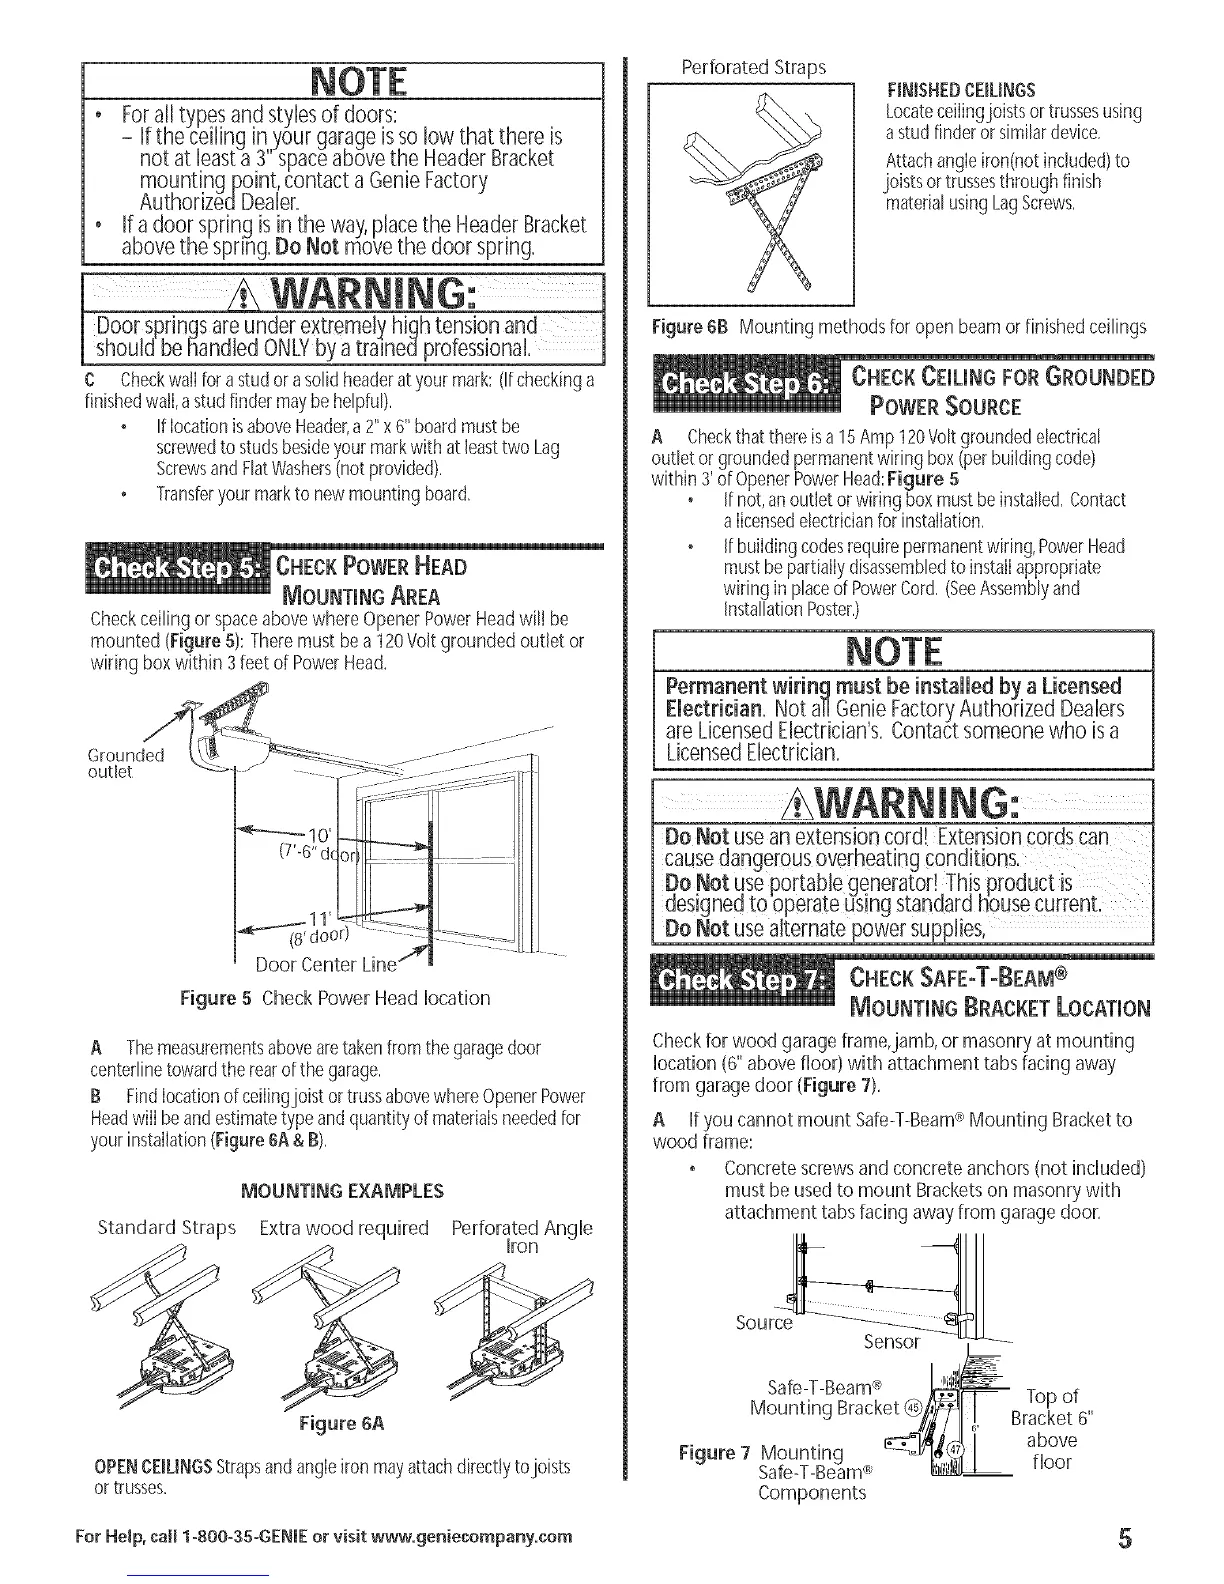
Perforated Straps
FINISHEDCEILINGS
Locateceilingjoistsortrussesusing
astudfinderor similardevice.
Attachangleiron(notincluded)to
joists ortrussesthroughfinish
materialusingLagScrews.
Figure6B Mounting methodsfor open beamor finishedceilings
CHECK CEILING FOR GROUNDED
POWER SOURCE
A Checkthat thereisa 15Amp 120Volt groundedelectrica!
outlet orgroundedpermanentwiring box (perbuildingcode)
within 3'ofOpenerPowerHead:Figure 5
• ifnot,anoutlet orwiring box mustbeinstalbd. Contact
a licensedelectricianfor instaJlation.
• Ifbuildingcodesrequirepermanentwiring,PowerHead
mustbepartiallydisassembbdto installappropriate
wiringin placeof PowerCord.(SeeAssemblyand
InstallationPoster.)
Permanentwiring must be installedby a Licensed
Flectrbian. Not all GenieFactoryAuthorized Deabrs
are LicensedEbctrician s. Contactsomeone who isa
LicensedElectridan.
Do Not usean extension cord! ExtensioncordsCan
Do Not useportable generator!:Thisproduct is
aes gned tOoperate usng stanaard housecurrent.
Do ['tot usealternate power supplies,
CHECKSAFE-ToBEAM®
MOUNTmN(;BRACKETLOCATION
Checkfor wood garage frame,jamb, or masonryat mounting
location (6" above floor) with attachment tabs facing away
from garage door (Figure 7).
A if you cannot mount Safe-T-Beam®Mounting Bracketto
wood frame:
Concretescrewsand concrete anchors (not included)
must be used to mount Bracketson masonrywith
attachment tabs facing awayfrom garage door.
Source
Sensor ,,
Safe-T-Beam® _ Top of
M°unting Brack_7! I,, Bracket 6"
Figure7 Mounting o _.,_,7_I above
Safe.T_Beam®_ floor
Components
For HeJp, call 1-800-35-GENIE or visit www.geniecompany.com 5

 Loading...