8
WARNING
!
• Make sure doorway is in full view and clear of obstacles and
people to avoid injury or property damage.
• DO NOT operate this unit from the wall control before LIMITS
are set. Severe damage to the opener could occur.
• The carriage MUST be engaged to turnbuckle BEFORE setting
limits. See installation poster or call Customer Service at
1-800-35-GENIE or visit www.GenieCompany.com.
• DO NOT set limits with Battery Backup attached. AC power
MUST be connected to the opener while setting limits for
proper operation.
AVERTISSEMENT
!
• S’assurer que le passage de la porte est visible et dégagé, à
savoir sans obstacles ni personne a n d’éviter toute blessure
potentielle ou dommage matériel.
• NE PAS utiliser cette unité avec la console murale avant
d’avoir réglé les LIMITES. L’ouvre-porte pourrait subir de
sérieux dommages.
• La tendeur DOIT être engagée dans le chariot AVANT de
régler les limites. Voir le poster d’installation (si fourni) ou
appelez le service clientèle au 1-800-35-GENIE ou visitez le
site www.GenieCompany.com.
• NE PAS xer de limites en mode batterie de secours.
L’alimentation CA DOIT être branchée sur l’ouvre-porte,
pendant le réglage des limites, pour assurer un bon
fonctionnement.
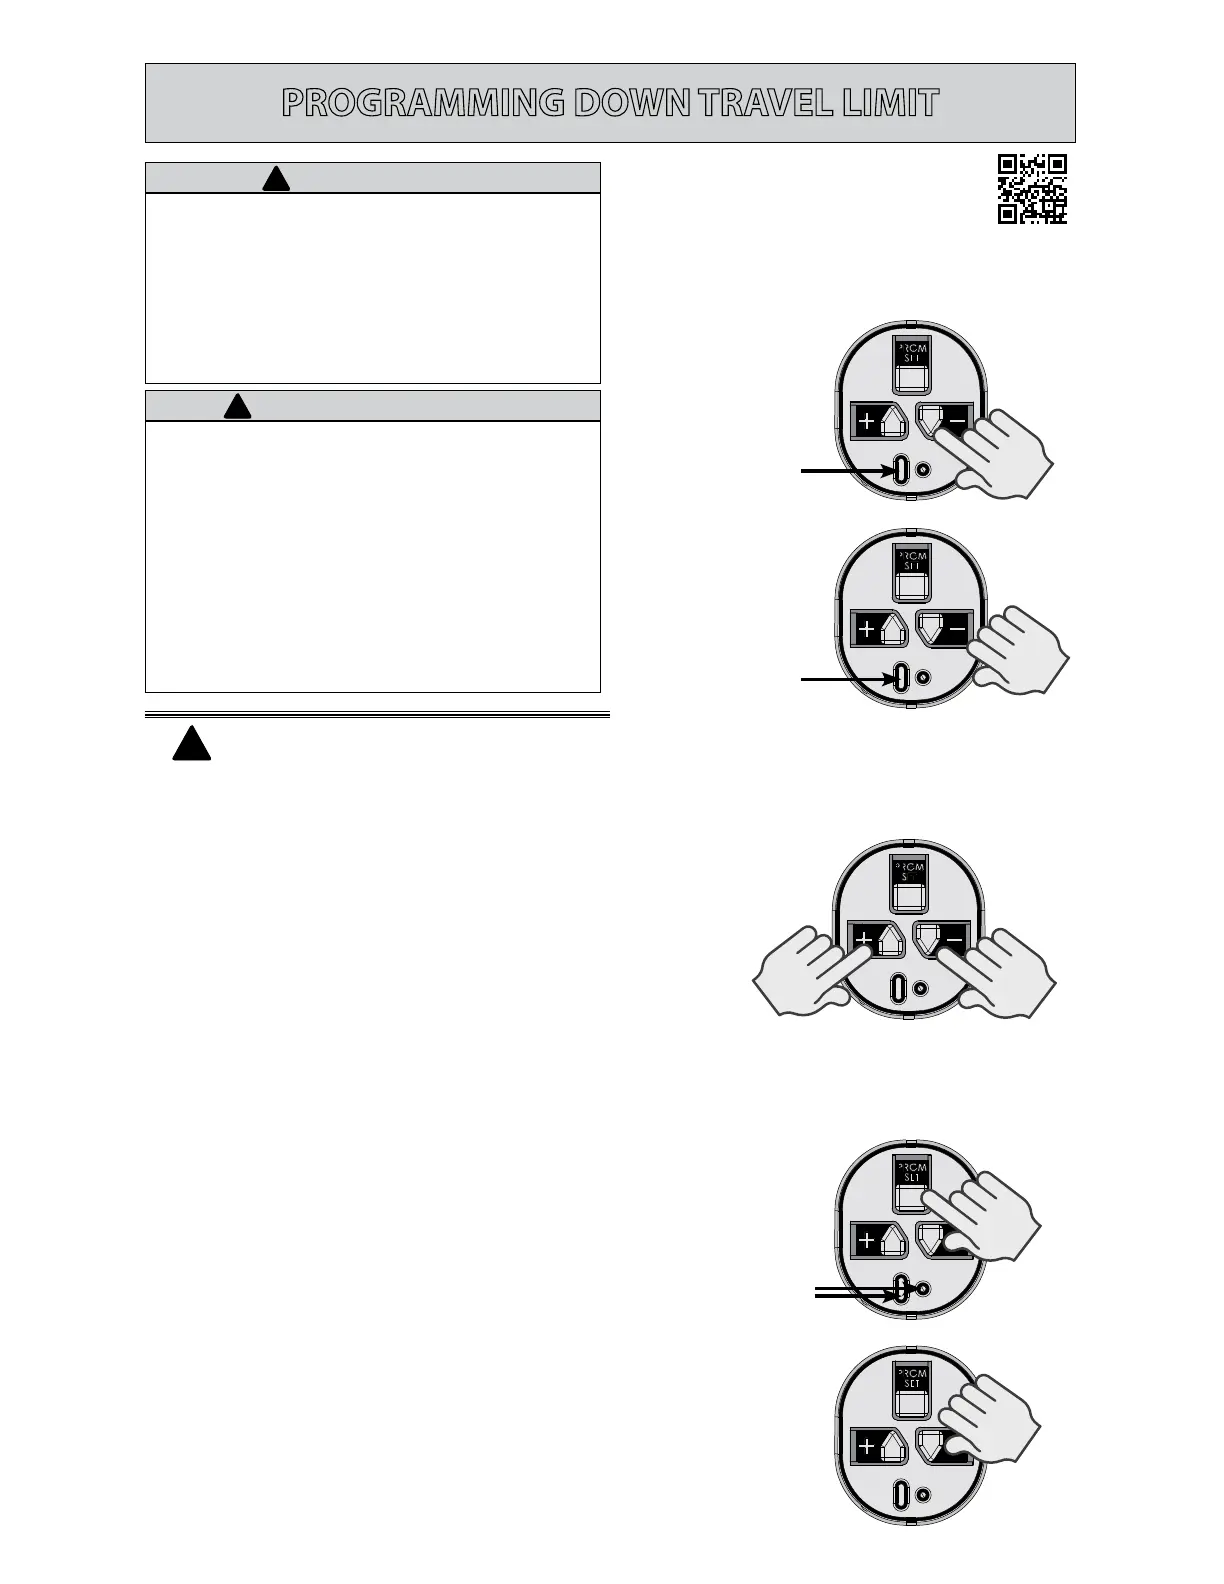
1. Press and hold the DOWN arrow button.
• Long LED will light BLUE.
2. Release DOWN arrow button.
• Long LED will ash BLUE.
3. Press and hold the DOWN arrow button until
door is fully closed.
• Use the UP arrow button if door closes too
far. Use both UP and DOWN buttons to adjust
close travel as necessary.
Door should rest on the oor until the weather strip
is compressed enough to seal along the width of the
door. Damaged doors or uneven oors may not seal
properly. Repair these conditions to achieve a proper
seal. DO NOT compress seal so much that the door will
bend or buckle.
4. Press and release the SET/PRGM button
• Both LEDs will ash BLUE then go out.
The DOWN limit is now programmed.
Steady Blue
HOLD
UNTIL
LED
Lights
Flashing Blue
RELEASE
1-2. Enter Programming Mode
3. Adjust Door Position
Programming DOWN Limit:
NOTE:
Carriage should be locked
to opener. Door should rest somewhere
between full open and closed. Do not start
with door fully open or closed.
4. Lock Programming
Flashing Blue
PRESS
&
RELEASE
PROGRAMMING DOWN TRAVEL LIMIT
!


 To Next Page