Do you have a question about the Genie GXL Series and is the answer not in the manual?
| Brand | Genie |
|---|---|
| Model | GXL Series |
| Category | Garage Door Opener |
| Language | English |
Contact information and support details for Genie garage door operators.
Describes the basic conveniences offered by the Genie garage door operator.
Outlines the standard features included with the garage door operator.
Lists optional accessories available for the garage door operator.
Details the specifications and benefits of the screw drive system.
Information on remote control certification and battery type.
Details Genie's safety systems like Safe-T-Reverse, Safe-T-Beam, and Watch Dog.
Warnings about personal injury or death from improper operation of garage doors.
Highlights the dangers of garage door springs and the need for professional service.
Warns about the risks of electrical shock due to improper wiring or installation.
Advises on bracing specific door types before operator installation.
Details dangers associated with the weight and movement of garage doors.
Warns about items on doors catching clothing and causing injury.
Cautionary notes on proper installation and door condition before starting.
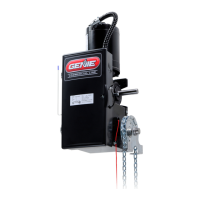
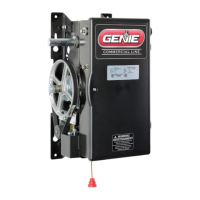
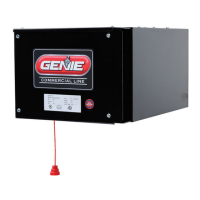
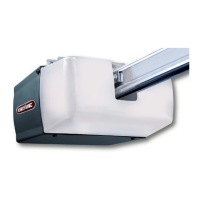
Diagram and identification of major rail and power unit components.
Identification of various control components like remote and wall controls.
Illustrations and names of various fasteners included in the kit.
Crucial safety warnings to reduce risk of severe injury or death during installation.
Instructions for track-operated doors, pointing to Section B.
Instructions for trackless doors, pointing to Section C.
Procedure for marking the vertical center line of the garage door and header.
Procedure for determining and marking the header bracket mounting height.
Instructions for mounting the header bracket using vertical or horizontal methods.
Steps for connecting the operator unit to the mounted header bracket.
Guidance on how to ensure the operator unit is level during installation.
Steps for securely mounting the power unit using suggested methods.
Instructions on bracing doors to prevent damage during operator installation.
Procedure for attaching the door bracket to the garage door.
Steps for joining and attaching the door arms to the carriage and bracket.
Procedure for marking the vertical center line for single piece doors.
Procedure for determining header bracket mounting height for single piece doors.
Steps for mounting the header bracket to the garage framing.
Guidance on bracing single piece doors before operator installation.
Procedure for attaching the door bracket to the single piece door.
Connecting the operator unit to the header bracket.
Instructions for safely raising and positioning the power unit.
Steps for connecting the straight and curved door arms together.
Attaching the assembled door arms to the operator carriage and door bracket.
Determining the correct height for the power unit based on door arm length.
Final steps for mounting the power unit using suggested methods.
Procedure for setting the down limit switch for the garage door.
Procedure for setting the up limit switch for the garage door.
Mounting the STB transmitter and receiver units.
Positioning and securing the brackets for the STB system.
Connecting the STB receiver to the transmitter with a 2-conductor wire.
Connecting the STB receiver to the operator power unit.
Steps for preparing wires and connecting them to the power unit.
Guidance on choosing a suitable location for the wall control.
Steps for preparing wires and connecting them to the wall control unit.
Securing the wall control unit and its warning label.
Procedure to remove battery cover and set personal code on remote.
Matching the power unit's code switches to the remote control's settings.
Reinstalling the battery cover after code setup.
Instructions for installing light bulbs and the protective lens.
Key safety precautions for operating and maintaining the garage door opener.
Procedure for plugging the operator's power cord into a grounded outlet.
Importance of verifying local codes for wiring and installation.
Steps to safely remove the operator's original power cord.
Procedure for hardwiring the operator to a branch circuit.
Steps for adjusting the Safe-T-Reverse mechanism by loosening and tightening nuts.
Procedure for testing the Safe-T-Reverse feature with a 2x4 board.
How to operate the garage door using the remote transmitter.
Instructions for attaching the visor clip to the remote control.
Information on ordering and using additional remote controls.
Guide for replacing the battery in the remote control unit.
Routine maintenance checks for door hardware, safety control, and lubrication.
Warning regarding broken garage door springs and need for professional service.
Procedure to check if the garage door is properly balanced.
How to test the safety control feature using a 2x4 board.
Specific lubrication requirements for the opener screw.
Details what the Genie Company limited warranty covers and its exclusions.
Steps to follow for requesting warranty service and finding authorized dealers.
Fields to be filled out at the time of installation for warranty registration.
Fields for customer name, address, and contact details.
Questions about factors influencing the purchase decision.
Information about installation type, home age, and purchaser demographics.
Questions regarding income, marital status, children, and education.