Do you have a question about the Genius DV610 and is the answer not in the manual?
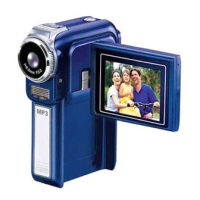
General introduction to the digital video camera's features and capabilities, including resolution and zoom.
Lists all items included in the camera package for immediate use, such as cables and batteries.
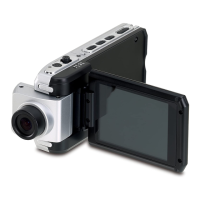
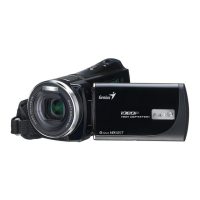
Identifies external components visible from the front of the camera, like lens and flash.
Identifies external components visible from the rear of the camera, including LCD and buttons.
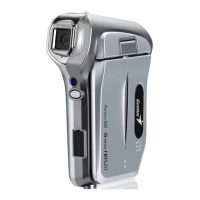
Identifies external components visible from the side of the camera, such as strap eyelet and speaker.
Identifies external components visible from the top and bottom of the camera, like microphone and tripod mount.
Step-by-step guide on how to insert the rechargeable Li-ion battery into the camera.
Instructions for fully charging the camera's battery before first use via the power adapter.
Procedure for managing memory cards to expand storage capacity for pictures and movies.
Method to prevent accidental erasure of data on the memory card using the write-protect tab.
Guide to powering on the camera and initiating basic operations like recording or playback.
Instructions on how to properly power down the camera using the power button or LCD panel.
Explains the purpose and operation of various buttons like directional, REC/PLAY, and MODE.
Details the indicators and icons displayed on the camera's LCD screen during recording modes.
Instructions for recording video clips in MPEG-4 format using the camera's shutter button.
Guide for capturing still images using the camera, including resolution and quality settings.
Steps to record audio files using the camera by selecting Voice Record Mode and pressing shutter.
How to capture detailed images of nearby subjects using Macro or Portrait modes.
Instructions on how to magnify subjects up to 8x using the Tele/Wide buttons.
Lists available settings for Movie and Picture recording modes like Resolution, Effect, and Exposure.
Describes how to navigate and select options within the record mode menus using buttons.
Information on default camera settings and how they are applied ('Always' or 'One Time').
Details various settings available within the record mode submenus for camera configuration.
How to adjust the video quality and resolution settings for recorded movies.
How to adjust the still image quality and resolution settings for captured pictures.
Options for applying visual effects like Normal, Black/White, and Classic to images and videos.
How to adjust color balance for different lighting conditions (Auto, Daylight, Fluorescent, Tungsten).
Steps to adjust the camera's exposure compensation setting across nine levels.
How to adjust the image sharpness for desired visual effects, adjustable across nine levels.
Accessing and configuring general camera settings like Sound, Time, and TV System.
Options for enabling or disabling camera operation sounds and keypad tones.
Customizing the initial screen displayed when the camera turns on with favorite pictures.
Procedure for setting the camera's date and time accurately.
Instructions for formatting memory cards to ensure optimal performance and data integrity.
Selecting the correct TV standard (NTSC or PAL) for external display output.
Changing the language displayed on the camera's menus and text for user convenience.
Restoring the camera to its original factory default settings for all configurations.
Configuring the camera's flash settings, including Auto-flash and Flash Off.
Using the self-timer function for delayed picture taking with a ten-second delay.
Capturing a series of five rapid, continuous images for action shots.
Optimizing camera settings for low-light or night photography to capture more detail.
Adjusting automatic exposure metering methods: Multi-segment, Center-Weighted, or Spot.
Combining two captured images into a single picture for creative effects.
Introduction to reviewing recorded movies, pictures, and audio files using the REC/PLAY button.
Explains the functions of buttons like directional, REC/PLAY, and MODE used in playback modes.
Details indicators displayed on the LCD screen during playback, such as mode and resolution indicators.
Steps for playing back recorded video clips using the directional and shutter buttons.
Viewing multiple recorded items as small preview images for easy selection.
Procedure for removing recorded video files from storage, with options for all or single movies.
Preventing accidental deletion of recorded video files by locking them individually or all at once.
Setting movies to play continuously or in a loop, either single or all files.
Steps for viewing captured still images, including navigation and magnification.
Creating and playing a sequence of images as a slideshow for presentation.
Information on Digital Print Order Format for easy printing of selected pictures.
Preventing accidental deletion of captured image files by locking them individually or all at once.
Steps for listening to recorded audio files, including playback controls and volume adjustment.
Explains the use of directional buttons for navigation and volume control in voice playback mode.
Defines MP3 as a compressed audio file format that can be downloaded from web sites.
Guide for copying MP3 files from a computer to the camera via USB connection.
Instructions for playing MP3 audio files on the camera using the built-in speaker or headphones.
How to play MP3s using headphones or outputting audio to a TV via the earphone/TV option menu.
Explains MPEG-4 as a video compression standard for DVD-quality movies used by the camera.
Steps to install necessary codecs and play recorded MPEG-4 videos on a computer.
Methods for sharing recorded MPEG-4 video files with friends via internet or CD.
Guide for connecting the camera to a television using an AV cable for external playback.
Steps to install necessary drivers from the CD-ROM for computer connection and data transfer.
How to physically connect the camera to a PC using the supplied USB cable.
Using the camera as a removable drive for file transfer, allowing read, delete, move, or copy operations.
Using the camera for video conferencing and streaming, activated by pressing the MODE button.
Minimum computer system requirements needed for using the camera for video conferencing.
Detailed steps for installing the PC Digital Video Camera driver from the CD-ROM.
Procedure for connecting the camera to a computer monitor or positioning it for video conferencing.
Instructions for launching and using application software like NetMeeting for video conferencing.
Guide to installing included software like Ulead VideoStudio and Acrobat Reader from the CD-ROM.
Instructions for using the Photo Express software to view and manage images from the camera.
Instructions for using the Video Studio software to capture and edit video from the camera.
Technical details of the camera's hardware and features, including image sensor, lens, and storage.
Minimum computer requirements for using the camera's software, including OS, RAM, and ports.
| Sensor Type | CMOS |
|---|---|
| Interface | USB 2.0 |
| Display | LCD |
| Storage | SD Card |
| Shooting Modes | Photo |
| Microphone | Built-in |
| Connector Type | USB |
| Video Resolution | 640 x 480 |
| Battery | Rechargeable Lithium-ion battery |