SmartObserver User Manual
SmartObserver Data Logger
3
Installing the Data Logger
The SmartObserver data logger should be installed in a dry place, typically inside a suitable
equipment cabinet.
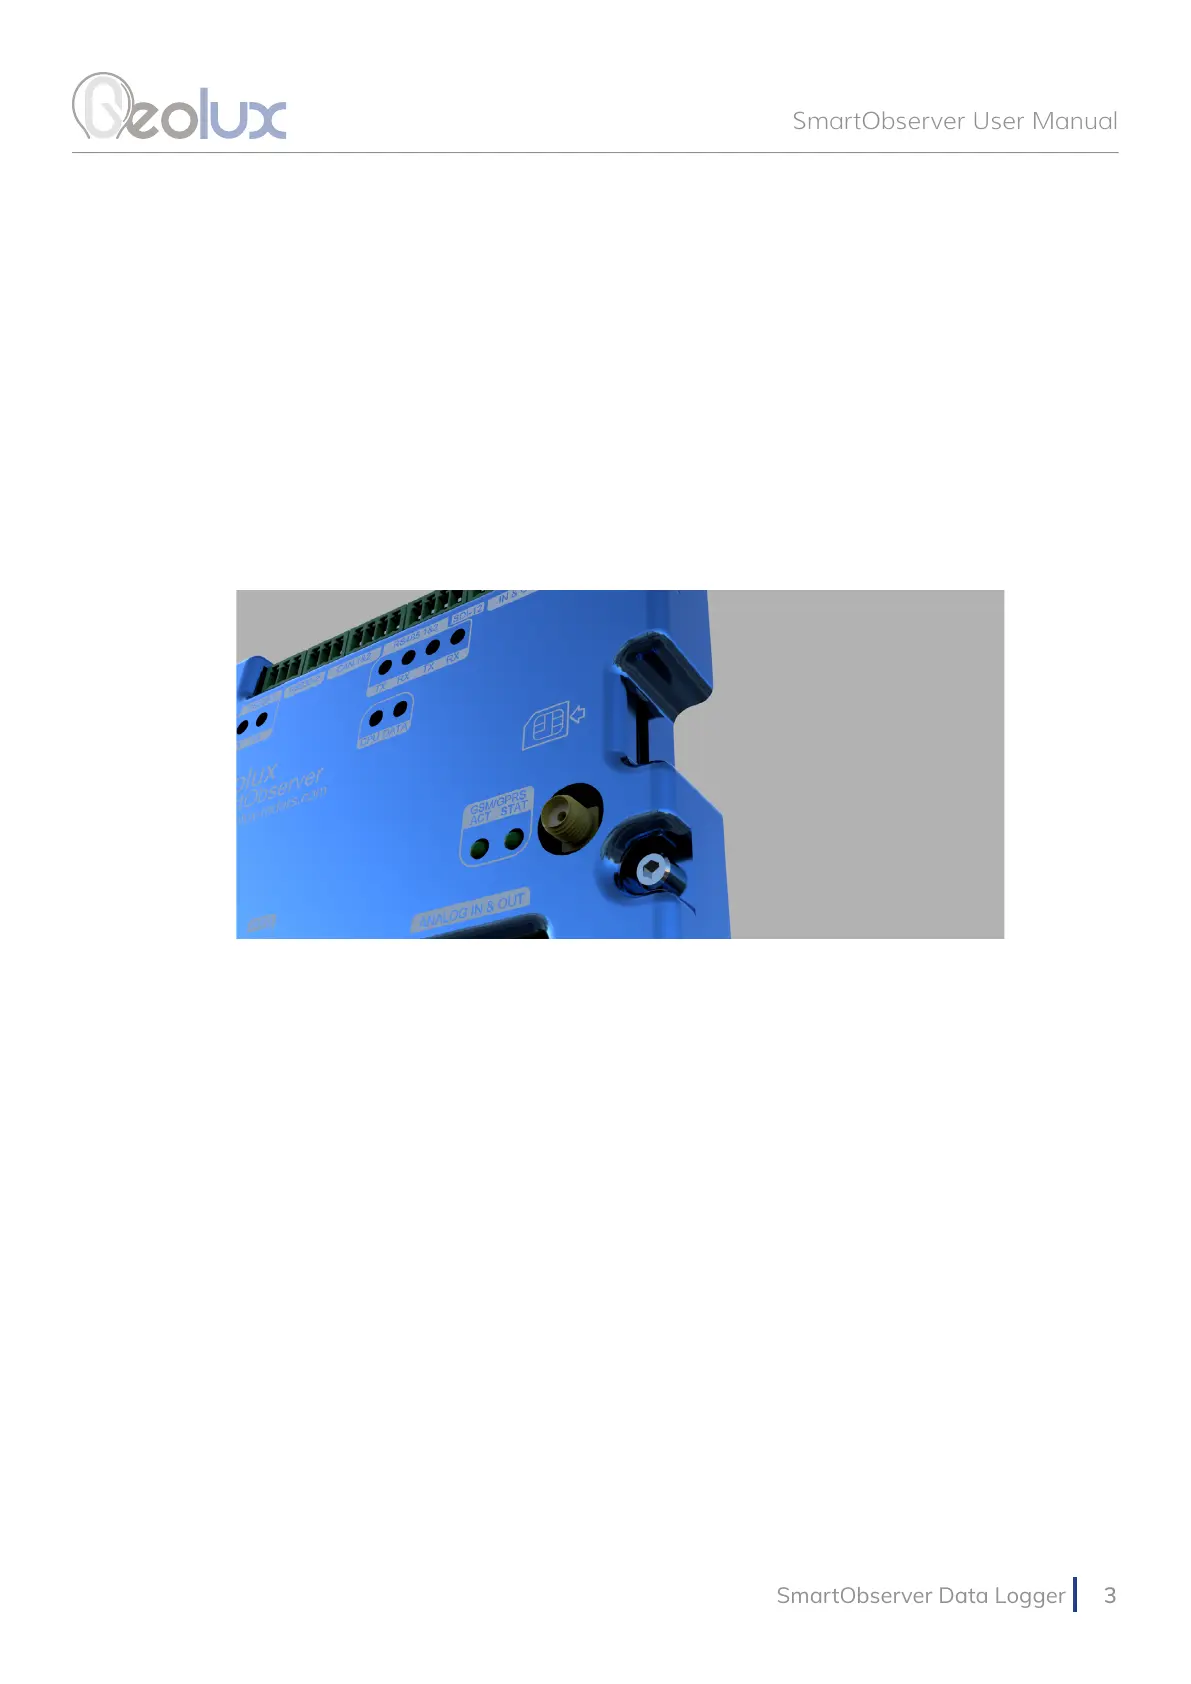
3.1. GPRS Connectivity
To enable GPRS connectivity, the SIM card must be inserted into the data logger, and the GPRS
antenna must be attached. The SmartObserver data logger uses the “micro SIM” format.
Picture 1. GPRS Connectivity
3.2. Input Power Supply
There are two input power supply lines available to the data logger as shown is Picture 2. One is
marked with PWR-IN, and the other is marked with BAT. PWR-IN is used to connect to any non-
battery power supply which provides 9 – 27 V. This can be an AC/DC converter, a solar panel, or a
small wind turbine that will be used to charge the battery. The battery, which provides a voltage
in the range of 3 – 19.2 V, should be connected to the BAT line. If the battery is not used, and the
SmartObserver data logger is powered only by an AC/DC converter, then the AC/DC converter
should be connected to the BAT line. In this case, the AC/DC converter should provide a voltage in
the range of 3 – 19.2 V.
The following combinations are all allowed:
• If a power grid is available at the location, the data logger can be powered from the grid, by
connecting the PWR-IN line to an AC-DC adapter with 12 V or 24 V output voltage.
• For remote locations, typically a solar panel is connected to the PWR-IN, and a battery is
connected to the BAT line. The data logger will perform battery charging from the solar panel.
• In remote locations it is also possible to connect only a large battery to the BAT line, without
a solar panel or wind turbine. In this case, the data logger will work until the battery runs out,
and then the battery needs to be replaced. A 12 V 160 Ah battery is usually suitable for 6-12
months of independent operation, depending on the number of connected instruments.