7
5. Type a new password and click OK.
6. Click on its IP address again and select Webpage to open its Web interface.
7. Type the set password on the login page and click Login.
IMPORTANT:
1. The camera has two sets of passwords: one is for Web interface and the other is
for the third-party platform connection via ONVIF, e.g. GV-VMS. GV-IP Device Utility
is used to set the ONVIF password. When the first-time user uses GV-IP Device Utility
to set a password for the camera, the two sets of passwords are created simultaneously.
2. To change the password for Web interface, go to Config > Security > User ; see
“Modified User” in 5.6.1 User Configuration in the user’s manual. To change the
password for ONVIF connection, go Config > Network > Advnaced; see 5.5.4 ONVIF in
the user’s manual.
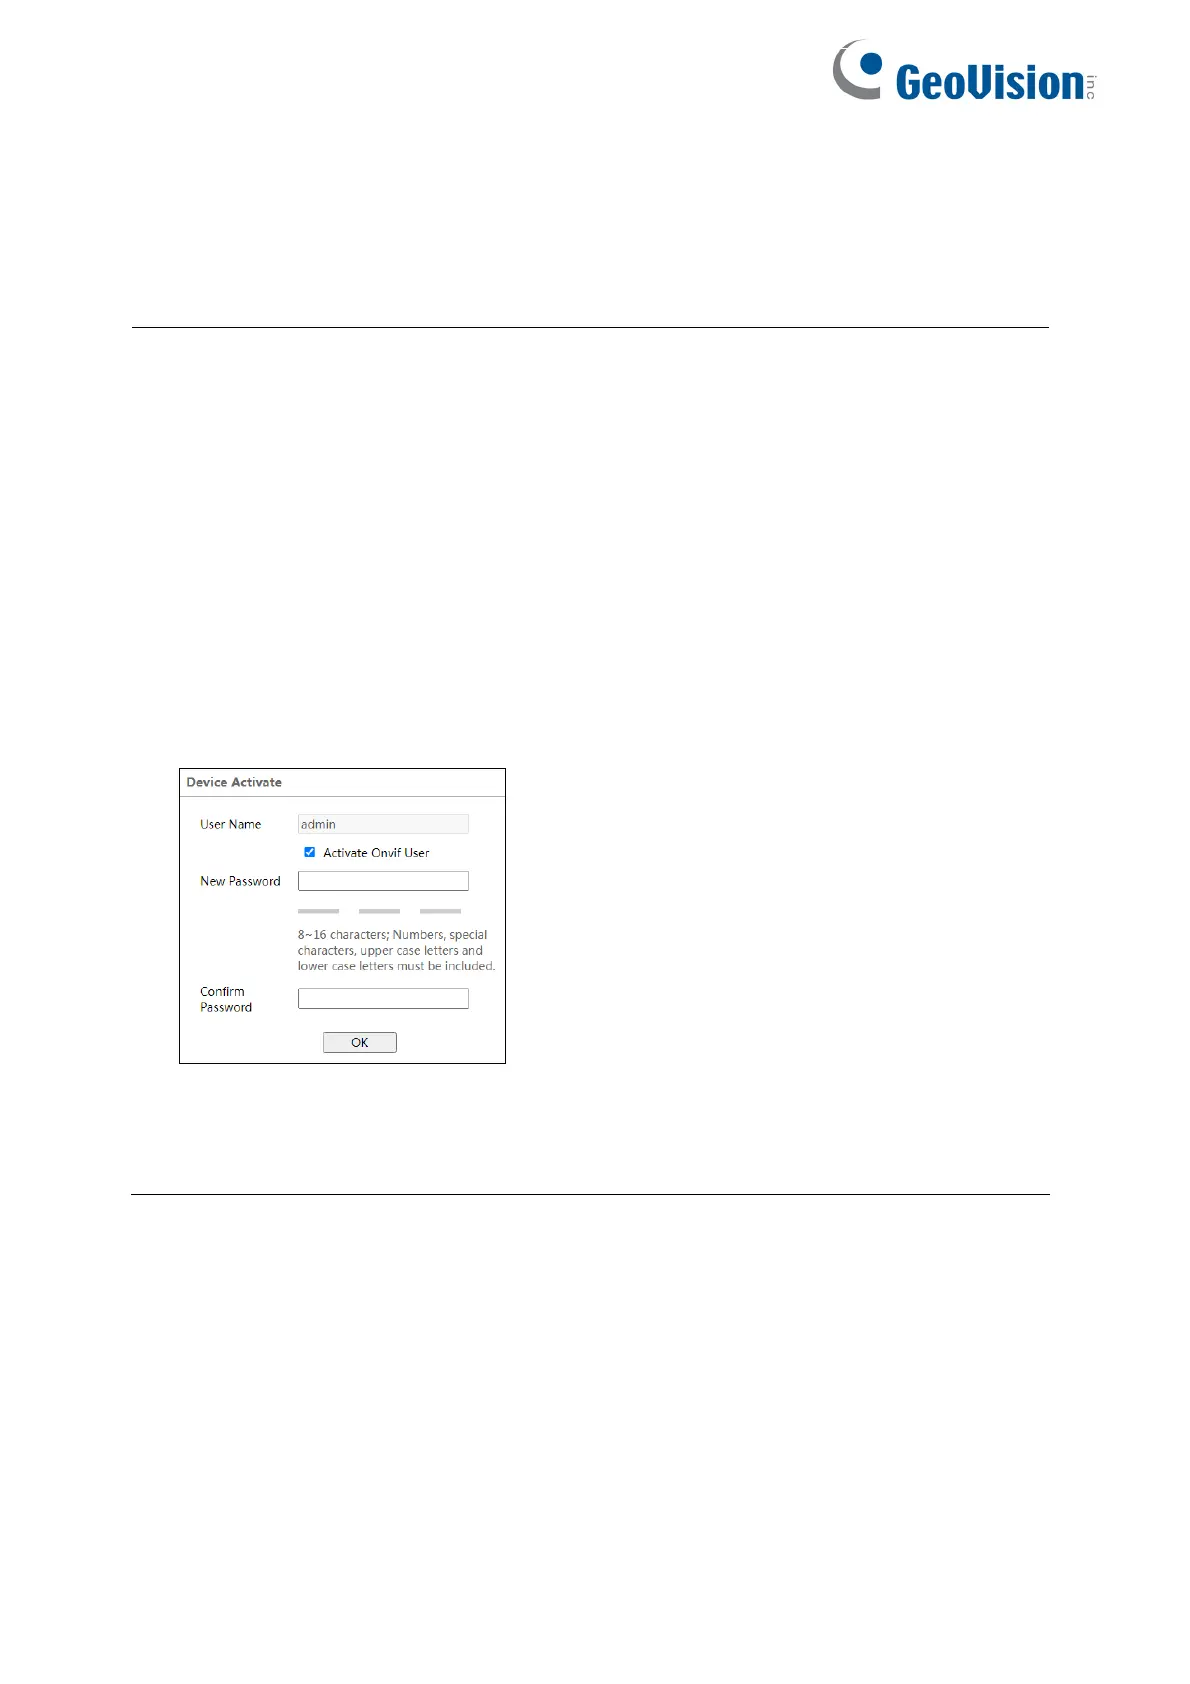
3. If the first-time user accesses the camera’s Web interface on the browser directly by
using the IP address found in GV-IP Device Utility, the following dialog box will apear.
If “Activate Onvif User” is enabled, the ONVIF user can be activated simultanously for the
third-party platform connection via ONVIF, using the default username and set password set
above to connect.

 Loading...