GHL Doser Resource Guide
Release 07/2018
17
6. Once you have selected your network, the SSID, Encryption, etc. boxes, will be
automatically filled in for you.
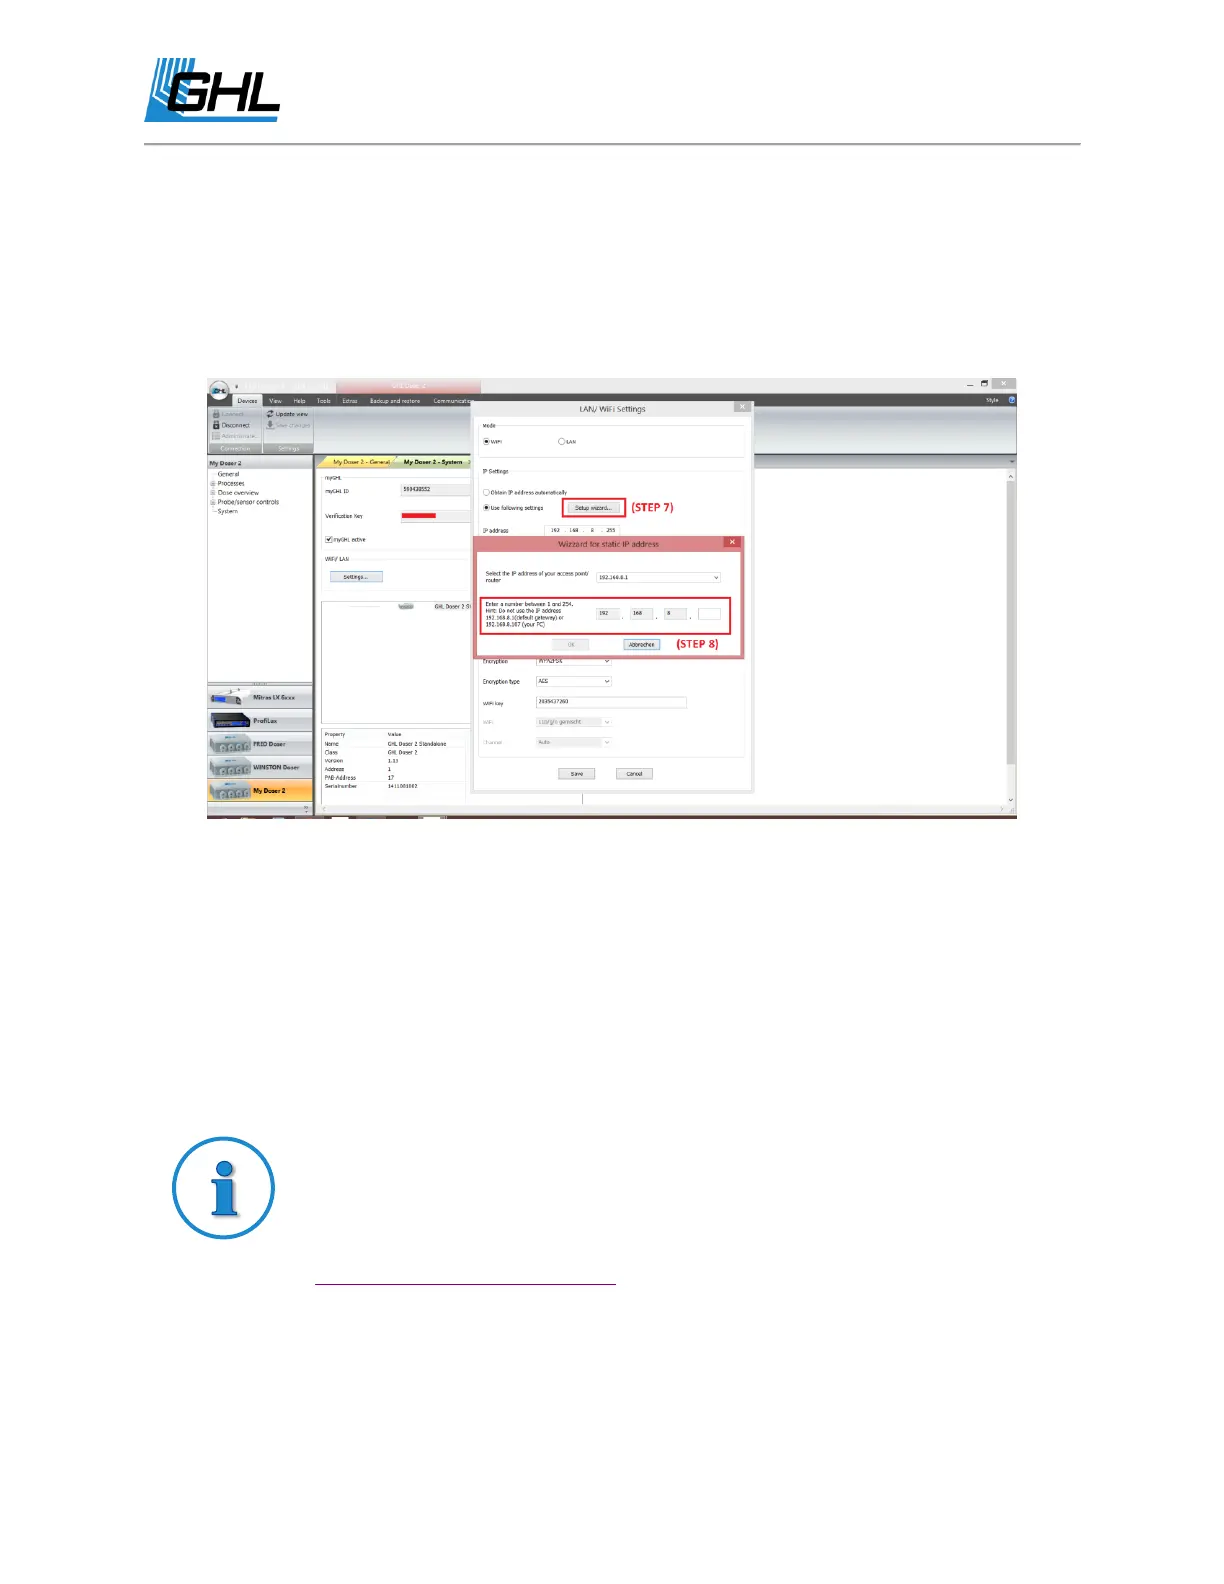
7. Click on “Setup Wizard”
8. In this screen, you are asked to select a number between a range. You will see that the
first three boxes have already been filled in for you. The last box is where you will input
any number within the specified range.
9. Write down the complete number as shown in the four boxes. This is your doser’s IP
address which will be used to wirelessly connect to the doser using any PC, smartphone,
and/or tablet.
10. Click “OK”, then “SAVE”.
11. To apply your WiFi network settings, click “DISCONNECT” at the top-left part of the GCC
screen.
12. The logo on the doser will go white for a couple minutes, then turn blue. When it goes
back to blue, the doser has connected to your Wi-Fi network.
You can view our Wi-Fi setup how-to video by clicking the link below.
Static IP Wi-Fi Setup:
https://youtu.be/PHCcd1tQQrA