- 31 - System Hardware Installation
3-5 Installing the PCI Expansion Card
• Voltagescan bepresentwithin theserverwheneveranACpowersource isconnected.This
voltage is present even when the main power switch is in the off position. Ensure that the
system is powered-down and all power sources have been disconnected from the server prior to
installingaPCIcard.
Failure to observe these warnings could result in personal injury or damage to equipment.
• ThePCIriserassemblydoesnotincludearisercardoranycablingasstandard.ToinstallaPCI
card,arisercardmustbeinstalled.
Follow these instructions to PCI Expansion card:
1. Remove the securing special screw on the riser bracket.
2. Remove the thumbscrew on the riser bracket
3. Liftuptheriserbracketoutofsystem.
4. Remove the slot covers from the riser bracket.
5. OrientthePCI-EcardwiththeriserguideslotandpushinthedirectionofthearrowuntilthePCI-E
cardsitsinthePCIcardconnector.
6. SecurethePCI-Ecardwiththescrew.
7. Reverse the steps 3 - 1 to install the riser bracket.
5
6
4
3
3
2
2
1
4
5
6
6
4
5
Available on Selected Models
PCIe x8
PCIe x8
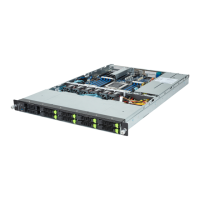
R181-2A0/R181-N20
 Loading...