© TheGigRig Ltd 2013
12
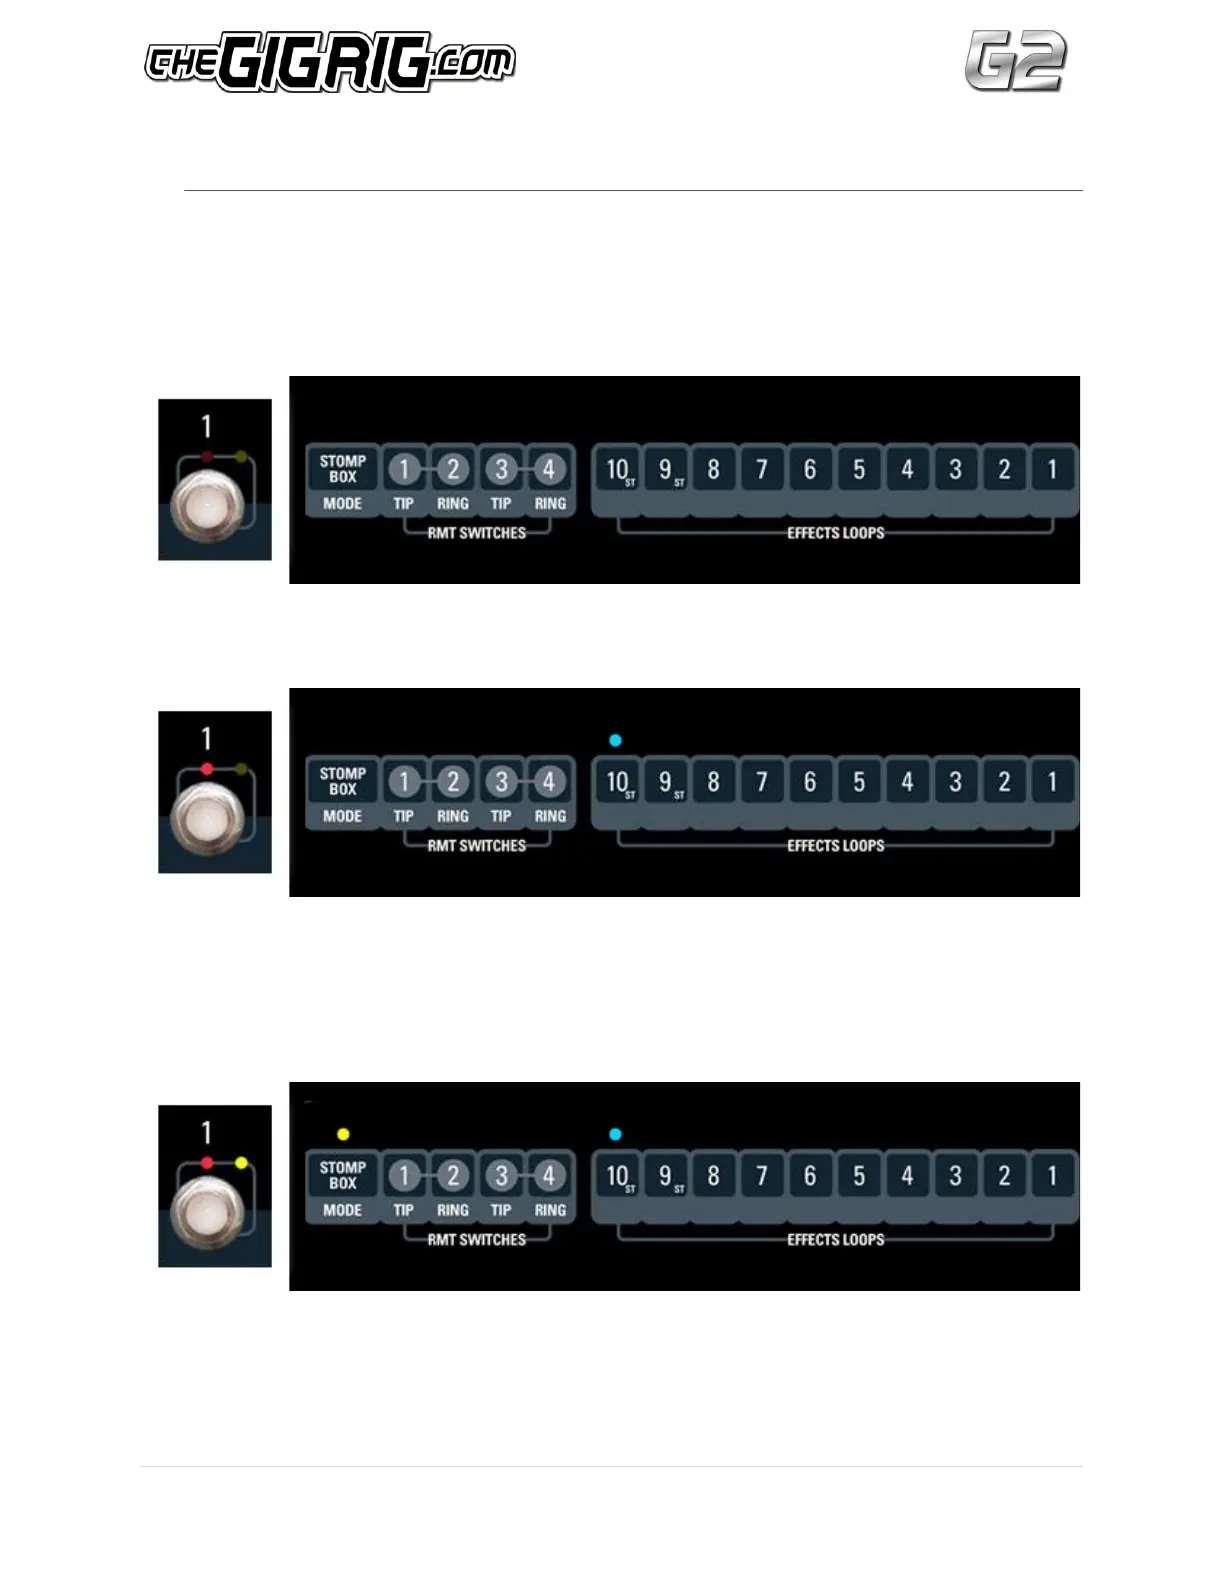
6. STOMP BOX MODE
One of the features on the original Pro14 that was universally loved was STOMP BOX
MODE, which could be set up on either the top or the bottom rail of presets. We’ve taken
this feature one step further with G2, so instead of this feature only being available on either
rail, you can now choose ANY preset to be in STOMP BOX MODE.
Here’s how it works
1. Here is preset 1. No lights are on so it is off. (well duh!)
2. Press preset 1 and the red LED comes on above the footswitch. You might want this
preset to be your delay sound which might be in loop 10, so you press LOOP 10 on the
EFFECTS LOOPS panel. Loop 10 turns on indicated by the blue LED so you can
clearly see what has been selected.
3. Now press the STOMP BOX MODE button. The yellow LED above the footswitch lights
up telling you that preset 1 is set up in STOMP BOX MODE. The yellow led above the
STOMP BOX MODE will also light up indicating that STOMP BOX has been selected
for this sound. This preset is now set up in STOMP BOX MODE.