WindSonic Doc No 1405 PS 0019 Issue 28 November 2019
13
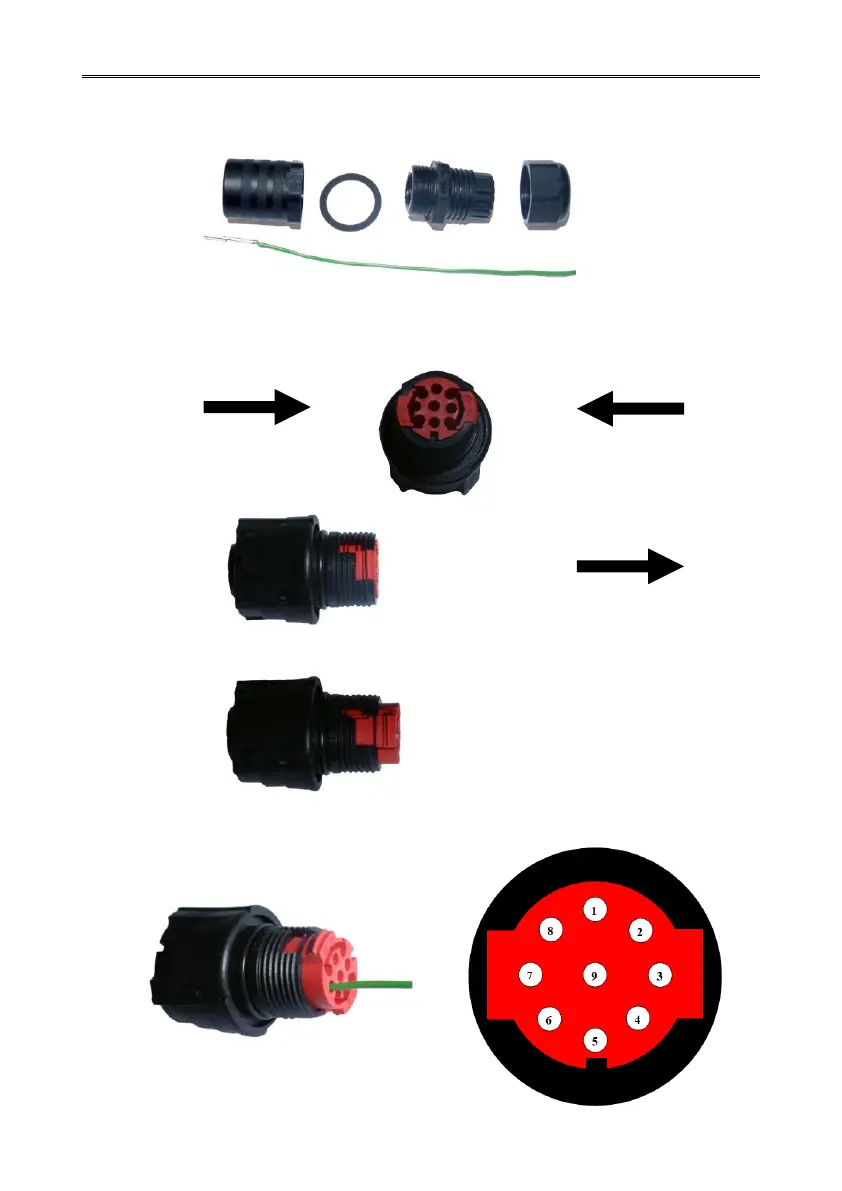
Connector Assembly.
Put the parts on the cable in the order as shown below.
Whilst squeezing the red retainer in the direction of ARROWS A, pull in the direction of
ARROW B.
A A
B
Your connector should now resemble the connector in the picture below.
Insert each contact pin until you feel a slight click. If you have inserted the contact into the
incorrect hole it can be removed at this point by simply pulling it out. Please note there will
be some resistance.
Rear View of Connector