18
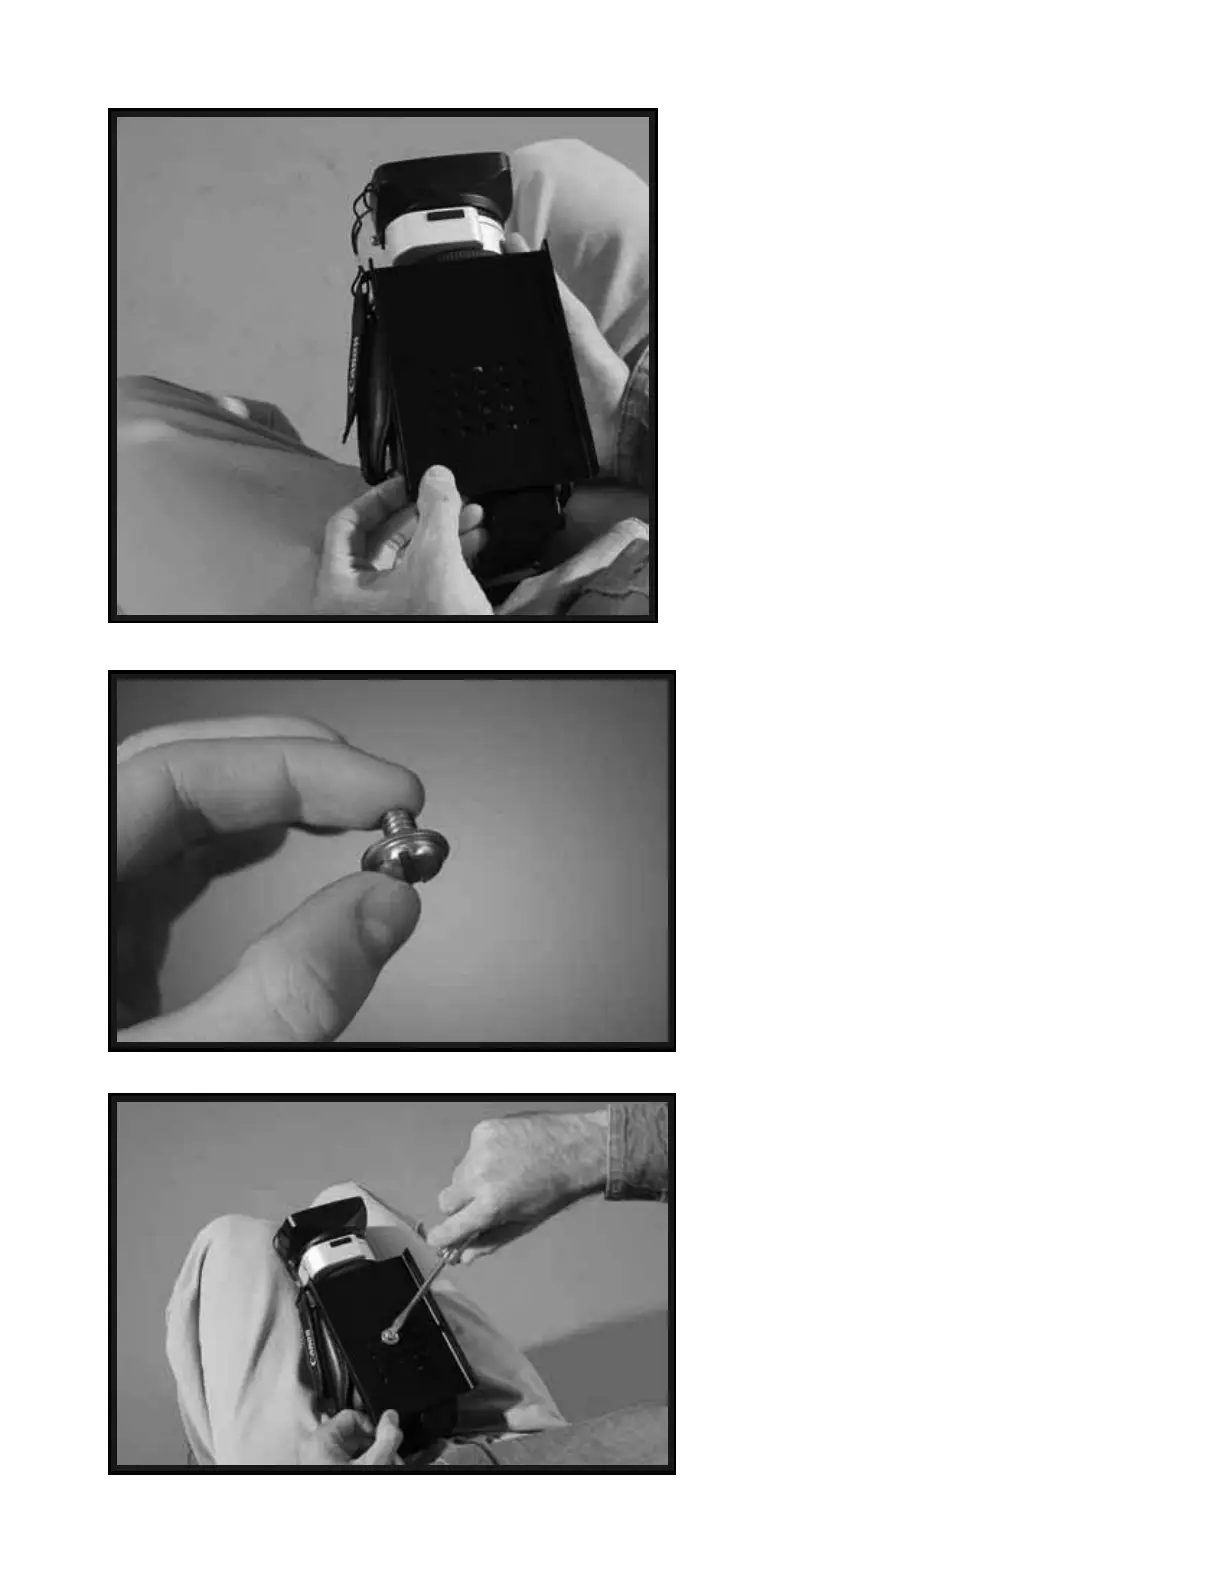
Make sure the HEAD PLATE is in
alignment and square with the bottom
of the your Camera, and make sure the
“Threaded Insert” on the base of your
Camera is aligned with one of the
“Mounting Holes” in the HEAD
PLATE.
NOTE: If you have a Video Camcorder or
Film Camera that is larger than the one used
in this Manual, then you might wish to first
find the true front to back center of gravity
of your Camera by rolling the base of your
Camera on a pen until it is balanced upon
the pen, then mark this point on your
Camera’s side with a small piece of tape or
a grease pencil, and then use this marking
to center the HEAD PLATE over your
Camera’s center of gravity.
Now use a CAMERA MOUNTING
SCREW and ¼” WASHER to attach the
HEAD PLATE to your Camera.
NOTE: If the shorter CAMERA
MOUNTING SCREW does not work
then try the slightly longer CAMERA
MOUNTING SCREW. Also try using
more than one ¼” WASHER or no ¼”
WASHERS at all if you have trouble with
this mounting procedure.
*** You can use a 3/8” MOUNTING SCREW
and 3/8” WASHER with the 4000 Pro.
With your Camera base side up in your
lap and with the HEAD PLATE in place,
use a flat head screwdriver to secure the
HEAD PLATE to your Camera using the
CAMERA MOUNTING SCREW and ¼”
WASHER combo you have just selected
.
WARNING: Do Not Overtighten this
Screw. Overtightening could break
the “Threaded Insert” on your
Camera base.
36
37
38