19
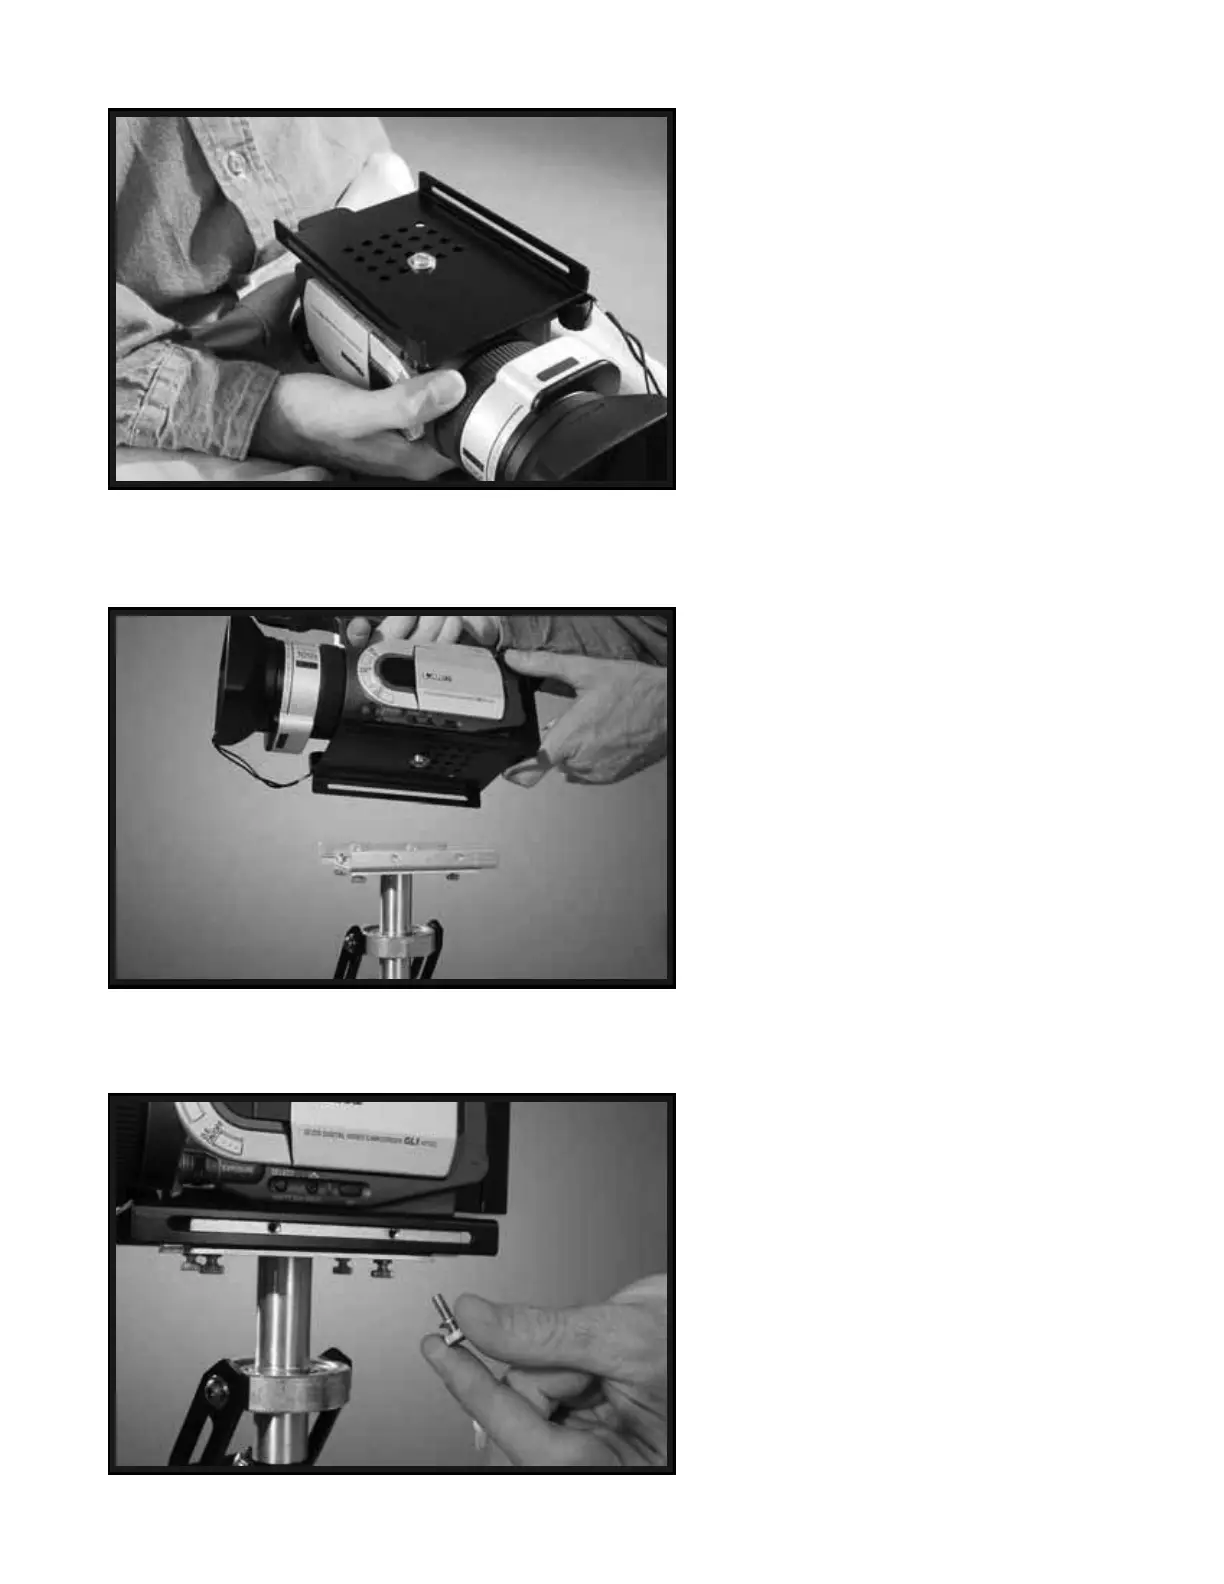
If all is correct, your Camera and HEAD
PLATE should now be attached to each
other securely as shown in Photo # 39.
NOTE: If you can easily rotate the HEAD
PLATE on the base of your Camera, even
though you have adequately tightened the
CAMERA MOUNTING SCREW, and you
do not feel comfortable tightening the
CAMERA MOUNTING SCREW any
more, then you should think about using
some sort of a flexible “Gasket” between
your Camera base and the HEAD PLATE.
You could use rubber tape, or a square flat
piece of rubber that you create by cutting
up an old rubber dishwashing glove for
example.
NOTE: Also, you could install a “Quick
Release Plate” (not provided) between your
Camera base and the HEAD PLATE at this
time if you wish. We recommend the Bogen
3270, or 3273 “Quick Release Plates”. The
Bogen 3273 is good for longer Cameras.
Now securely place and center your
Camera and the attached HEAD PLATE
on top of the MID PLATE as shown in
Photo # 40 and Photo # 41.
Insert and secure the four remaining
BRASS THUMB SCREWS through the
slots in the HEAD PLATE and into the
“Threaded Inserts” in the sides of the
MID PLATE.
At this point you should have four
BRASS THUMB SCREWS securing
the HEAD PLATE to the MID PLATE
as in Photo # 42.
39
40
41