EasyManuals Logo

Glow-worm Ultracom 24cxi Installation And Servicing

Glow-worm Ultracom 24cxi
68 pages
To Next Page IconTo Next Page
To Previous Page IconTo Previous Page
Page #56 background imageLoading...
Page #56 background image
56
15 Replacement of Parts
15.10 Viewing Window
For access, refer to section 15.1.
Refer to diagram 15.5.
Remove circlip.
Remove steel washer.
Remove glass.
Remove bre washer.
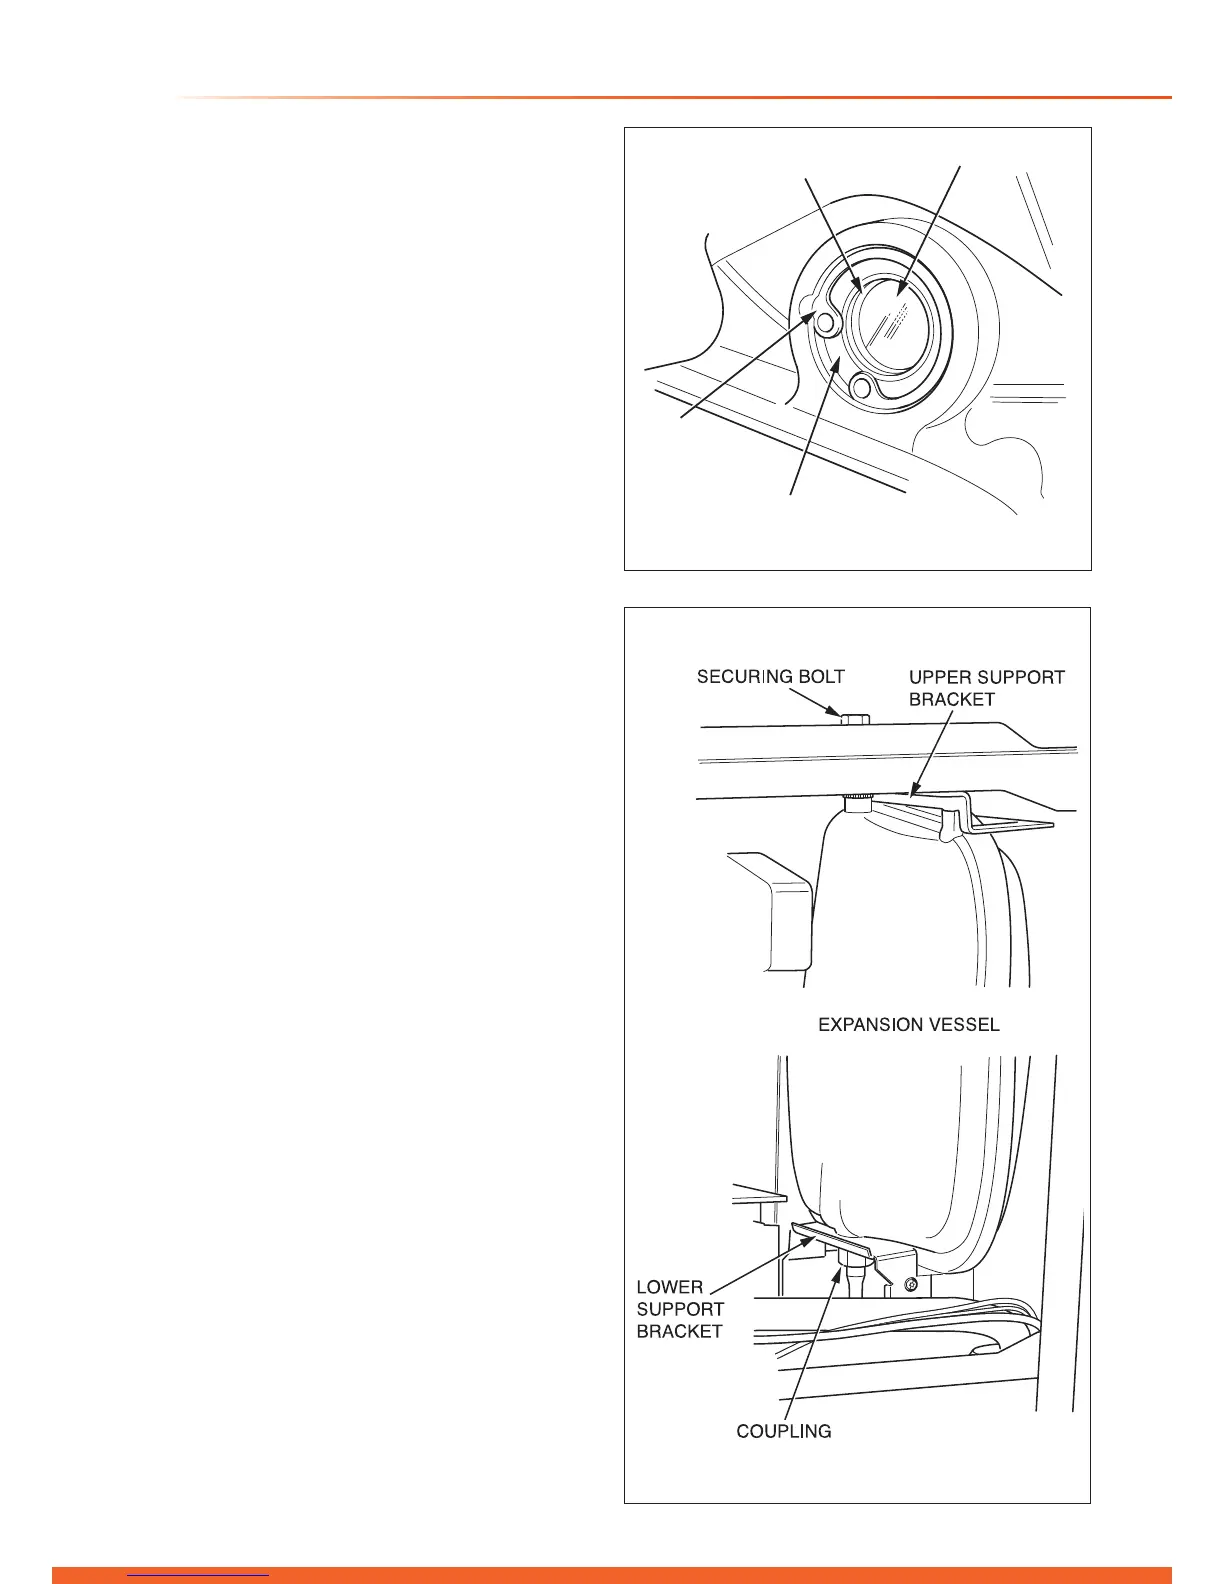
15.11 Expansion Vessel
For access, refer to section 15.1.
Drain the boiler heating circuit as described in the appropriate
section of 15.1.
Undo the coupling at the base of the vessel, see diagram
15.6.
While holding the vessel remove the securing bolt on the top
panel of the boiler. Remove upper support bracket.
Fit a new gasket between the expansion vessel and coupling.
Rell, vent and pressurise the boiler.
Diagram 15.6
13279
Diagram 15.5
13278
FIBRE WASHER
GLASS
STEEL WASHER
CIRCLIP

Other manuals for Glow-worm Ultracom 24cxi

Questions and Answers:

Question and Answer IconNeed help?

Do you have a question about the Glow-worm Ultracom 24cxi and is the answer not in the manual?

Glow-worm Ultracom 24cxi Specifications

General IconGeneral
ManufacturerGlow-worm
ModelUltracom 24cxi
CategoryBoiler
TypeCondensing
Output24 kW
Efficiency89.3%
Fuel TypeNatural Gas
Efficiency RatingA
ERP RatingA
MountingWall Mounted
Max. Working Pressure3 bar
Warranty2 Years
FuelNatural Gas
Flow Temperature Range30°C - 80°C
Dimensions740mm x 418mm x 300mm

Related product manuals