Compass™ Service Manual
GP600-SM 11 RevA02062006
Flash Code 3 (Right Motor Fault) or 4 (Left Motor Fault):
Checking the Motors
Disconnect the motor and measure the motor resistances at the motor connectors, using an ohm meter. If
the resistance is more than 1 ohm or less than 1 milliohm, the motor is probably faulty.
NOTE: If, when rotated, the motor seems fine sometimes and not others, then the motor
brushes and/or commutator are faulty. Replace the motor.
Checking the Circuit Breaker
1. Disconnect both batteries.
2. Set your ohm meter to the base unit of ohms.
3. Place your lead across the two terminals on the circuit breaker; your reading should be under 20 ohms,
indicating that the circuit breaker is operational.
Flash Code 5 (Right Park Break Fault) or 6 (Left Park Break Fault):
Checking a Right or Left Park Break Fault
1. Check that the motor/park brake connectors are securely plugged in.
2. Check that the contacts in the connectors are not damaged or corroded.
3. Check the park brakes using an ohm meter by disconnecting each park brake and measuring the
resistance at the connectors. If the resistance is more than 100 ohms or less than 20 ohms, the park
brake is probably faulty.
Flash Code 7: Joystick Fault
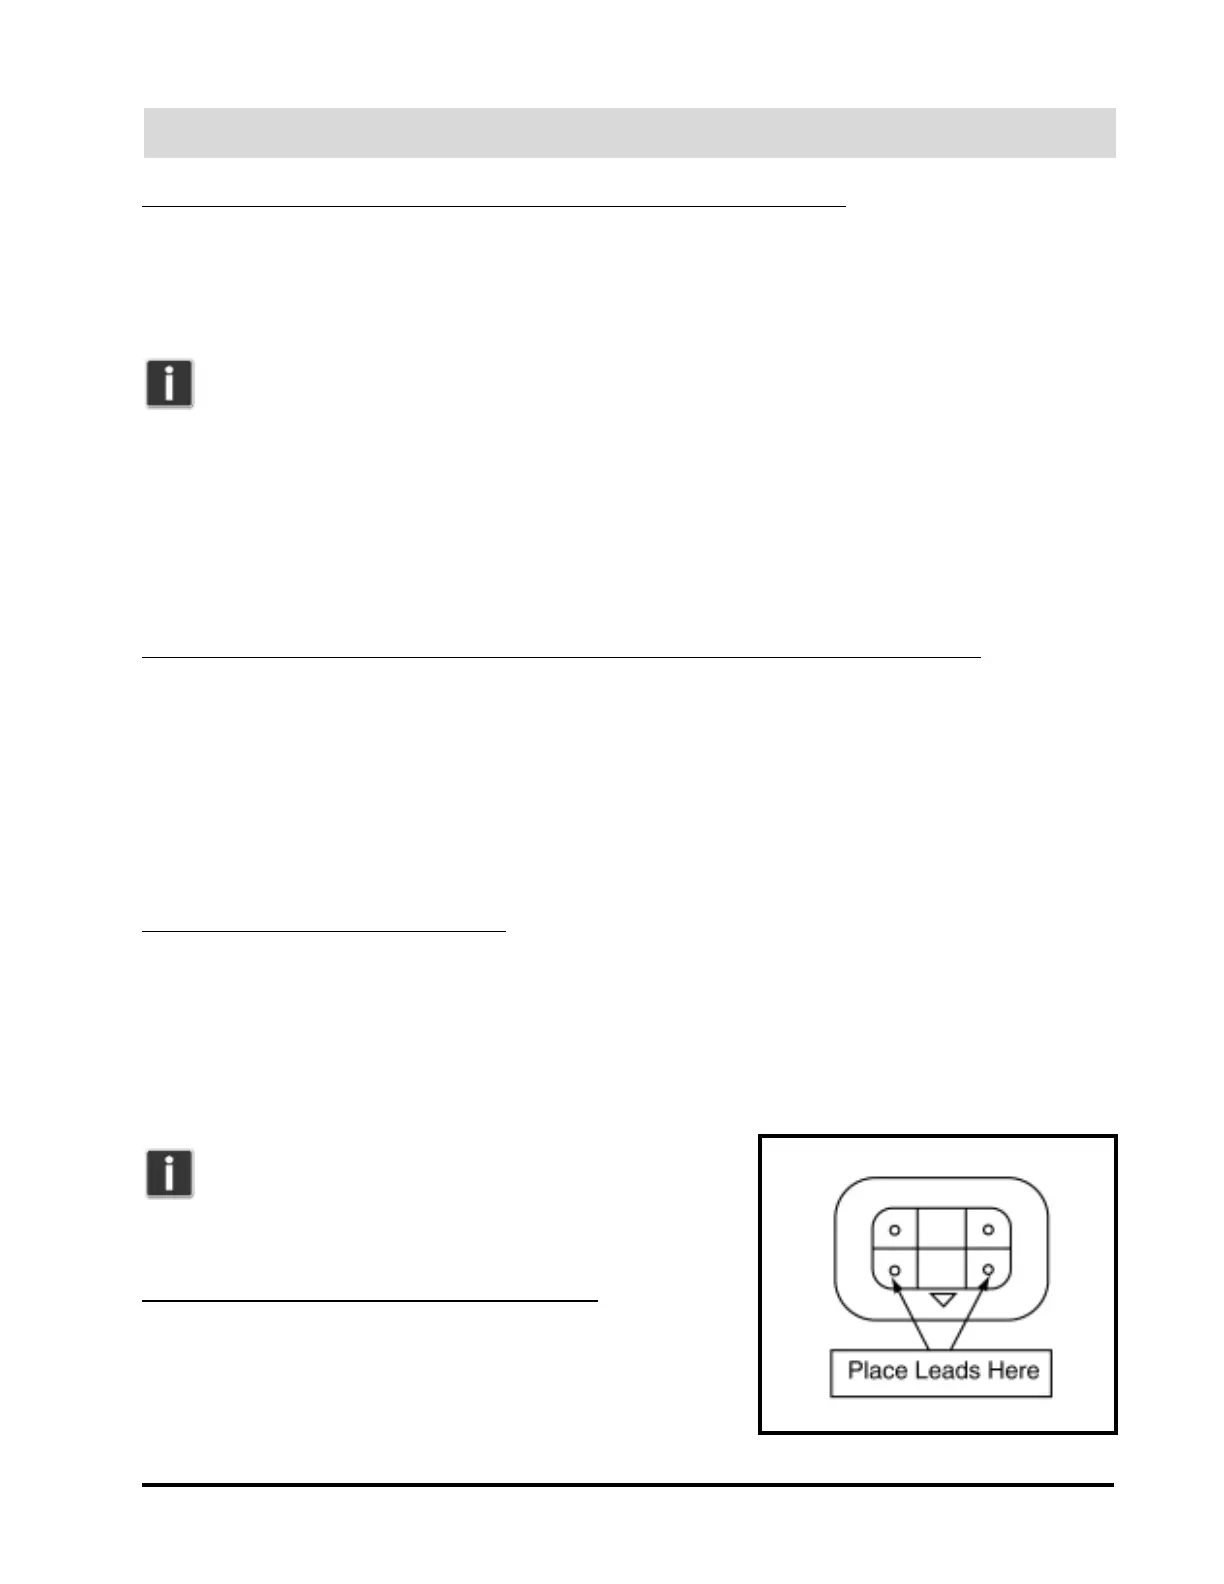
Checking the Jumper Harness Voltage
1. Unplug the joystick cable from the jumper harness.
2. Plug the jumper harness into the control module.
3. Place ohm meter leads into the jumper harness at the open end, where the two pins are closest to the
down arrow; you should see source voltage. See figure B.
Note: If you see source voltage but the joystick’s
LEDs do not light, then the joystick needs to be
replaced.
Flash Code 8: Control Module Fault
Checking the Controller Module Voltage
1. Unplug the jumper harness from the control module.
2. Plug the joystick cable into the control module.
3. Place ohm meter leads into the two outer pins on the control
module; your reading should be 24 volts or more.
Figure B. End of Jumper Harness