Commander III
2-43
above) shows the list number of the displayed fault
and the number of faults in the display.
If there is more than one active fault in either display,
press the right arrow button (►) to move forward
through the list of faults or press the left arrow button
(◄) to move backwards through the list of faults.
Press the number 8 button while viewing either display
to recheck the controller for the most recent faults (for
example, if an emergency stop button is pressed when
either display is being viewed, the fault may not be
displayed until the number 8 button is pressed).
Press the number 4 button while viewing the fault
history display to clear all faults from the controller
memory. A delete conrmation box will appear. Press
the OK button to conrm permanent deletion of the
faults. Press the ESC button to retain the faults in
the history. Any current faults will remain in the active
faults display, and will appear in the fault history
display when the number 8 button is depressed.
Main menu
Screen setup
087
120G+
Screen Setup
Select Language
Backup Controller
Memory
Restore Controller
Memory
TFT=60C/140F
PCB=46C/114F
100
English
1
ºC
100
100
%
120G+
11/15/12
13:16:32
English
Select Language: Press the number button indicated
in the data box to select the default language. Press
the ▲ or ▼ navigation buttons to scroll through the
various languages available. The controller will always
startup with the selected default language. Pressing
the ◄ and ► navigation buttons simultaneously on
any display will toggle between the default language
and English. An English translation for each selected
language is indicated in the top border of the display.
Display Brightness: Press the number button
indicated in the data box to adjust the brightness level
of the display screen. Press the ▲ or ▼ navigation
buttons to increase or decrease the setting. Lighting
levels range from a minimum of 4 to a maximum of
100. The display lighting will dim after 5 seconds of
inactivity (see Temperature Monitor section below).
Press any navigation button to return to the selected
lighting level.
Temperature Monitor: The lower left section is a
temperature monitor for the display (TFT) and the
internal display components (PCB). If temperatures
exceed benchmark levels, the back lighting level of
the display is reduced. Ambient light is also monitored
(sensor located above number 5 button) to determine
the back lighting level of the screen and on/off
operation of back lighting for the elevation and steer
buttons. The ambient light level will range from 1 to
255.
Date/Time Stamp Section: Used to apply a date
and time stamp to the occurrence of controller faults.
The date is listed as month/day/year and time is hour/
minute/second based on a 24 hour clock. The time
clock does not adjust for daylight saving changes.
Press the number button indicated in the data box
to select the month. Press the ▲ or ▼ navigation
buttons to change the setting. Press the ◄ or ►
navigation buttons to select the previous or next
setting. Press the OK button to store and deselect the
setting.
006G+
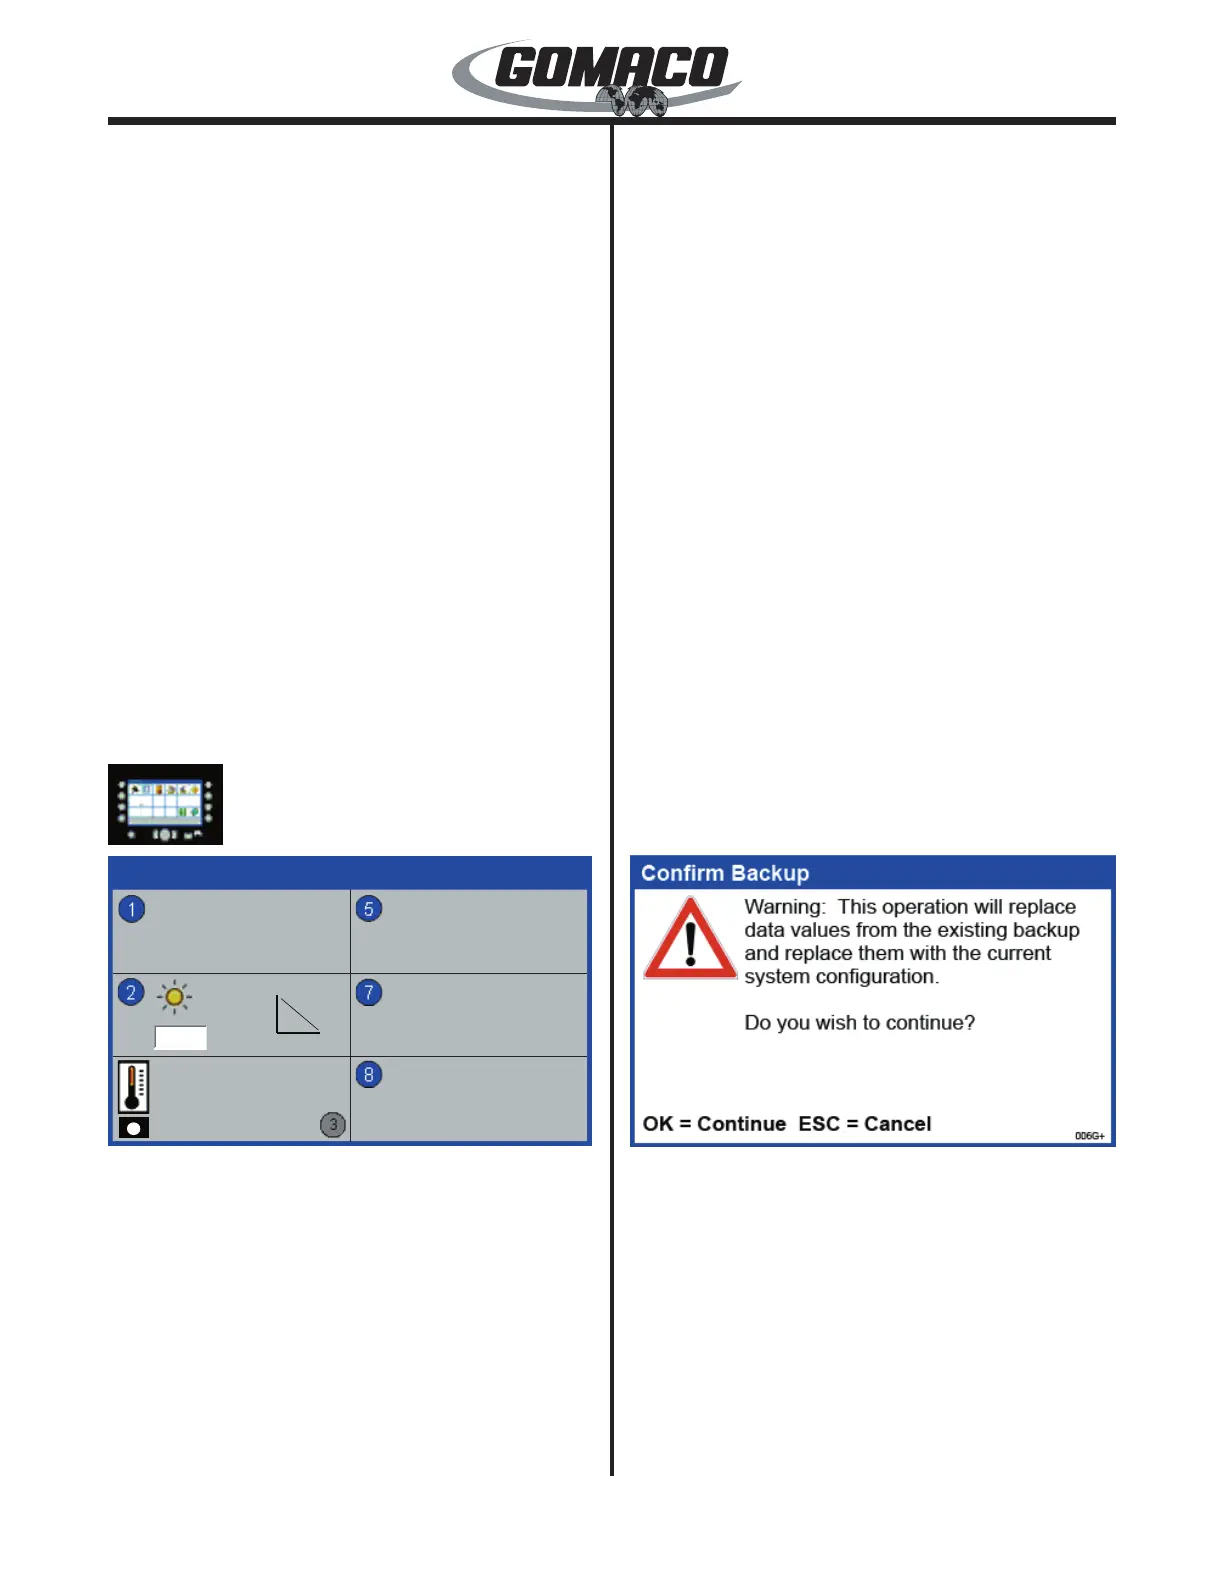
Backup Controller Memory: Once all adjustments
have been made in the G+ controller, press the
number 7 button to backup the settings and store
them in computer memory. A Conrm Backup screen
will appear. Press the OK button to continue with the
backup. Press the ESC button to retain the currently
stored adjustments.
 Loading...