22 23
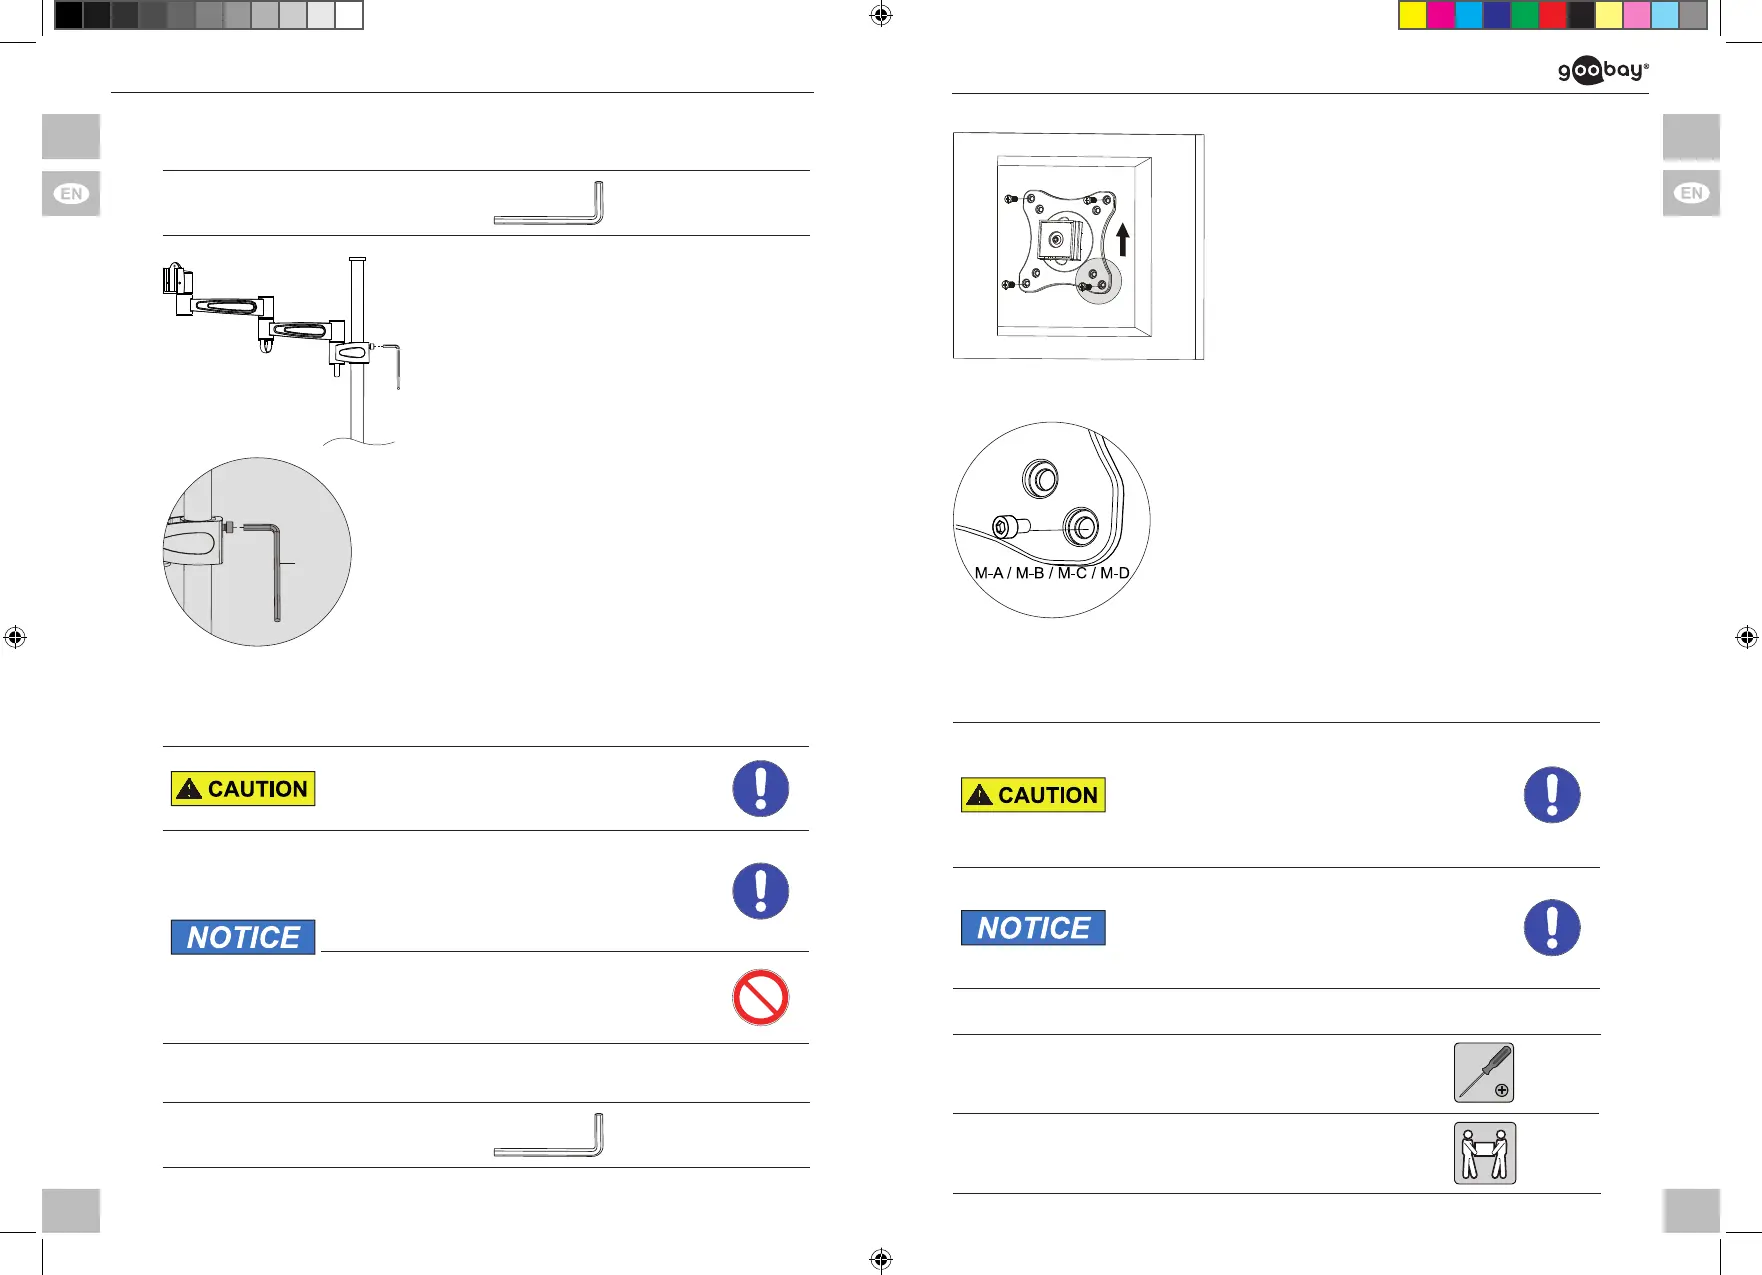
4.3 Adjusting the pole assembly
Allen key 5mm F
1. Loosen the Allen screw a few by
turning it counterclockwise.
2. Adjust the preferred height.
In this case act by the size of your at
screen.
Fi g. 14: Adjusting the pole assembly
3. Fix the Allen screw with the VESA
Plate holder by turning it clockwise.
F
Fi g. 15 : Fixing the VESA Plate
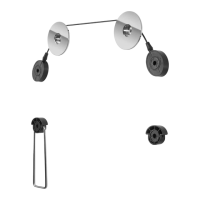
4.4 Flat screen mounting
Risk of injury by tripping and falling
>> Place, transport and install product, parts
and acceories in a safe way.
Risk of material damage by improper
procedure
>> Only use moderate force when tightening
the screws in order to avoid damaging
threads.
>>
>>
NEVER set the screen on the front during
installation!
Donotdamagetheatscreenbytoo
long screws.
Ta b . 1 8 : Mounting the at screen
Allen key 3mm D
1. Leantheatscreen
vertically on a soft, large
surface or a wall and
protect it of scratches and
overturning.
Fig . 16: Flat screen mounting 1
2. Attach the VESA Plate (B) with
thescrewsontheatscreens
back side.
Installing is only possible with at at
screen backs.
Fi g . 17: Flat screen mounting 2
4.5 Attaching,xingandlockingtheatscreen
Risk of injury by tripping and falling
>>
>>
Place, transport and install product, parts
and acceories in a safe way.
When working with burdens, secure your-
self and the working place, let a second
person help you.
Risk of material damage by inappropri-
ate ambient conditions
>> Keep enough space around product and
to the whole system to ensure proper
ventilation and mobility.
Ta b . 1 9 : Attaching, xing and locking the at screen
Phillips screwdriver
Second person
63496+63497_manual_V4.indd 22-23 28.05.2018 16:02:48