EasyManua.ls Logo

Gorenje Classico BO73CLI - User Manual

Gorenje Classico BO73CLI
44 pages
Print Icon
To Next Page IconTo Next Page
Loading...
Instructions for Use
GB IE MT
Question and Answer IconNeed help?

Do you have a question about the Gorenje Classico BO73CLI and is the answer not in the manual?

Overview

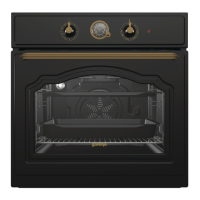
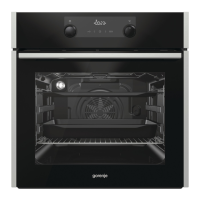
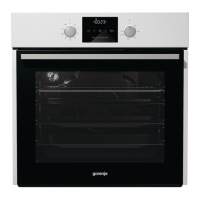
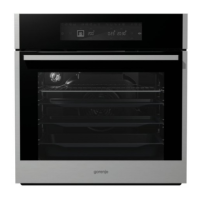
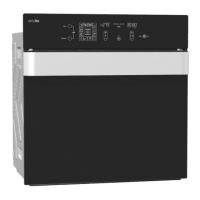
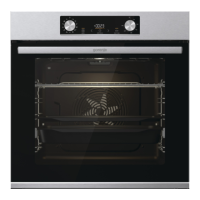
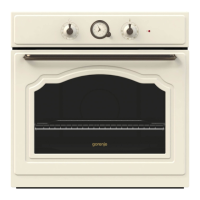
This document describes the Classico Electric Oven, a household appliance designed for conventional food preparation.

Function Description

The Classico Electric Oven offers a variety of cooking modes to suit different culinary needs:

  • Oven Lighting: With some models, there are two interior lighting lamps (one on the upper part of the back wall, and an additional lamp on the middle of the right side wall). Oven lighting can be selected independently or turns on automatically with other operation modes.
  • Upper / Lower Heater: This mode uses both upper and lower heating elements to radiate heat uniformly. It is suitable for baking pastry and meat on a single shelf level.
  • Large Grill (▼▼▼▼): Activates both the upper heater and the infra heater simultaneously. The infra heater on the oven ceiling provides direct heat, while the upper heater boosts the effect. This mode is ideal for grilling smaller meat chunks like steaks, roasts, chops, and ribs, or for utilizing the entire oven grid area.
  • Grill (▼▼): Only the infra heater is activated. This mode is suitable for grilling smaller quantities of items such as toasted sandwiches, grill sausages, or toasting bread.
  • Grill & Fan: Combines the infra heater and the fan for simultaneous operation. It's appropriate for grilling meat, large chunks of meat, or poultry on one shelf level, as well as for cooking food au gratin or browning.
  • Hot Air and Lower Heater: This mode activates the lower heater and the hot air fan simultaneously. It is particularly convenient for making pizza, moist or heavy pastry, fruit cakes (leavened dough), short pastry, or cheesecakes.
  • Hot Air: The round heater and the fan operate simultaneously, circulating hot air consistently around the food. This mode is suitable for roasting meat and baking pastry on several shelves simultaneously. Cooking temperatures should be set lower than with conventional modes.
  • Defrosting (*): In this mode, only the fan operates, circulating air without any heating. It's used for slow defrosting or thawing of frozen food.
  • Lower Heater and Fan: The lower heater and the fan operate simultaneously. This mode is used for baking low leavened dough and preserving fruit and vegetables. It's recommended to use the first shelf position from the bottom and shallow baking trays to allow warm air circulation.
  • Upper and Lower Heater Plus Fan (+): Both upper and lower heaters operate simultaneously with the fan, enabling uniform circulation of hot air. This system is suitable for various pastries, defrosting food, and drying fruits and vegetables. Preheating is required, and cooking on a single shelf level is recommended for best results.
  • Lower Heater / Aqua Clean (–): Heat is radiated only by the lower heating element. This mode is used for baking/cooking the bottom side of a dish more thoroughly (e.g., moist pastry with fruit filling). The lower heater can also be used for oven cleaning.

Important Technical Specifications

  • Power Connection: The appliance must be connected to the power mains by an authorized service technician or expert, adhering to relevant regulations and standards.
  • Voltage: The appliance is suitable for photovoltaic electrical power under conditions where the electrical voltage is 220VAC - 240VAC with semi-tonic frequency 50Hz.
  • Power Cord: The length of the power cord should be adjusted so that in case of pulling load, the ground wire is strained later than the voltage wires.
  • Oven Bulb: For models with an oven bulb, it is a replacement part with specifications: socket E 14, 230 V, 25 W, 300°C. These bulbs are special purpose lamps not suitable for household room illumination.
  • Rating Plate: Basic appliance information is found on the rating plate, visible on the edge of the oven door when open.

Usage Features

  • Program Timer: Setting the time of day is essential for appliance use. Oven operation is only possible once the time is set. The program timer allows for:
    • Setting the Stop Time: The oven will stop operating at a preset time (up to 15 hours from current time).
    • Setting Delayed Start: The oven will automatically start and stop at preset times (stop time up to 12 hours from current time, cooking duration up to 3 hours).
    • Minute Minder: Functions as an alarm upon expiry of a set time (up to 3 hours).
  • Control Lamps:
    • Red Lamp: Indicates when oven heaters are operating; turns off when the selected temperature is reached.
    • Backlit Knob Dials (some models): The dial of an activated knob lights up when a function is selected.
  • Cooling Fan (some models): A built-in fan cools the appliance housing and control panel.
  • Shelf Levels: Accessories (grid, shallow, and deep baking tray) can be inserted at four levels. Shelf levels are numbered consecutively from the bottom.
  • Telescopic Pull-Out Guides (some models): Installed on the second, third, and fourth levels, these guides facilitate inserting and removing trays. They can be partially or completely pulled out.
  • Oven Accessories: Includes a grid for food containers or direct food placement, a shallow baking tray for pastry and cakes, and a deep baking tray for meat, moist pastry, or as a drip tray.
  • Grilling and Browning: Requires careful attention due to high temperatures. Use protective kitchen gloves and special meat tongs. Do not roast empty cookware. Preheat the oven for five minutes when using the infra heater.
  • Spit Roasting (some models): Features a rotating spit with a detachable handle and two forks for fixing meat. Insert the spit into the special support frame and secure the meat. A deep tray should be placed below as a drip tray. The infra heater operation is controlled by a thermostat.

Maintenance Features

  • General Cleaning: Disconnect the appliance from power and let it cool before cleaning. Do not use steam or high-pressure cleaners, harsh abrasive cleaners, sharp metal scrapers, or steel wool.
  • Appliance Housing Front: Clean with liquid non-abrasive detergents and a soft cloth. Do not apply detergent directly.
  • Aluminum Surfaces: Clean with non-abrasive liquid detergents for such materials and a wet cloth. Do not apply cleaner directly or use abrasive sponges. Avoid contact with oven cleaning sprays.
  • Stainless Steel Front Panels (some models): Clean with a mild cleaner (soapsuds) and a soft sponge. Avoid abrasive or solvent-based cleaners.
  • Lacquer-Coated and Plastic Surfaces (some models): Clean knobs and door handle with a soft cloth and liquid detergents for smooth lacquer-coated surfaces. Avoid oven cleaning sprays.
  • Oven Interior: For regular cleaning, use a conventional detergent. For stubborn stains, use a glass or shallow baking dish with 0.6 l of water and the lower guide. After thirty minutes, wipe off food residues.
  • Oven Interior Ceiling (some models): Some models have a foldable upper infra heater for easier cleaning. Disconnect power and ensure the heater is cooled before lowering.
  • Accessories: Wash baking trays, grids, etc., with hot water and conventional detergent.
  • Special Enamel Coating: The oven interior, door, and baking trays have a smooth, resistant enamel coating for easier cleaning.
  • Removing Telescopic Pull-Out Guides: To clean oven side walls, the guides can be removed by rotating them inwards from the lower end and then removing them from the upper holes. Clean with conventional cleaners; do not wash in a dishwasher or grease them.
  • Removing Inside Door Glass (Premium Full-Glass Door): The door glass can be removed for cleaning. Slightly lift the supports on the left and right side of the door, then pull them away from the glass. Hold the door glass by the lower edge and lift it to remove. The third inside glass (some models) can also be removed. Reassemble in reverse order, ensuring markings on the door and glass are aligned.
  • Removing Wire Guide Racks: To clean oven side walls, the wire guide racks can be removed by holding the lower end, rotating inwards, and removing from the upper holes. Clean with conventional cleaners. Re-hang in reverse order.
  • Removing and Replacing Oven Door with Single-Axis Hinge (some models):
    • Conventional Closing: Fully open the oven door and rotate the stoppers.
    • Soft Closing System (GentleClose): If fitted, flip the door latches back to a 90° angle. Slowly close the door until latches align with slots, then lift and pull from both hinge slots. Remove attachment clips and rotate them back to their initial position. Ensure hinges are correctly placed when reassembling. Always make sure hinge attachment clips are firmly seated to avoid injury.

Gorenje Classico BO73CLI Specifications

General IconGeneral
BrandGorenje
ModelClassico BO73CLI
CategoryOven
LanguageEnglish

Related product manuals