FLUSHING GUIDELINES
WARNING
2.
Changing colors.
Use a compatible solvent.
To
reduce the risk of serious bodily inluw, including
fluid injection, always follow
the-Pressure
Rella
Procedure Warning
on
page
4
before checking, ad-
justing, cleaning or shutting down the sprayer.
I
3.
Changlng
from
water-base
to
oil-base paint.
Use
warm, soapy water, and then a compatible solvent.
4.
Changlng
from
oil-base to water-base paint.
Use
1-
CAUTION
I
a ComDatibie solvent. then warm. soaov water. and
NEVER
leave water in the sprayer if there is the any
I
chance it could freeze. Push the water
out
with com-
then ciean water.
I
.~~~~
.~
~~ .
~,~,
. ~~.
I
patible solvent. Water frozen in~the pressure control
tube prevents the sprayer from being started, and
causes
serious damage to
the
pressure control.
5.
Storage.
After
the
compatible solvent flush, relieve
pressure, but do not drain
the
compatible solvent.
When
To
Flush
1.
Flush a new sprayer
to remove the protective oil.
Vent, then soapy water, and then clean water.
Before usina water-base Daint-
use
compatible soi-
Before usina oil-base Daint.use compatible solvent.
6.
Startup after storage.
ible Solvent with soapy water, and then with clean
BeforeNfoaintush
out
the
compat-
water.
When
usina oil-based DainLflUSh out
the
compatible
solvent with the paint to be sprayed.
How
To
Flush
1.
Relieve pressure.
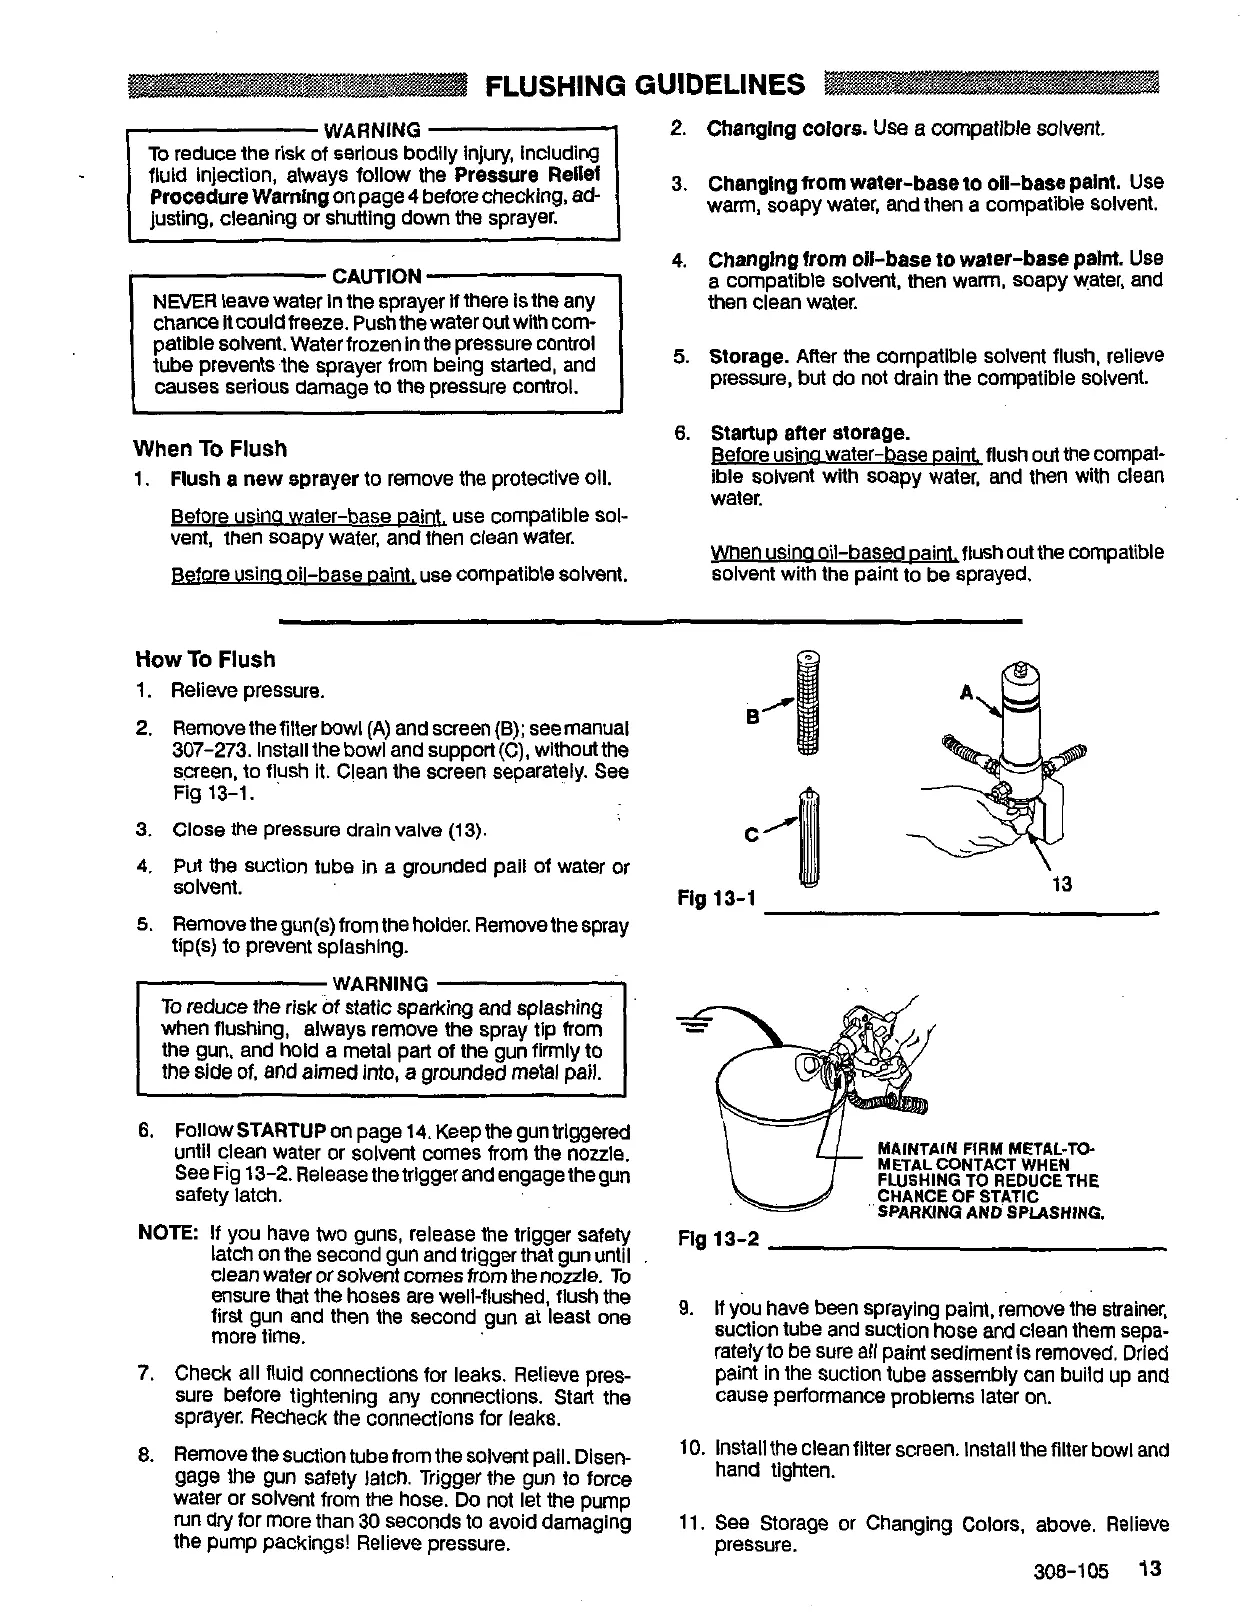
2. Removethe filter bowl (A) and screen
(8);
seemanual
307-273. Install the bowl and support
(C),
without the
screen, to flush it. Clean the screen separately. See
Fig
13-1.
3.
Close
the
pressure drain valve
(13).
4.
Put
the
suction tube in
a
grounded pail of water or
5.
Remove the gun@) from the holder. Remove the spray
solvent.
tip@) to prevent splashing.
the
gun, and hold a metal part of the gun firmly to
the side
of,
and aimed into, a grounded metal pail.
6.
Follow
STARTUP
on page
14.
Keep the gun triggered
until clean water or solvent comes from the nozzle.
See Fig 13-2. Release the trigger and engage the gun
safety latch.
NOTE:
If
you have
two
guns, release the trigger safety
ciean water or solvent comes from the nozzle. To
latch on
the
second gun and trigger that gun until
first gun and then the second gun at least one
ensure that the hoses are well-flushed, flush the
more time.
7. Check all fluid connections for leaks. Relieve pres-
sprayer. Recheck the connections for leaks.
sure before tightening any connections.
Start
the
8.
Remove the suction tube from the solvent pail. Disen-
gage
the
gun safety latch. Trigger the gun to force
water or solvent from the hose.
Do
not let the pump
the pump
packings!
Relieve pressure.
run
dry
for
more than
30 seconds to avoid damaging
Bf
Fig 13-1
13
MAINTAIN
FIRM
METAL-TO-
METALCONTACT
WHEN
FLUSHING
TO
REDUCE THE
CHANCE OF
STATIC
SPARKING
AND
SPLASHING.
Fig 13-2
9.
If
you
have been spraying paint, remove the strainer,
suction tube and suction hose and clean them sepa-
ratelyto be sure all paint sediment
is
removed. Dried
paint In the suction tube assembly can build up and
cause performance problems later on.
..
10. Install the clean filter screen. Install the filter bowl and
hand tighten.
11.
See
Storage or Changing Colors, above. Relieve
pressure.
308-105
13
 Loading...


