14 308155
Service
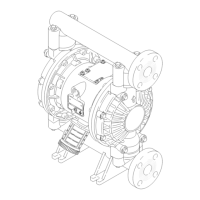
Reciprocator Repair
NOTES
D The following reciprocator repair instructions are for
Models 239882, 224741, and 224742. For Model
237653 instructions, see accompanying manual
307654.
D Clean and inspect all parts for wear or damage.
Replace parts as needed. For the best results,
always replace all the o-rings and seals when you
disassemble the pump. Repair Kit 223426 is
available. Parts included in the kit are marked with
one asterisk, for example (23*), in the text and
drawings. Always replace the seals (23*, 24*) and
the seals (16*, 44*) together.
D Assembly Tool 189305 is required for
reassembling the reciprocator.
D Loctiter 242 thread sealant and Loctiter Primer T
or Perma-Locr 115 thread sealant and
Perma-Bondr Surface Conditioner I are required.
Be sure their shelf life is within the manufacturer’s
recommendations.
Note: Use Loctiter 609 on yoke (9) and rod (12) on
page 15, step 9 only. Use Loctiter 242 or
Perma-Locr 115 on other threaded surfaces as
required.
Before you begin, drain the oil out of the reciprocator
as follows: Place the reciprocator in a drain pan, push
the piston all the way up/in, then all the way down/out.
1. Place the adapter (43) in a vise. Remove the four
capscrews (46) and the base (33). Pull the bottom
cap (32) off of the adapter. See Fig. 7. If needed,
replace the seals as described on page 12.
2. Remove the capscrew (3), nuts (36), and
lockwashers (37) on top of the reciprocator. See
Fig. 7.
3. Loosen both nuts on the fluid tube (45). Use a
wrench to rotate the tube fittings (1,58) to the side,
and remove the tube (45). Check the o-rings
(1a,58a) on the fittings, and replace them if they
are worn or damaged. Install plugs in the fittings to
prevent contamination. See Fig. 4 and the Parts
Drawing.
See Fig. 9 for Steps 4 to 13, except where noted.
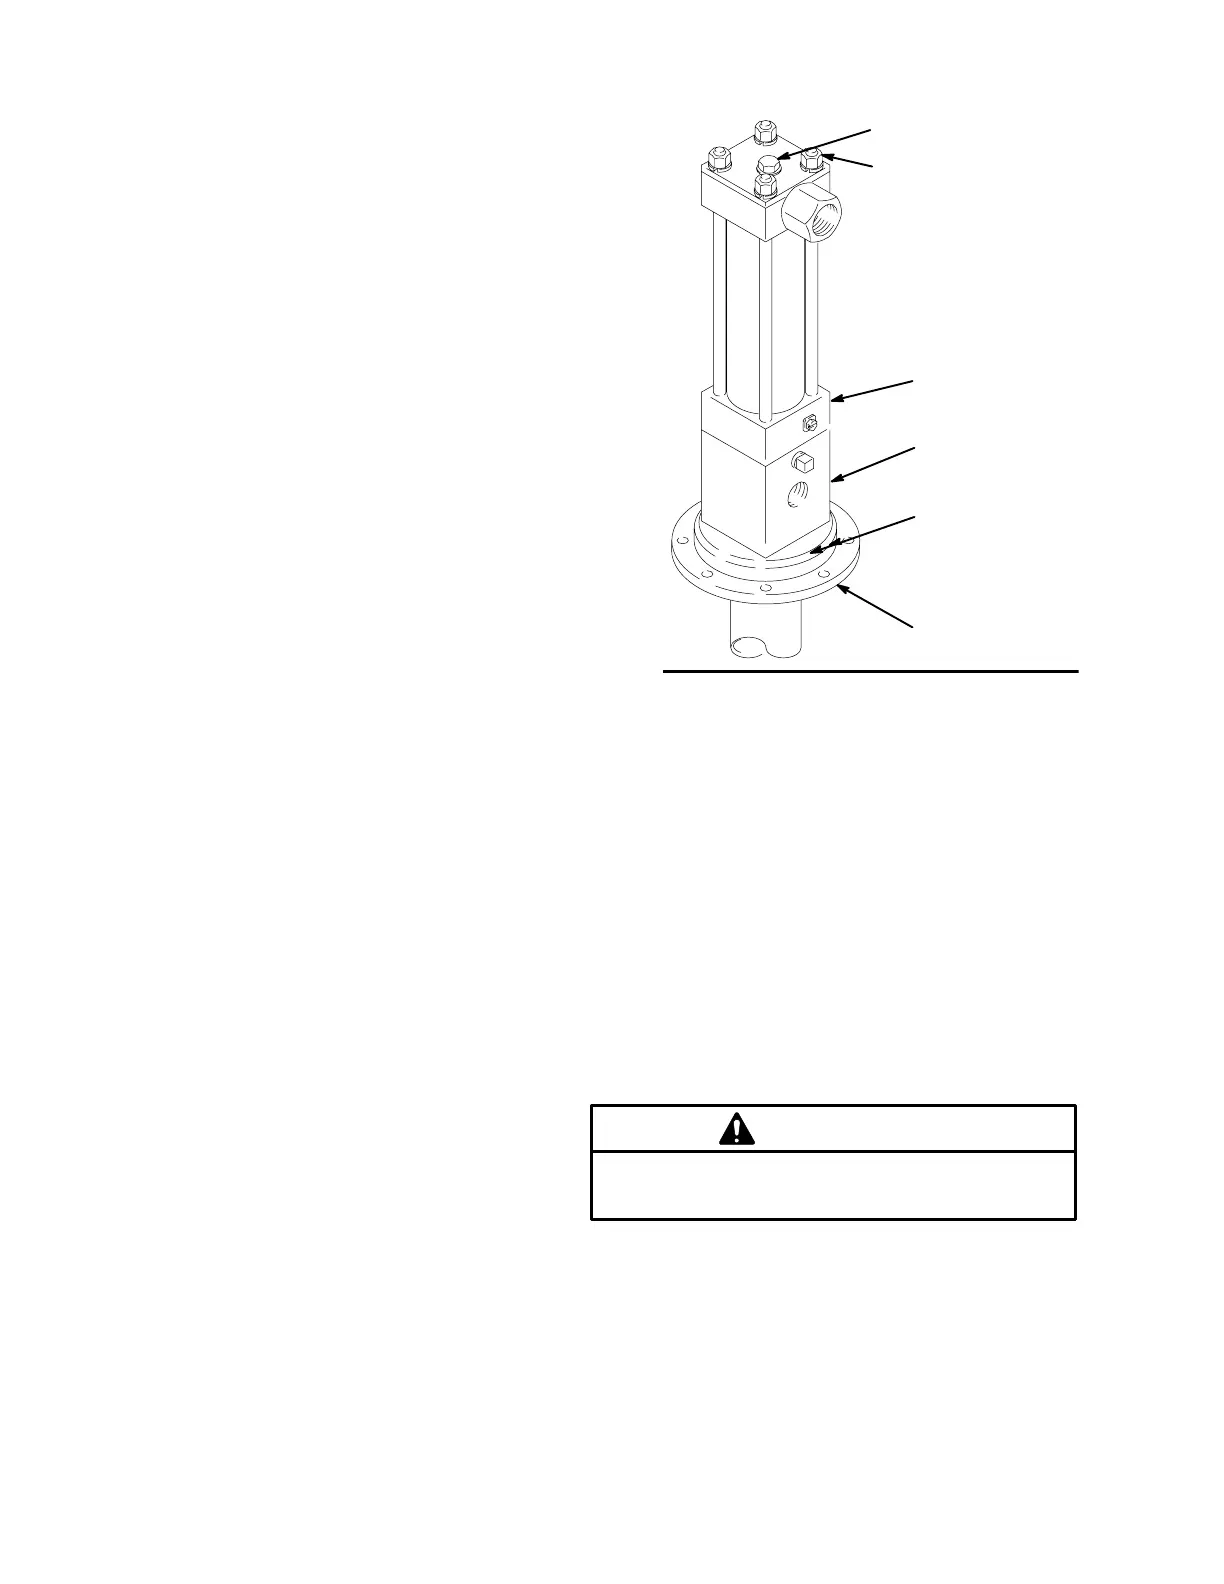
Fig. 7
43
36,37
33
32
3,39,2
46
(hidden from
view)
06146C
4. Tap on the bottom of the displacement rod (34)
with a plastic mallet to loosen the cylinder (25).
5. Grasp the spool valve assembly (31), and pull it off
the cylinder and tie rods (38). Pull the cylinder and
piston off the bottom cap (32). It is not necessary
to remove the tie rods from the bottom cap.
6. Lay the assembly on its side. Place a clean rag
around the yoke (9) to prevent losing the detent
balls. Slide the yoke sideways off the valve sleeve
(29) while holding the balls (7) and spring (6) in
place.
7. Slide the cylinder (25) off the displacement rod
(34). Hold the hex end of the displacement rod in a
vise, and use a spanner wrench in the pin holes of
the piston (22) to screw it off the rod.
CAUTION
Be careful not to scratch the outside of the dis-
placement rod or the inside of the cylinder.