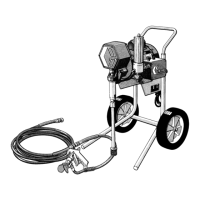
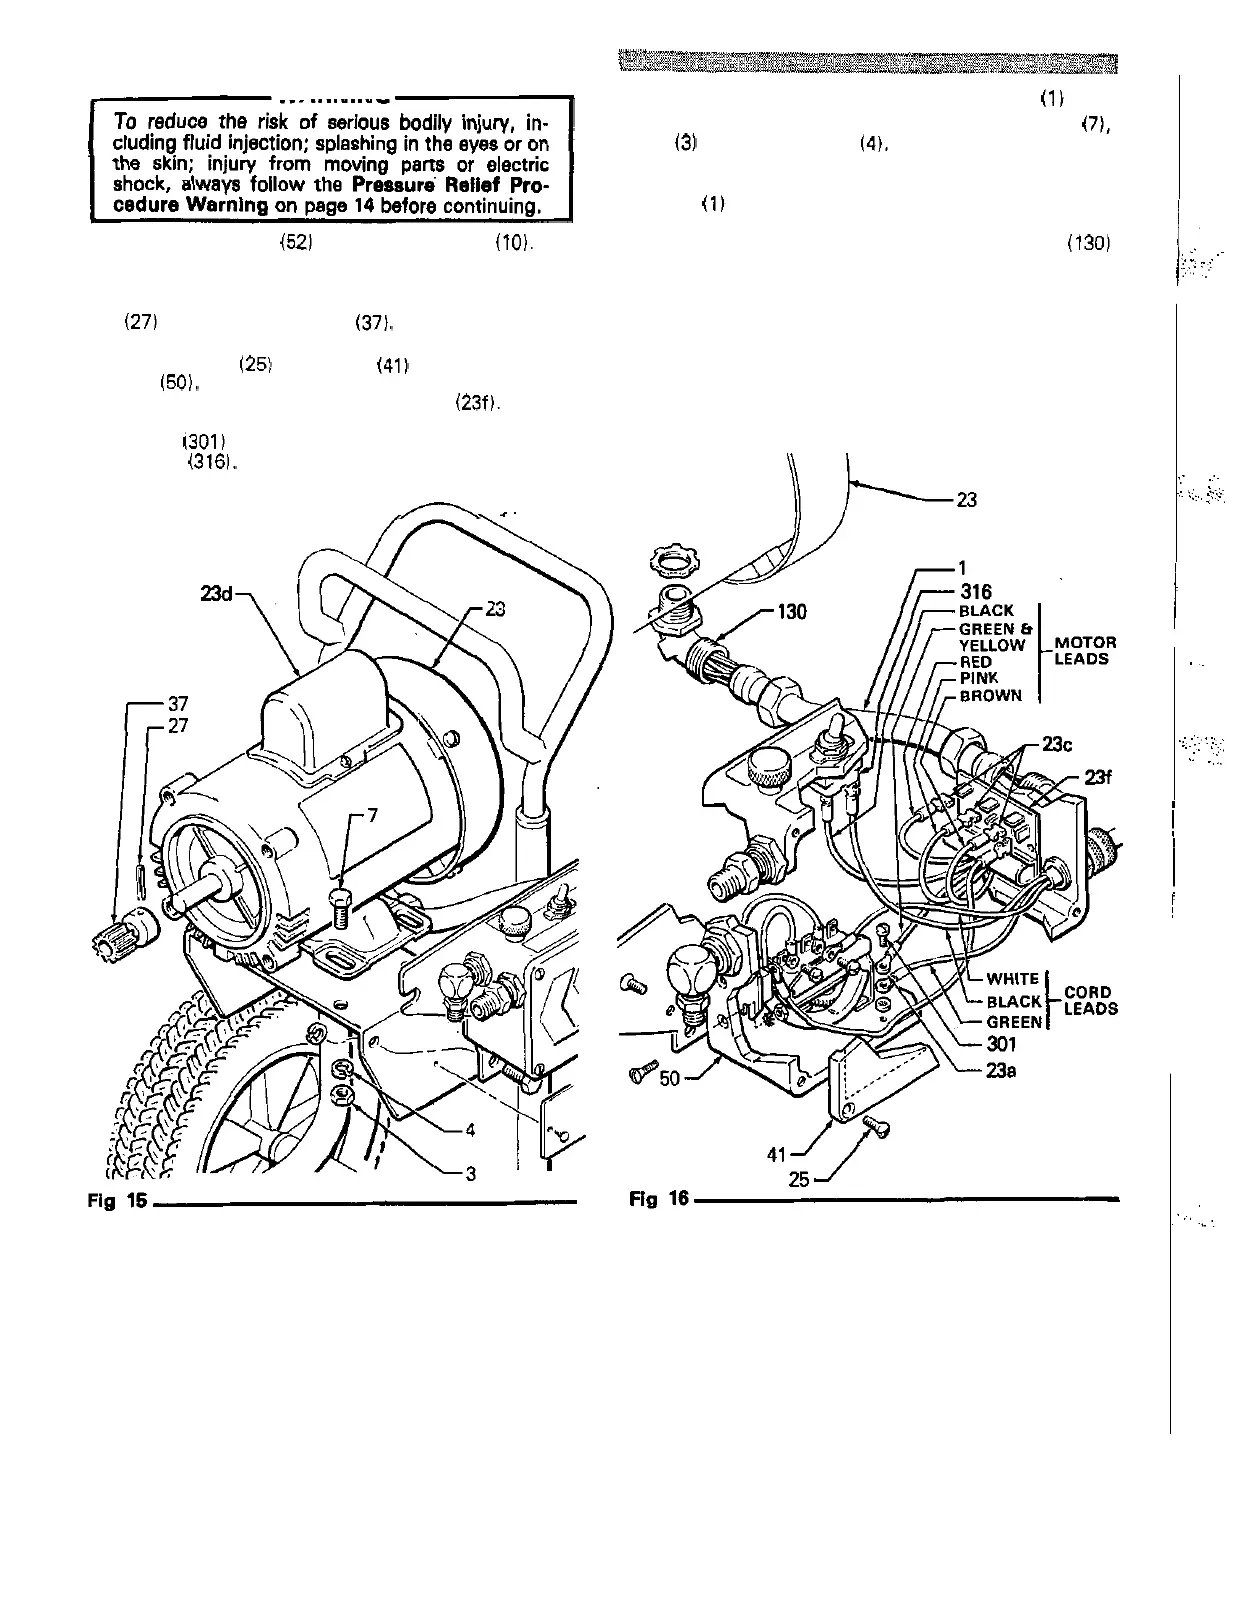
REMOVING
and
REPLACING ELECTRIC MOTOR
WARMING
Unscrew the nuts on both ends of the conduit (1) from
the connectors.
See
Fig 16. Remove the screws (7).
nuts
(3)
and lockwashers (4).
See
Fig 15. Remove the
motor from the frame while carefully guiding the wires
through the connector in the control box. Remove the
conduit
(1)
from the wires.
Disconnect the hose
(52)
from the connector
(10).
See Loosen the locknut and unscrew the connector (130)
page 19. You can leave the pump, connecting rod and Install a new motor in the reverse order.
Fig 14. Remove the drive assembly as described on from the motor, being careful to avoid twisting wires.
bearing assembled to the drive assembly. Drive out the
pin
(27) and remove the gear (37).
See
Fig 15.
control
(50).
See Fig 16.
Disconnect
the
red,
pink and
Remove screws
(25)
and
cover
(41)
from
the
pressure
brown motor leads from the circuit board
(23f). Discon
-
nect the green and yellow motor lead from the ground
-
ing screw (301) and the black motor lead from the tog
-
gle switch (316).
n.
307
-
724
17
,.:
j..:..
...
':
.,
.
:
.
,
..
,
..
.;
. . :.
,.
..~.
.,.,.
..i
::.:
.... . .
.
..
..
I
1
i
I
..
.,.,
:.:
:
<,
~
...
:
:
.
'y.
,.:
,
.
.,..
.. .
I
i

 Loading...