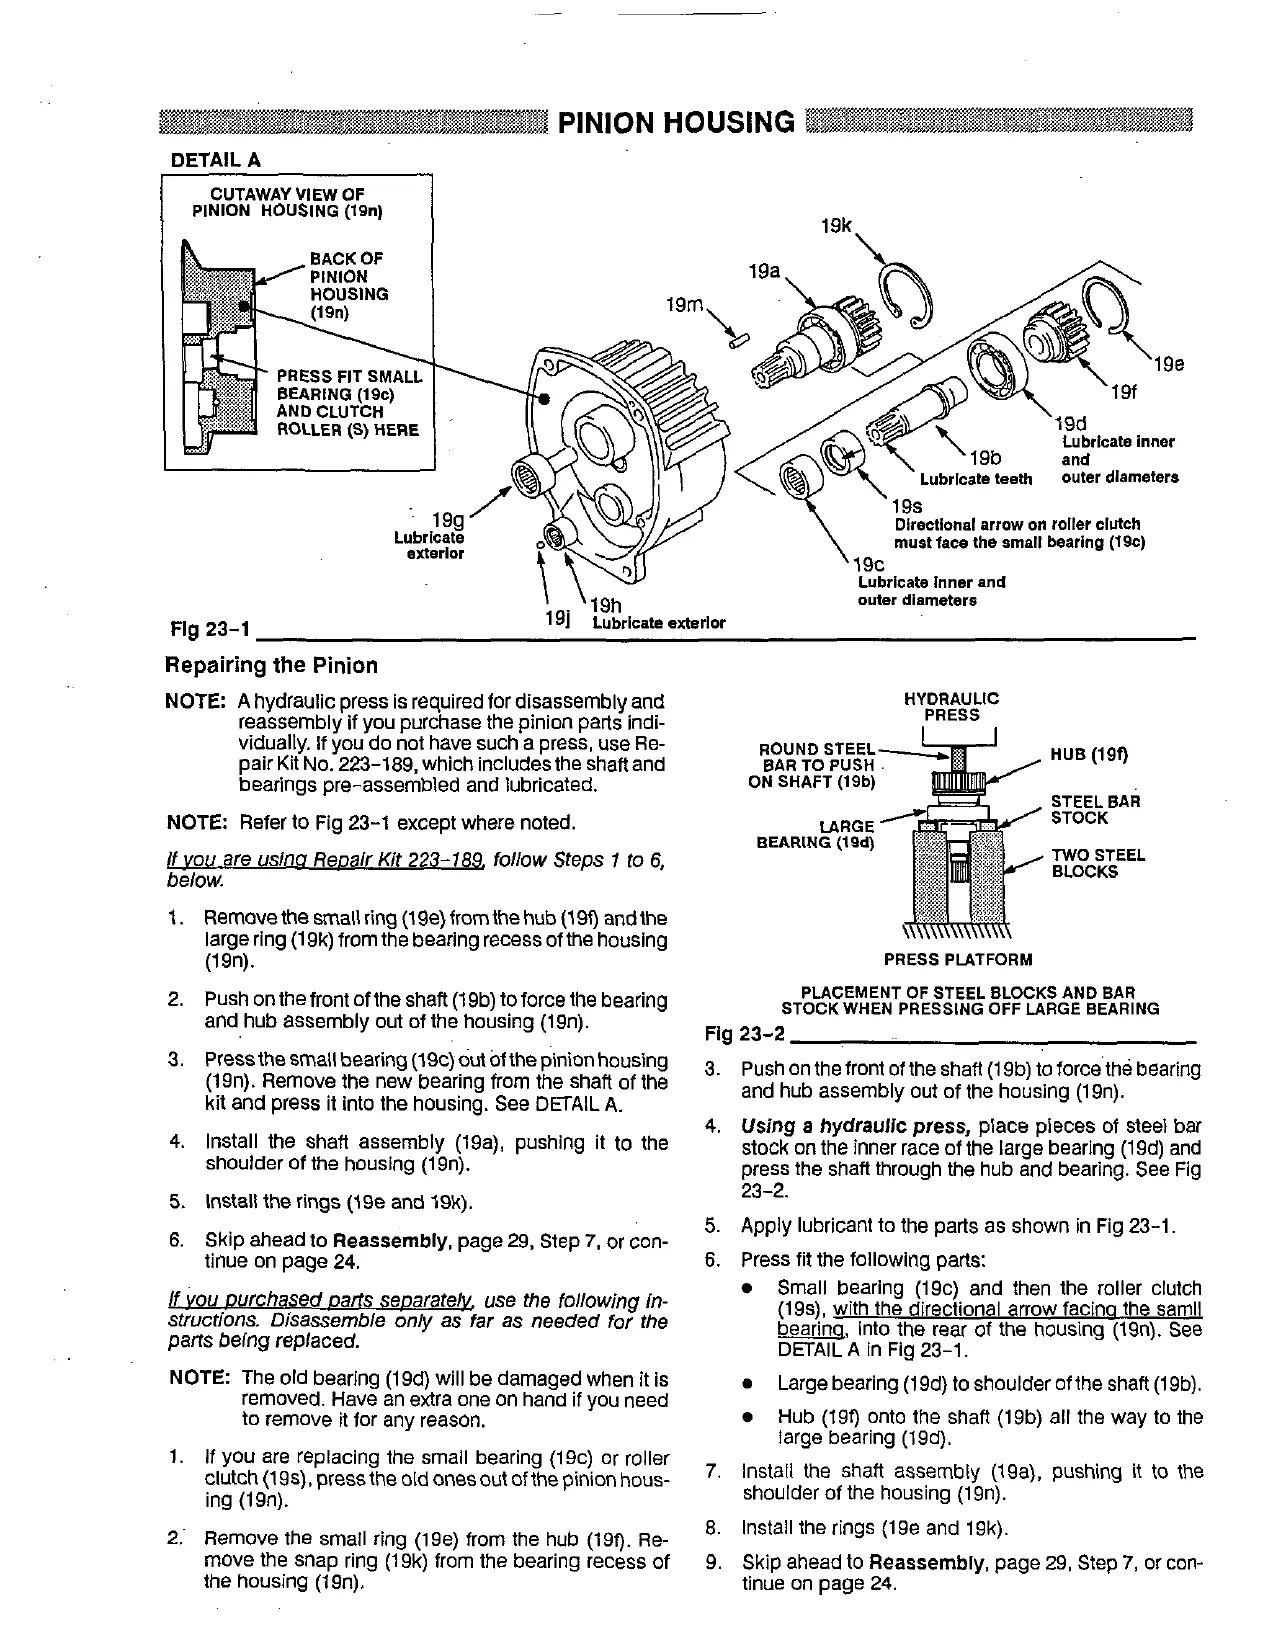
19k
Lubrlcatn inner
ectlonal arrow
on
roller clutch
us:
face the small bearing (19c)
outer diameters
Lubricate Inner and
Flg
23-1
19j
Lubrlcate exierlor
Repairing
the
Pinion
NOTE:
A
hydraulic press is required for disassembly and
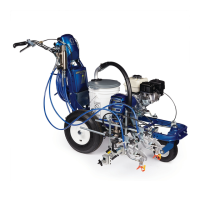
HYDRAULIC
reassembly if you purchase the pinion parts indi-
vidually. If you do not have such a press, use
Re-
pair Kit
No.
223-189, which includes the shafland
bearings pre-assembled and lubricated.
ON
SHAFT (19b)
ROUND STEEL
BAR
TO
PUSH
HUB
(199
STEEL BAR
STOCK
TWO
STEEL
BLOCKS
NOTE
Refer to Fig 23-1 except where noted.
/f
vou
are
uslna
Reoalr Kif
223-188
follow Steps
1
to
6,
below.
1.
Remove the Small
ring
(1 9e) from the
hub
(1 99 and the
large ring (1 9k) from the bearing recess
of
the housing
(19n).
PRESS PLATFORM
LARGE
BEARING
(lad)
2. Push
on
the front of the shafl (19b) to force the bearing
and hub assembly out of the housing (19n).
3. Press the small bearing (19c) out of the pinion housing
kit and press it into the housing.
See
DETAIL
A.
(19n). Remove the new bearing from the shaft
of
the
4. install the shafl assembly (19a), pushing it to the
shoulder of the housing (19n).
5.
Install the rings (19e and 19k).
6.
Skip ahead to Reassembly, page 29, Step
7,
or con-
tinue
on
page 24.
If
vou
ourchased Darts seoarafelg
use
the following
in-
structions. Disassemble
only
as far as needed for
the
parts belng replaced.
NOTE:
The old bearing (19d) wiii be damaged when it is
removed. Have an extra
one
on
hand
if
you need
to remove it for any reason.
1. If you are replacing the small bearing (19c) or roiier
clutch (19s), press the old ones out of the pinion hous-
ing (19n).
STOCK WHEN PRESSING
OFF LARGE BEARING
PLACEMENT
OF
STEEL BLOCKS AND
BAR
Fig
23-2
3. Push
on
the front of the shafl(19b) to forcethe bearing
and hub assembly
out
of the housing (19n).
4.
Using
a
hydraulic press, place pieces
of
steel bar
press the shafl through the hub and bearing.
See
Fig
stock
on
the inner race
of
the large bearing (19d) and
23-2.
5.
Apply lubricant to the parts as shown
in
Fig 23-1
6.
Press
fit
the following parts:
Smaii bearing (19c) and then the roiier clutch
w.
into the rear
of
the housing (19n). See
(19s), with the directional arrow facing the samii
DETAiL
A
in Fig 23-1.
0
Large bearing (19d) to shoulder ofthe shafl(19b).
Hub (199 onto the shafl (19b) ail the way to the
large bearing (19d).
7.
install the shafl assembly (19a), pushing it to
the
shoulder
of
the housing (19n).
2.
Remove the small ring (19e) from the hub (199. Re-
~~ ~
8. install the rings (19e and 19k).
the housing (19n).
move the snap ring (19k) from the bearing recess of 9. Skip ahead to Reassembly, page 29, Step
7,
or con-
tinue
on
page 24.