Disassembling these parts can
start
from the pinion hous-
If
sfartlng
from
the clutch,
see
page 24.
ing or from the clutch, if no pinion service is needed.
If
starting
from
the
plnlon
housing,
first follow Steps
1
to
6
of
DRIVE
HOUSING, on page
21,
and then continue
with the procedure below.
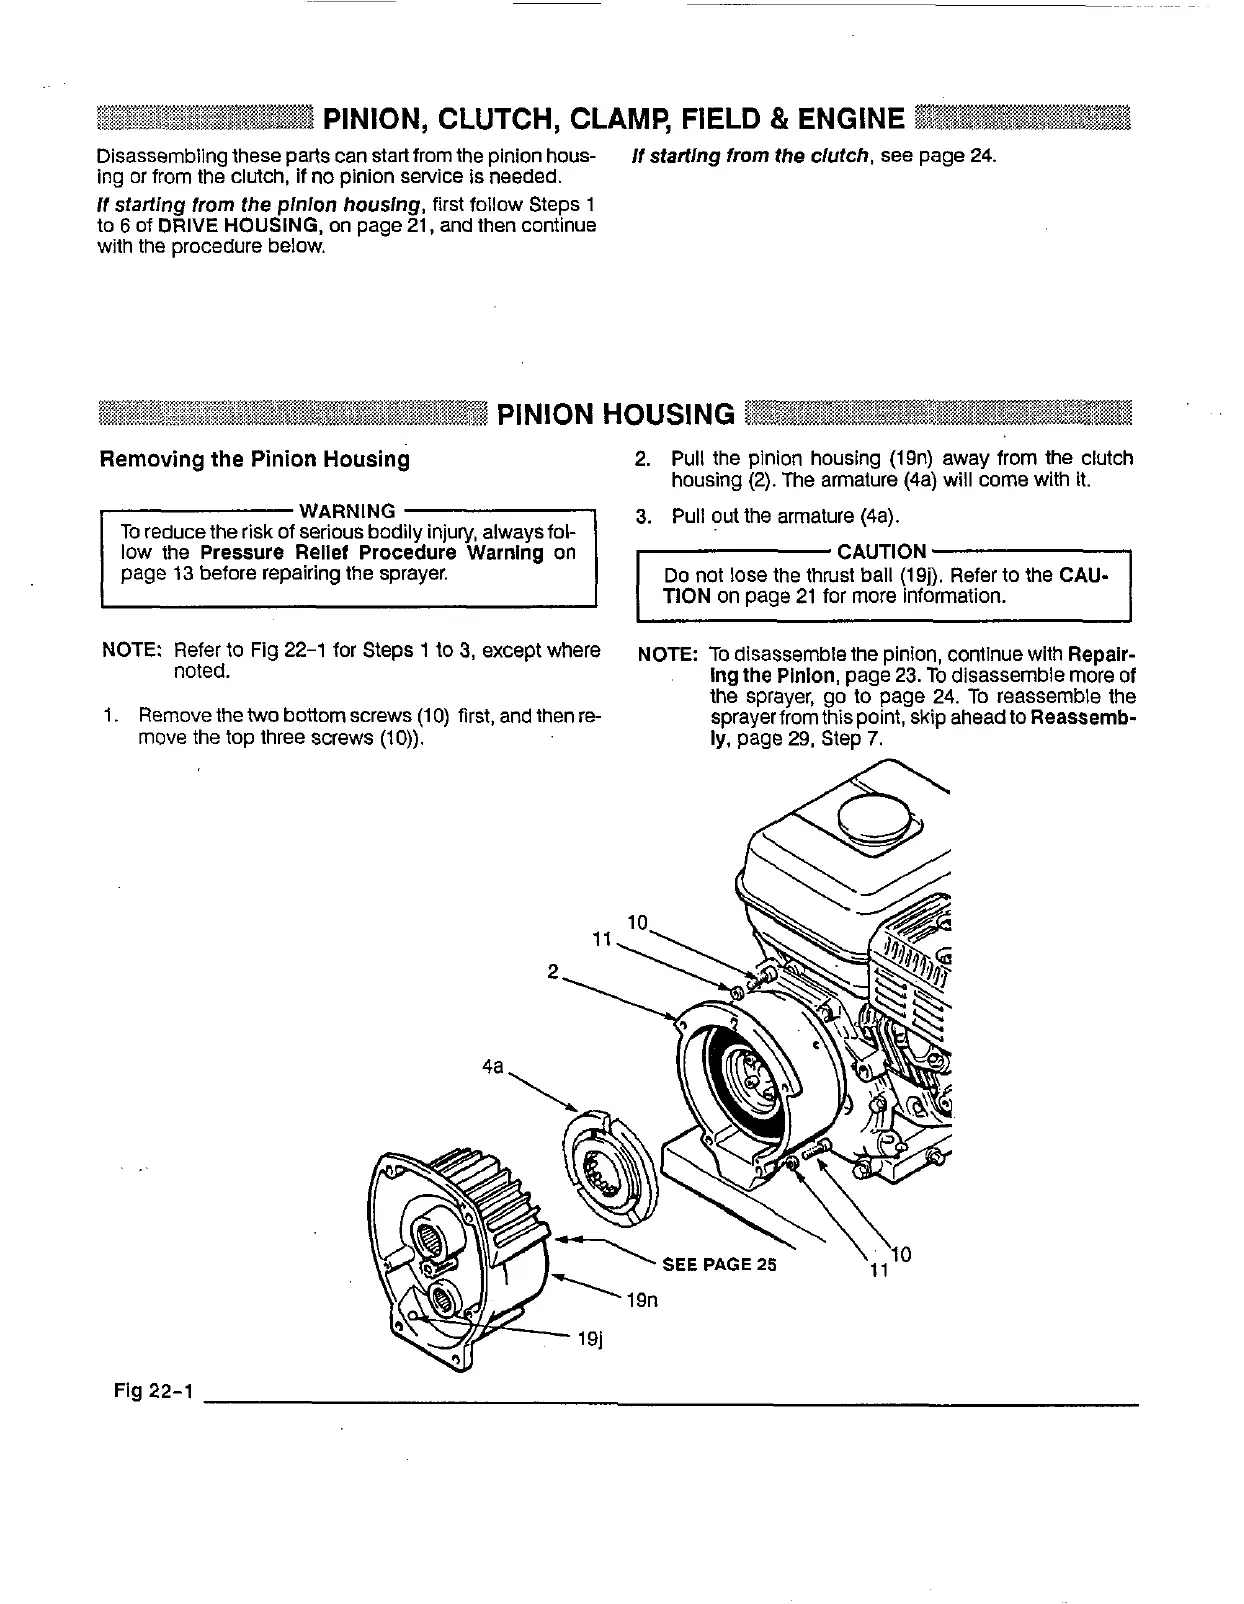
Removing
the
Pinion
Housing
2. Pull the pinion housing (19n) away from the clutch
housing
(2).
The armature (4a) will come with it.
WARNING
3. Pull out
the
armature (4a).
low the
Pressure Rellet Procedure
Warning
on
page
13
before repairing the sprayer.
TION
on page 21 for more information.
NOTE: Refer to Fig
22-1
for Steps
1
to
3,
except where
NOTE
To
disassemble the pinion, continue with
Repalr-
noted.
ing
the
Pinlon, page 23.
To
disassemble more of
the sprayer, go to page 24.
To
reassemble
the
1.
Remove the
two
bottom screws
(1
0)
first, and then re-
sprayerfromthispoint, skip ahead
to
Reassemb-
move the top three screws
(10)).
ly.
page 29, Step
7.
Fig
22-1