Repair
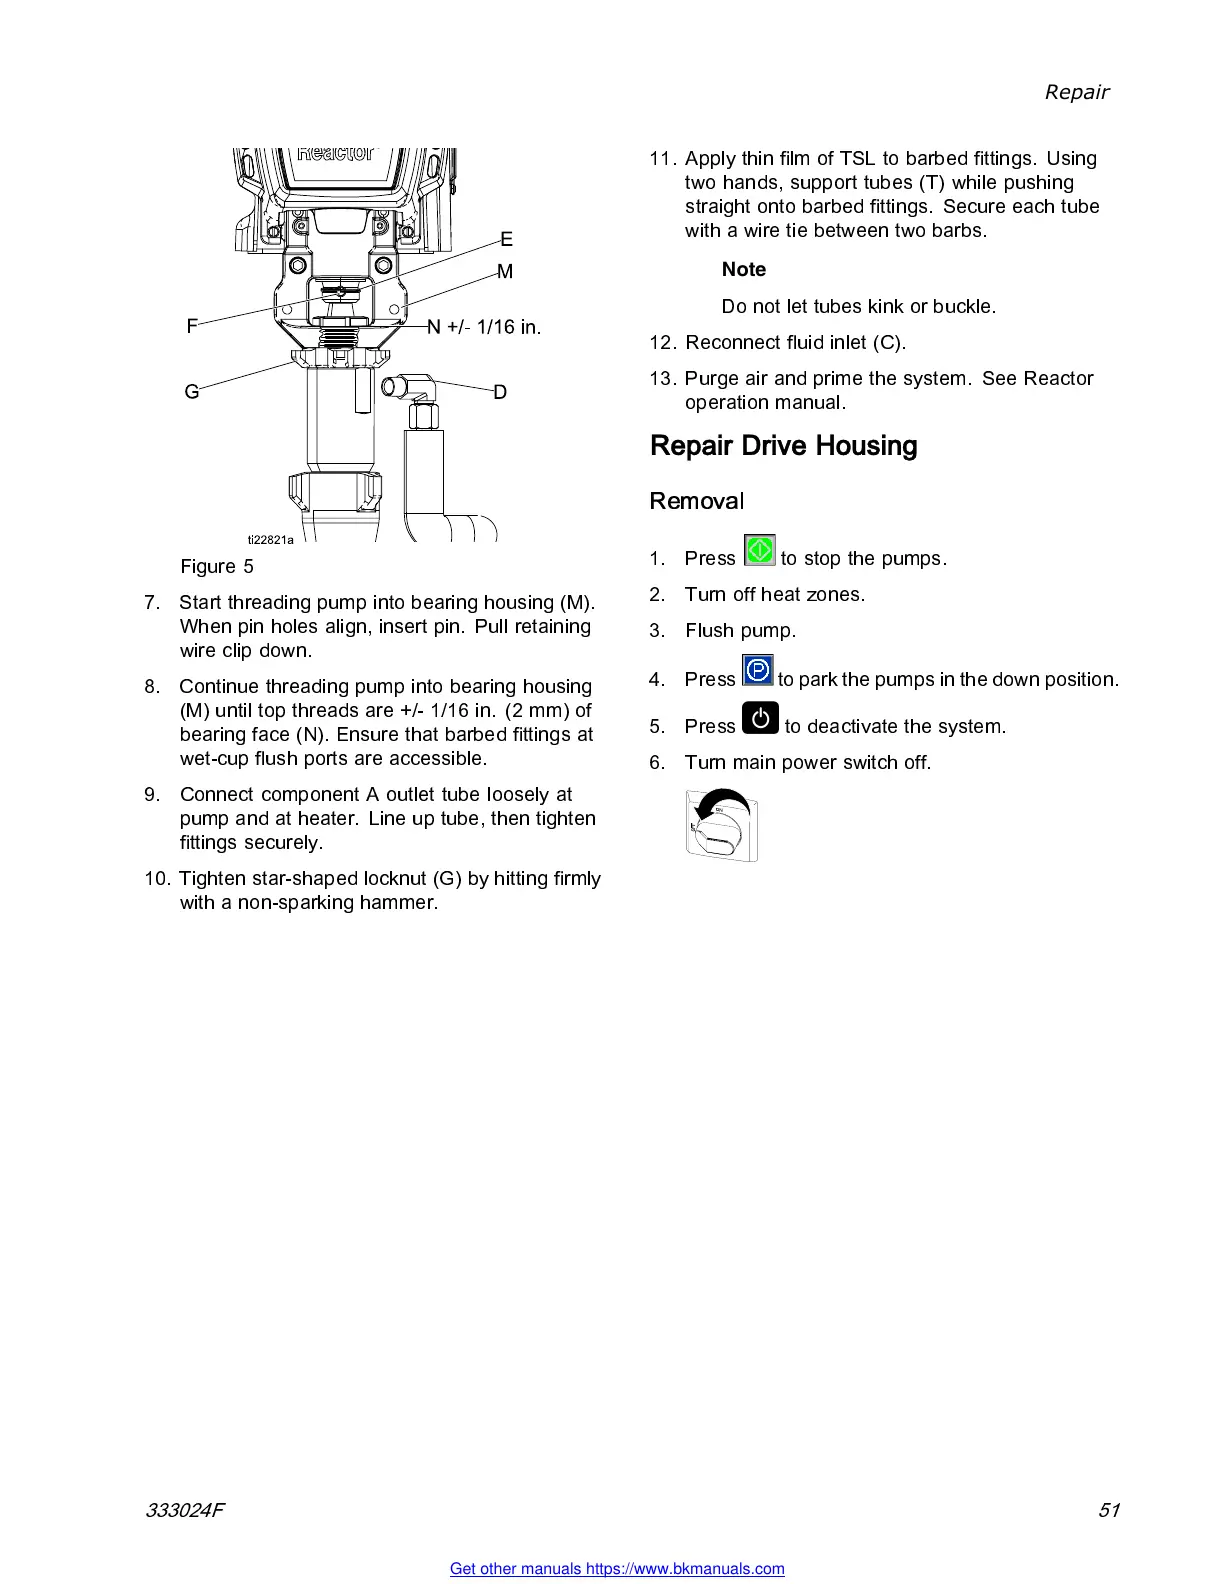
Figure 5
7. Start th readi ng pum p in to beari ng housin g (M).
When pin holes align, insert pin. Pull retaining
wire clip down.
8. Continue threa di ng pump into bearin g housi ng
(M) until top threads a re +/- 1/16 in. (2 mm) of
bearin g face (N). Ensure that barbed fittings at
wet-cup flush ports are accessible.
9. Connect component A outlet tube loosely at
pump a nd at heater. Li ne up tub e, then tighte n
fittings securely.
10. Tighten star-shaped locknut (G) by hitting firmly
with a non-sparking hammer.
11. Apply thin film of TSL to barbed fittings. Using
two hands, s upp ort tubes (T) while push ing
straight onto barbed fittings. Secure each tube
withawiretiebetweentwobarbs.
Note
Do not let tubes kin k or buckle.
12. Reconnec t fluid inlet (C).
13. Purge air and prime the system. See Reactor
operation manual.
Repair Drive Housing
Removal
1. Press to stop the pumps.
2. Turn off heat zones .
3. Flush pump.
4. Press
to park the pumps in the down position.
5. Press
to deactivate the system.
6. Turn main power switch off.
333024F 51
Get other manuals https://www.bkmanuals.com



 To Next Page